29
The conversion is performed using the following pro-
cedures:
LEFT HAND PLUMBING
1. Rotate and remove the PRV and reducer bushing
from In/Out Header.
2. Rotate and remove the T&P Gauge.
3. Remove cover from the Flow Switch and discon-
nect wiring.
4. Rotate and remove the Flow Switch from In/Out
header.
5. Relocate the PRV and the reducer bushing to
where the Flow Switch was located.
6. Tighten down the PRV and position the outlet
toward the right jacket side.
7. Relocate the Flow Switch to where the PRV was
located.
8. Tighten down the Flow Switch and position the
arrow on the flow switch to the left jacket side.
9. Rewire the Flow Switch, one lead on C (common),
the second on NO (normally open).
10. Place cover over the Flow Switch and tighten
down the screw.
11. Re-install the T&P Gauge.
12. Remove the thermostat sensor from the Jaco fit-
ting and set aside.
13. Remove both CPVC Ring Nuts and Plugs.
14. Relocate and tighten both CPVC Ring Nut and
Plugs to the right side of the In/Out Header. Note:
the Jaco fitting plug must be located on the Inlet
side.
15. Reroute and install the thermostat sensor to the
right side of the In/Out Header.
LEFT INLET / RIGHT OUTLET PLUMBING
1. Remove the thermostat sensor from Jaco fitting
and set aside.
2. Remove the Inlet CPVC Ring Nut and Plug.
3. Relocate and tighten the CPVC Ring Nut and Plug
to the right side of the In/Out Header.
4. Reroute and install the thermostat sensor to the
right side of the In/Out Header.
RIGHT INLET / LEFT OUTLET PLUMBING
1. Rotate and remove the PRV and reducer bushing
from the In/Out Header.
2. Rotate and remove the T&P Gauge.
3. Remove cover from the Flow Switch and discon-
nect the wiring.
WARNING:
Before performing any conversion
steps, make sure that all electrical power to the
heater has been turned OFF.
4. Rotate and remove the Flow Switch from the
In/Out header.
5. Relocate the PRV and reducer bushing to where
the Flow Switch was located.
6. Tighten down the PRV and position the outlet
toward the right jacket side.
7. Relocate the Flow Switch to where the PRV was
located.
8. Tighten down the Flow Switch and position the
arrow on the flow switch to the left jacket side.
9. Rewire the Flow Switch; one lead on C (common),
the second on NO (normally open).
10. Place the cover over the Flow Switch and tighten
down the screw.
11. Re-install the T&P Gauge.
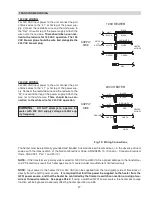
The loose parts bag contains the pieces needed to
connect your plumbing to the heater. Two options are
recommended for the installer, as shown in the follow-
ing images. The loose parts bag contains the pieces
needed to connect your plumbing to the heater. Verify
that all components on the Accessories list are
accounted for (see Figure #3 for more details). Before
installation, see Figures #21 & 22 for correct water
flow orientation. With the supplied CPVC Tee, be sure
to install the flow switch on the inlet side with the water
supply. (The arrow on flow switch should be pointing
towards heater). Fork terminals are provided by the
conduit attached to the heater. Remove the flow
switch cover and route the two fork terminals through
the side of the flow switch. Attach the ring nut on the
inside wall of the flow switch against the conduit and
tighten. Attach the Orange wire fork to the “N.O.” con-
tact and the Orange/Black wire fork to the “COM.” con-
tact. Finally, re-install the flow switch cover before
operation.
LOOSE PLUMBING PARTS
NOTE:
Use appropriate CPVC primer and glue for
attachments.
Содержание 259B
Страница 13: ...13 Florida Building Code Fig 6 Florida Building Code 2010 Tie Down Method...
Страница 32: ...32 WIRING DIAGRAM...
Страница 44: ...44 SECTION 6 REPLACEMENT PARTS...
Страница 48: ...www raypak com Raypak Inc 2151 Eastman Avenue Oxnard CA 93030 805 278 5300 Fax 805 278 5468 Litho in U S A 48...


