


© Qube Engineering 2009
Qube’s AP1 LED Dash DIY Kit Supplemental Instructions Page 18
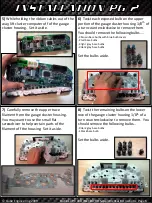
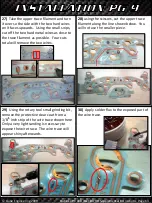
47)
Turn the gauge cluster assembly back
over. Plug the wire harness with the black
wire in to the female wire harness on the
right side of the LED array board.
48)
Move the ribbon cables and power
harness out of the way and reinstall the
gauge cluster computer back onto the gauge
cluster. Make sure the yellow wire doesn’t
get pinched between the housing and the
computer board. Reattach the wire harness
with the red wire to the female wire harness
on the gauge cluster computer.
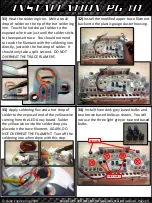
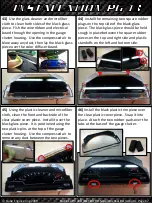
49)
Reattach the four ribbon cables. Push
downward on the pinchable part of the
plastic harness to lock the ribbon cables in
place.
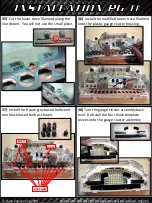
50)
Reinstall the back cover onto the gauge
cluster assembly. The power harness should
emerge from the bottom side of the
assembly from between the gauge cluster
assembly and back cover.


