


7-60
Field
–
Replaceable Units (FRUs)
501510 Rev. S
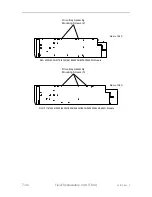
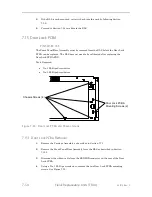
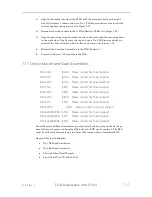
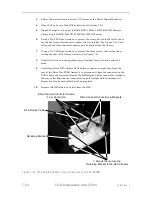
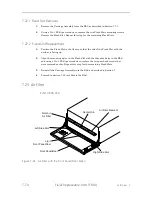
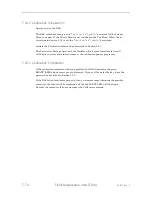
Front of RLS
Remove these 3 screws
Figure 7-39 Bottom View of the RLS showing the Sensor Slave PCBA Bracket Screws
7.17.3
Sensor Slave Assembly Replacement
This procedure assumes that the Sensor Slave Assembly was removed in Section
7.17.2.
1.
Position the bracket inside of the library’s chassis, aligning the three threaded
holes with the screw holes in the bottom of the RLS.
2.
Using a No. 1 Phillips screwdriver, replace the three 6-32 x 1/4 flat-head screws
on the bottom of the RLS that hold the Sensor Master PCBA bracket in place.
See Figure 7-39.
3.
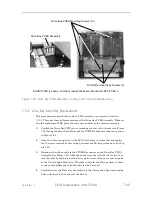
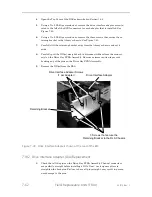
Reconnect the ribbon cable to the SENSOR connector on the right side of the
PCBA as seen from the front of the RLS. See Figure 7-38.
7.17.4
Sensor Master Assembly Replacement
This procedure assumes the Sensor Master Assembly was removed in Section 7.17.1.
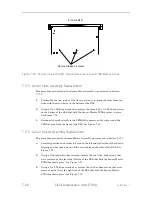
1.
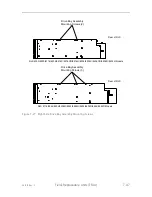
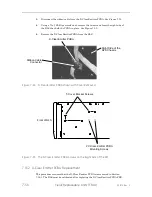
Carefully position the bracket in between the left and right sides of the chassis,
aligning the threaded holes with the screw holes on the sides of the RLS. See
Figure 7-37.
2.
Using a 5/64-inch Allen (hex) wrench, replace the two Allen-head screws that
were removed earlier from the left side of the RLS that hold the Sensor Master
PCBA bracket in place. See Figure 7-37.
3.
Using a No. 2 Phillips screwdriver, replace the two flat-head screws that were
removed earlier from the right side of the RLS that hold the Sensor Master
PCBA bracket in place. See Figure 7-37.
Содержание RLS-4470
Страница 1: ...RLS 8000 Tape Library Technical Service Manual 501510 Rev S...
Страница 2: ......
Страница 14: ...xiv 501510 Rev S This page left blank intentionally...
Страница 16: ...1 2 Introduction 501510 Rev S Table 1 1 Applicable Documents...
Страница 20: ...1 6 Introduction 501510 Rev S This page left blank intentionally...
Страница 23: ...501510 Rev S Description and Theory of Operation 2 3...
Страница 34: ......
Страница 50: ...3 16 The Operator Interface 501510 Rev S This page left blank intentionally...
Страница 64: ...4 14 The Maintenance Menu 501510 Rev S This page left blank intentionally...
Страница 65: ...501510 Rev S The Private Menu 5 1 5 The Private Menu...
Страница 69: ...501510 Rev S The Private Menu 5 5 10 Close the Front Panel Door...
Страница 144: ...7 40 Field Replaceable Units FRUs 501510 Rev S 4 Reinstall the Carriage Assembly into the RLS as described in Section 7...
Страница 184: ...8 6 Firmware Updating 501510 Rev S Figure 8 2 Sample of the Library Firmware Upload Progress Screen...
Страница 188: ...8 10 Firmware Updating 501510 Rev S Figure 8 7 Properties Screen...
Страница 205: ...501510 Rev S RLS Expansions 9 13 This page left blank intentionally...


