7-66
Field
–
Replaceable Units (FRUs)
501510 Rev. S
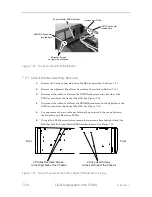
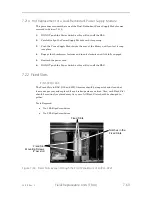
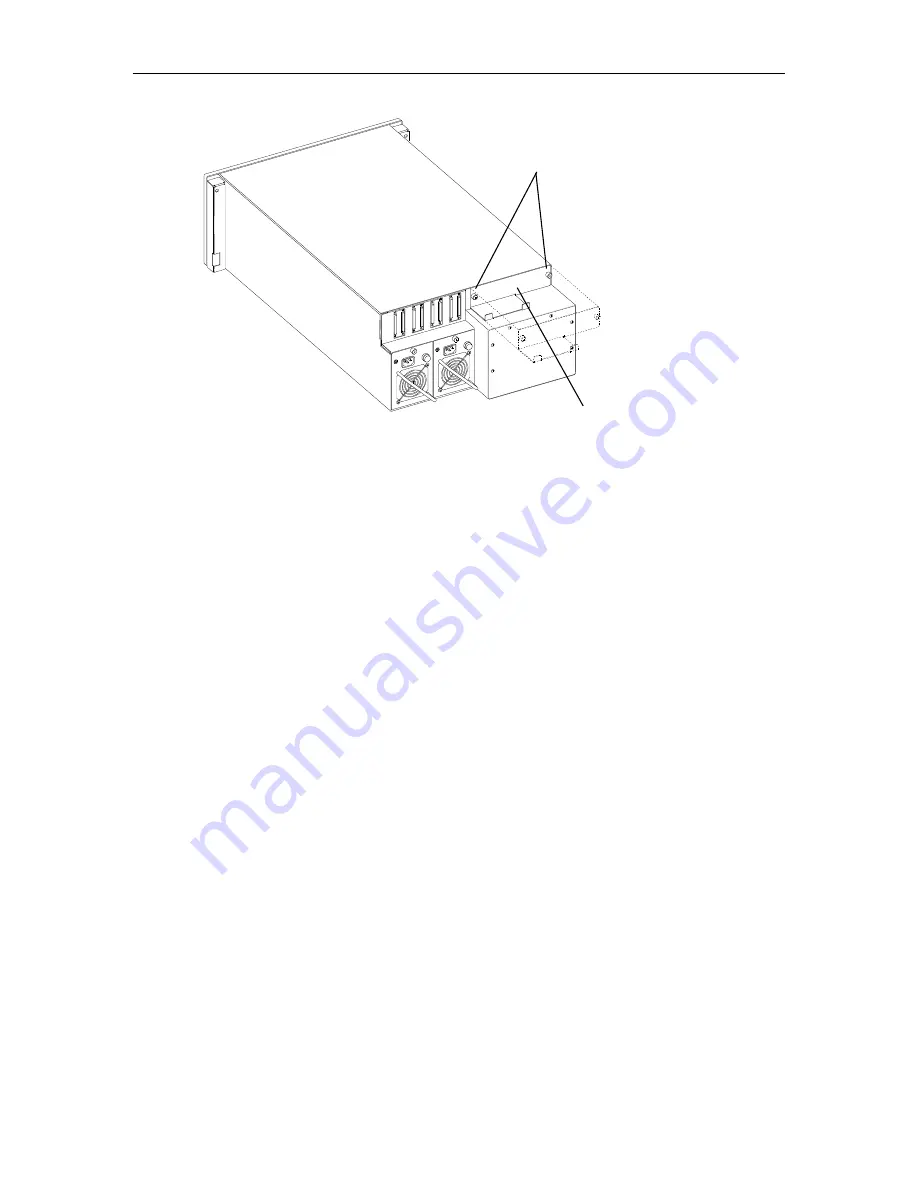
IPM (Interface Personality Module)
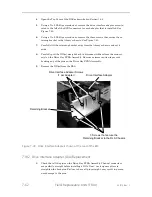
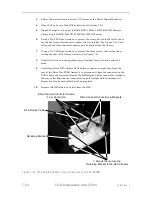
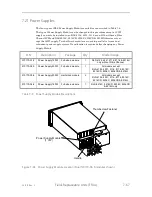
Thumbscrew Fasters (2)
Figure 7-42 IPM Location on the rear of the RLS
7.20.1
IPM Removal
1.
Remove power from the RLS by first pressing the power switch off and then re-
moving the power cord (two power cords if Dual-Redundant Power Supply Mod-
ules are installed).
2.
Detach all cables connected to the IPM except for the COMM-LINK cable on Fi-
bre Channel IPMs. Note how the cables were connected so they can be recon-
nected in the same manner upon completion of this procedure.
3.
Unfasten the IPM by turning its two thumbscrew fasteners counter-clockwise
until the threads are fully disengaged.
4.
Grasp the bottom tabs and gently pull the IPM straight out the back of the RLS.
7.20.2
IPM Replacement
This procedure assumes that the IPM was removed in Section 7.20.1.
1.
Carefully align the IPM board with the slide rails inside the IPM opening in the
rear of the RLS.
2.
Gently push on the bottom tabs. The IPM will slide easily until its connector
makes contact with its mate. Now push firmly until a
snap
is felt indicating the
mating connectors are fully seated.
3.
Rotate the two thumbscrew fasteners clockwise until they are fully engaged.
4.
Reattach all cables that were removed above.
Содержание RLS-4470
Страница 1: ...RLS 8000 Tape Library Technical Service Manual 501510 Rev S...
Страница 2: ......
Страница 14: ...xiv 501510 Rev S This page left blank intentionally...
Страница 16: ...1 2 Introduction 501510 Rev S Table 1 1 Applicable Documents...
Страница 20: ...1 6 Introduction 501510 Rev S This page left blank intentionally...
Страница 23: ...501510 Rev S Description and Theory of Operation 2 3...
Страница 34: ......
Страница 50: ...3 16 The Operator Interface 501510 Rev S This page left blank intentionally...
Страница 64: ...4 14 The Maintenance Menu 501510 Rev S This page left blank intentionally...
Страница 65: ...501510 Rev S The Private Menu 5 1 5 The Private Menu...
Страница 69: ...501510 Rev S The Private Menu 5 5 10 Close the Front Panel Door...
Страница 144: ...7 40 Field Replaceable Units FRUs 501510 Rev S 4 Reinstall the Carriage Assembly into the RLS as described in Section 7...
Страница 184: ...8 6 Firmware Updating 501510 Rev S Figure 8 2 Sample of the Library Firmware Upload Progress Screen...
Страница 188: ...8 10 Firmware Updating 501510 Rev S Figure 8 7 Properties Screen...
Страница 205: ...501510 Rev S RLS Expansions 9 13 This page left blank intentionally...

