


5
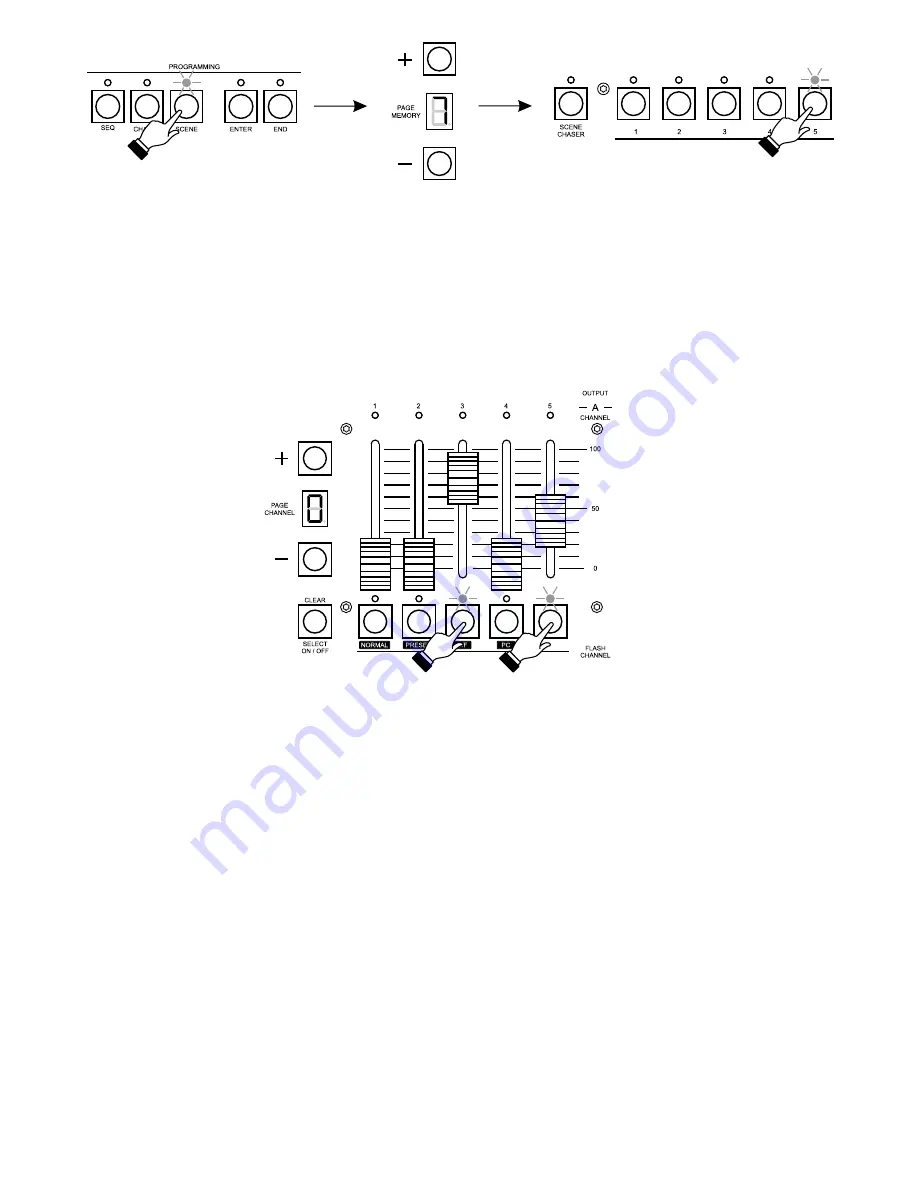
3. In the CHANNEL block press the keys corresponding to these channels, where you want to
make changes. If these channels are in a different range, with the "+" or "-" PAGE CHANNEL
keys select the appropriate range and press the CHANNEL block keys. The channel selection
is indicated by the shining LED. The blinking LED stands for the channel from a different range.
4. With the sliders adjust the brightness for the selected channels. The channels from the current
range only can be modified.
5. You can deselect the channels by pressing the corresponding key again - the LED will go out.
This will also discard all the brightness settings for this channel. If you want to discard all the
changes made, press the SELECT ON/OFF key.
6. You may also select all the 100 channels for edition. To do so, when no LEDs are lit above the
CHANNEL keys, press the SELECT ON/OFF key and adjust the brightness for all channels,
paying attention to range selection where needed.
7. After all the adjustments are made for the particular scene, press the ENTER key in the
PROGRAMMING block - the scene will be saved, what will be confirmed by going out of the
LED above the ENTER key.
8. In the MEMORY block press the key of the scene you have edited.
9. To program other scenes, repeat the procedure from points 2 - 8.
10. You can change the settings of a saved scene. To do so, select a scene you want to edit by
pressing the appropriate key in the MEMORY block. The scene will be launched. Proceed as
you have during scenes creation, adjust the brightness for the required channels and press
the ENTER key. Leave this scene edition by pressing its corresponding key in the MEMORY
block.
11. The scenes programming is finished by pressing the SCENE key - the LED above will go out.
Содержание PX125 Opera RedLine
Страница 1: ...INSTRUCTION MANUAL PX125 Opera RedLine R...


