4.
Touch Screen Basics
The touch screen is sensitive to the light pressure of a fingertip. It is not
necessary to use a stylus. To select a function, touch the corresponding button
once. Do not touch the LCD screen with any sharp object, pen, pencil, or
marker as these may cause permanent damage. Avoid spilling any liquid onto
or near the touch screen.
A sleep mode is initiated after 15 minutes with no activity or user stimulation
of the touch screen. Lightly touch the LCD screen once to reactivate it.
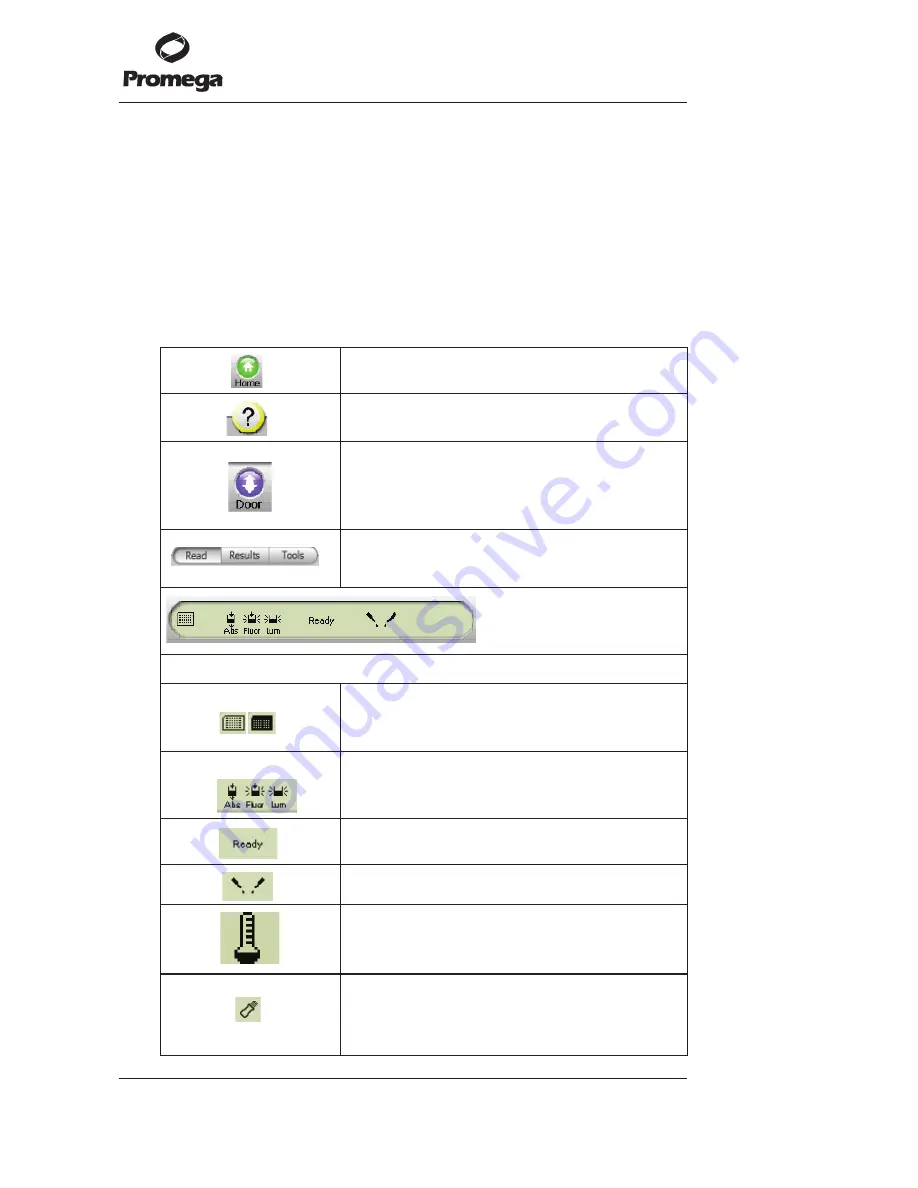
4.A. Buttons and Icons on the Instrument Control Screen
Promega Corporation ·
2800 Woods Hollow Road
·
Madison, WI 53711-5399 USA
Toll Free in USA 800-356-9526
·
Phone 608-274-4330
·
Fax 608-277-2516
· www.promega.com
Part# TM311
Printed in USA.
Page 8
Revised 5/10
7026T
A
•
Home Screen.
7027T
A
•
Help Screen.
7028T
A
•
Opens and closes the instrument door.
•
Changes to a “Stop” button when a run is in
progress.
•
Touch the “Stop” button to cancel a run, if needed.
7029T
A
•
Selects one of the three screens in the Instrument
Control Screen.
7030T
A
•
Instrument Status bar (above).
7031T
A
•
Plate icon, visible when a microplate or a Waste
Collection Tray is detected inside the instrument.
•
Icon turns dark when a microplate has been read.
7032T
A
•
“Detection Mode” icon. A gray icon indicates which
detection module is installed.
•
A black icon indicates the active module.
7033T
A
•
Indicates the instrument is ready to begin a run.
7034T
A
•
Indicates one or two injectors are installed.
7992T
A
•
“Temperature Display” icon. Indicates that the
heater option is activated.
•
Instrument temperature displayed to the right.
7035T
A
•
Visible when a USB flash drive is detected.
•
Icon turns dark when files have been saved to the
USB flash drive.


