


C762, C764, C764i Stairclimber
Page 81
Removing a Bearing From the Sheave Shaft
Set the sheave assembly on a work bench or table when you perform the next step.
9.
Remove the loose flange from the end of the sheave shaft (see Diagram 7.17). Remove the
set screws that secure the bearing to the sheave shaft. Slide the bearing and second flange
from the sheave shaft. Discard the bearing and set aside the set screws and flanges. If you
are removing both bearings, repeat this step for the second bearing.
10. If you are replacing the sheave or sheave shaft
...
THEN...
OTHERWISE...
Continue with the next step.
Skip to Step 14.
Removing the Sheave From the Sheave Shaft
11. Remove the set screws that secure the sheave to the sheave shaft. Pull the sheave from the
shaft.
12. Pry the key out of the key slot on the shaft.
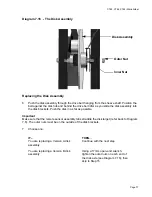
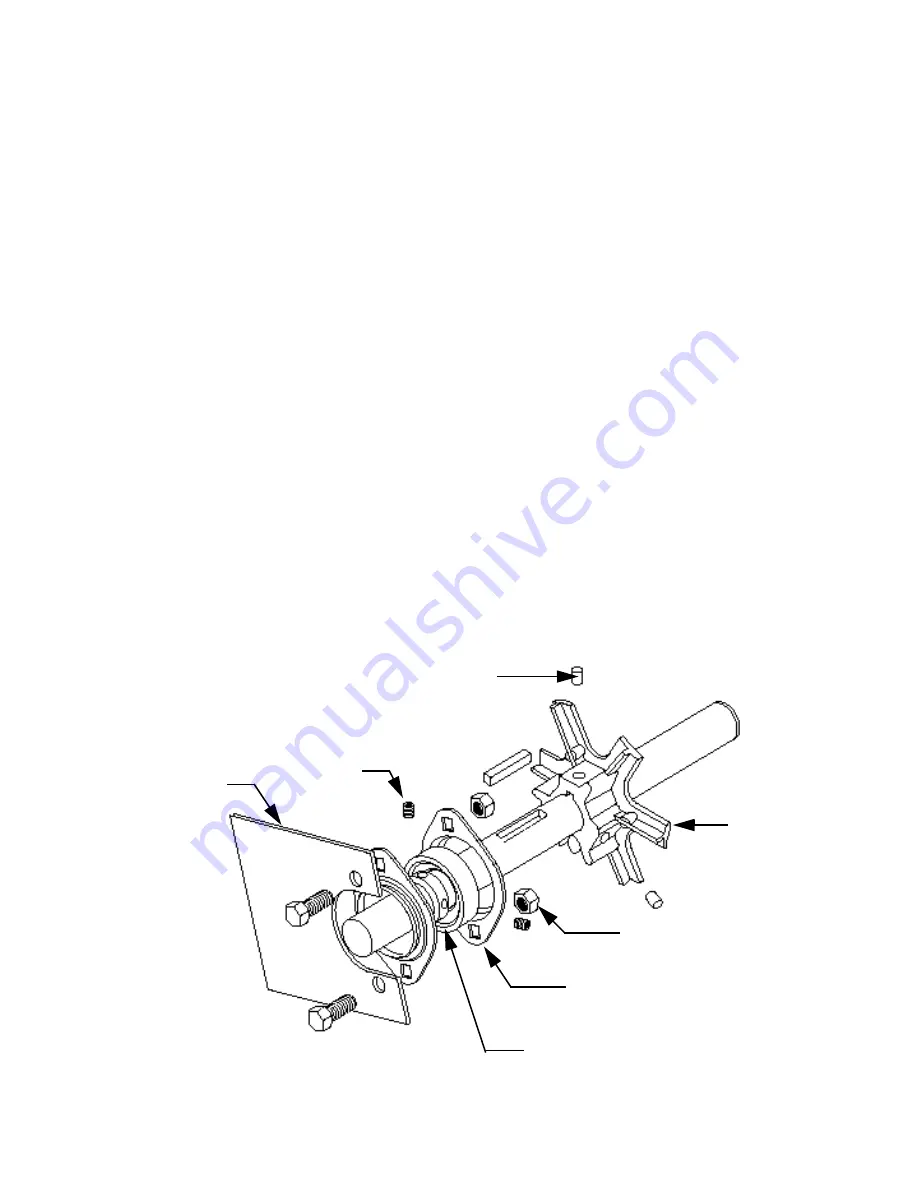
Diagram 7.17 - The Sheave Assembly
Set Screw
Sheave
Locknut
Bearing Flange
Bearing
Set Screw
Sheave
Bracket
Содержание Cardio Theater Integrated Bracket C764i
Страница 23: ...C762 C764 C764i Stairclimber Page 23 Diagram 5 3 Magnet Wiring ...
Страница 59: ...C762 C764 C764i Stairclimber Page 59 Diagram 7 6 Speed Sensor and Target Disk Assembly Speed Sensor Target ...
Страница 61: ...C762 C764 C764i Stairclimber Page 61 Diagram 7 7 Magnet Wiring ...
Страница 100: ...C762 C764 C764i Stairclimber Page 100 Wiring Diagram 8 1 C762 C764 120 Vac ...
Страница 101: ...C762 C764 C764i Stairclimber Page 101 Block Diagram 8 2 C762 C764 120 Vac ...
Страница 102: ...C762 C764 C764i Stairclimber Page 102 Wiring Diagram 8 3 C762 C764 240 Vac ...
Страница 103: ...C762 C764 C764i Stairclimber Page 103 Block Diagram 8 4 C762 C764 240 Vac ...


