23
3.
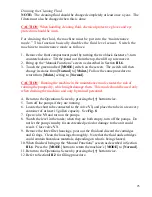
Keeping the housing upright, remove it from the machine, remove and discard
the old cartridge, empty the fluid, and thoroughly clean the housing. Note that
the fluid and cartridge could contain hazardous materials, depending on what is
being cleaned. Remove and discard the O-ring.
4.
Replace the filter cartridge with a new one and verify that a new O-ring is
properly seated in the groove.
5.
Holding the new cartridge down, fill the housing to the O-ring groove with new
fluid at the proper dilution. (The cartridge will tend to float.) Position the
housing under its top, allow the cartridge to float upward, and engage the
cartridge on the boss in the top. Lift the long housing and thread it into the top
by turning to the right. The cartridge will seat on the boss in the long housing.
Tighten securely (hand tight.)
6.
Repeat for the other long housing.
7.
Unscrew the smaller filter housing and empty the fluid. Use the supplied filter
wrench if necessary.
8.
Thoroughly clean the bowl and scrape out any residue from the bottom. (This
filter does not employ a cartridge.) Replace the O-ring.
9.
Fill the small housing to the O-ring groove with new fluid at the proper
dilution.
10.
Reinstall the small housing with the new O-ring. Tighten securely (hand
tight.)
11.
Open the small bleed valves at the top right side of the long filter housings.
12.
Open valve
V1
.
13.
Quickly close the right bleed valve when fluid begins to flow through it. Leave
valve
V1
fully open.
14.
Open valve
V2
.
15.
Quickly close the left bleed valve when fluid begins to flow through it. Leave
valve
V2
fully open.
16.
Replace any lost fluid with an equal amount of fresh fluid at the proper dilution.
17.
Replace the front compartment panel.
18.
The machine is now ready to operate.
NOTE:
When starting the machine, it may take a short time for the pumps to prime.


