16
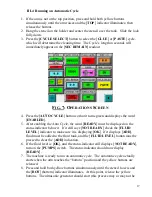
8. Press the
[+]
button in the lower right corner of the “Temperature” screen twice
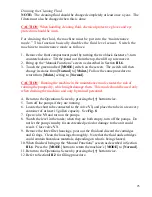
to move to the “Timer Setup” screen as shown below:
F
IG
.
6:
T
IMER
S
ETUP
S
CREEN
Timer Setup Procedure
1.
Touch the appropriate timer button on the screen.
2.
Enter the desired time, in seconds and tenths (e.g., as one minute = 60 seconds,
you would enter “60.0”) and press [
ENTER
].
3.
The timer button should reappear, displaying the value you have set.
4.
Repeat the process for the two cleaning cycle timers ([
Glue
] and
[Solder
Paste]
). Note that each of these cycles is independently programmable for any
desired length within the displayed range. The names are primarily for reference.
5.
The [
Up Transit
] timer is set in the same way, but the proper setting may need
to be determined by running a few cycles. This timer determines the position
where the arm will pause on its way back to the top position.
6.
The [
Dwell
] timer is also set in the same way. This is typically adjusted to allow
time for the spray to rinse off the bottom ledge of the stencil frame. If this
feature is not needed, simply set this timer to 0.1.
7.
The [
Dryer
] timer is set in the same way, except here the times are typically
much longer. For example, for a 15-minute drying cycle, one would enter
“900.0” (15 minutes x 60 seconds/minute = 900.0 seconds).
8.
A [
Shtdwn Time
] button allows the user to set the interval between the end of a
cleaning cycle and the shutdown of the spray pumps. See Section
III.6
for
information on this timer.
9.
After the timers are set, the machine is ready for operation. Press
[+]
to return to
the Operations Screen and go on to the next Section.


