


Then you can load that STL into Kisslicer and create the gcode for the whole set.
Connecting
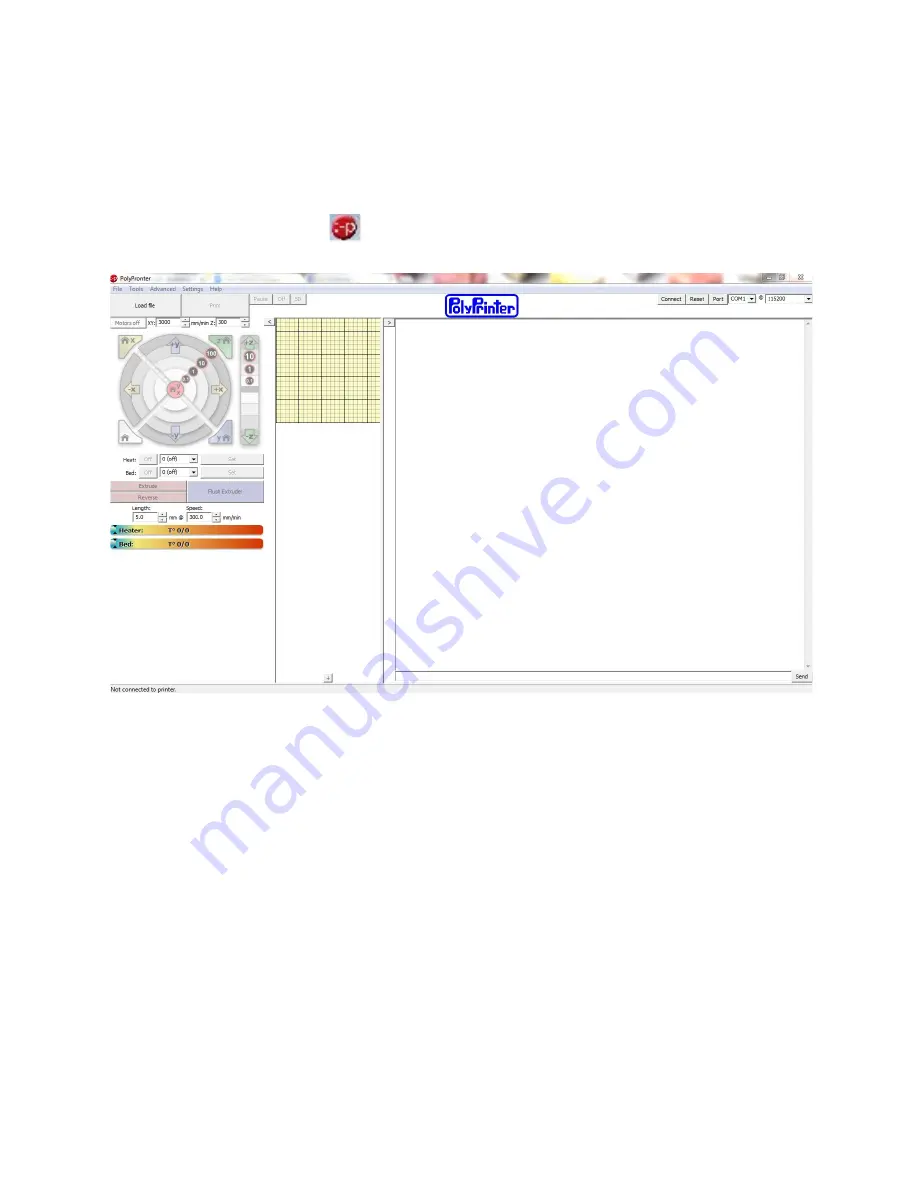
Find the icon for “Pronterface”
, in your Start Menu. Click to launch Pronterface. It should
look something like this:
The important part is the Port. Most of the time, it will already be filled in with the port that
represents the USB connection to the printer. We’ll assume it’s correct for the moment.
Press the “Connect” button.
Some text should appear in the window on the right side of Pronterface, including the phrase:
“Connected”.
If it does not:, see below, in Troubleshooting, Connection Problems.
Installing the Filament
●
If it’s a new reel you will have to unpack it and find the end, (which should normally be
threaded through a hole in the rim of the reel) taking care not to let it slip under any of
the other turns of filament. Make sure you can loosen the end, but don’t let it unravel. If
there is no hole in the rim to secure the end with, hold onto the end.
●
While securing the end of the filament, slip the reel over the reel mount so that the
filament will come up through the hole in the filament guide arm, and continue up toward
the filament pulley. Viewed from the front of the PolyPrinter, the end will be pointing
26


