


Drawing Shapes
Example: Drawing a rectangular frame
1
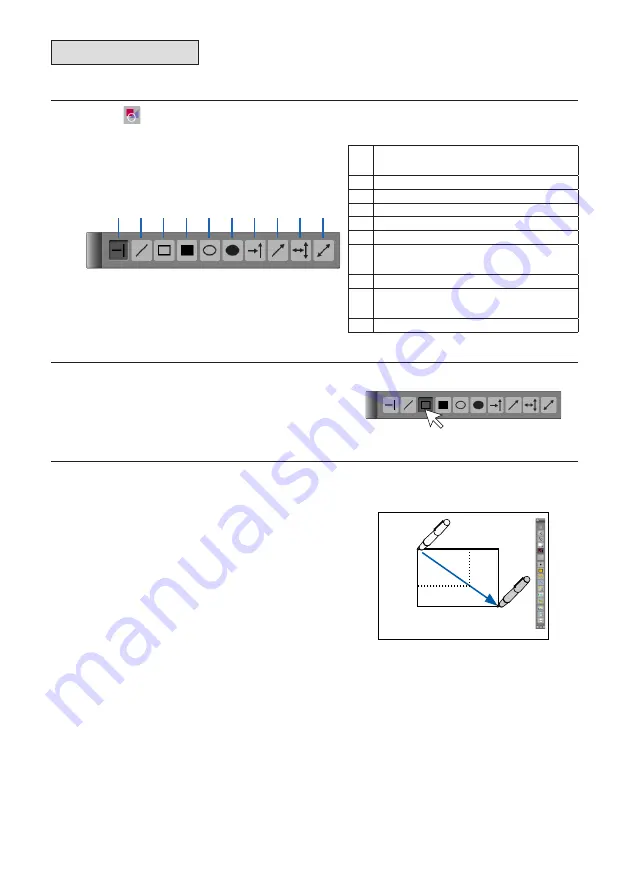
Click [Figure].
The “Figure Menu” window appears.
1 Sets the figure to horizontal and verti-
cal lines (default)
2 Sets the figure to straight lines
3 Sets the figure to a rectangle
4 Sets the figure to a rectangle (filled)
5 Sets the figure to a circle
6 Sets the figure to a circle (filled)
7 Sets the figure to a horizontal/vertical
arrow
8 Sets the figure to an arrow
9 Sets the figure to a horizontal/vertical
2-way arrow
10 Sets the figure to a 2-way arrow
2
Click the Rectangle icon.
• To change the color, select the desired color at
the “Color Selection Menu” window.
• To change the thickness of the lines, select the
desired thickness at the “Style Menu” window.
3
Drag the pen from the starting point
to the end point.
When the pen is dragged, the figure is drawn from
the starting point as a dotted line, following the
movement of the pen. The figure is only entered
when the pen is lifted, so you do not have to worry
about going off course while dragging.
• Another figure can be selected while the “Figure
Menu” window is displayed.
• The “Figure Menu” window is closed when the
“Figure Menu” window or the [Figure] icon on
the toolbar is clicked.
To write letters, click the [Pen] or [Marker] icon,
then write.
Drag
0
Содержание UPIC-56M
Страница 43: ...24 4512 09A 2009 PLUS Vision Corp...


