E-35
Perform steps 1, 2 and 3 on page E-33 to display
the file list screen.
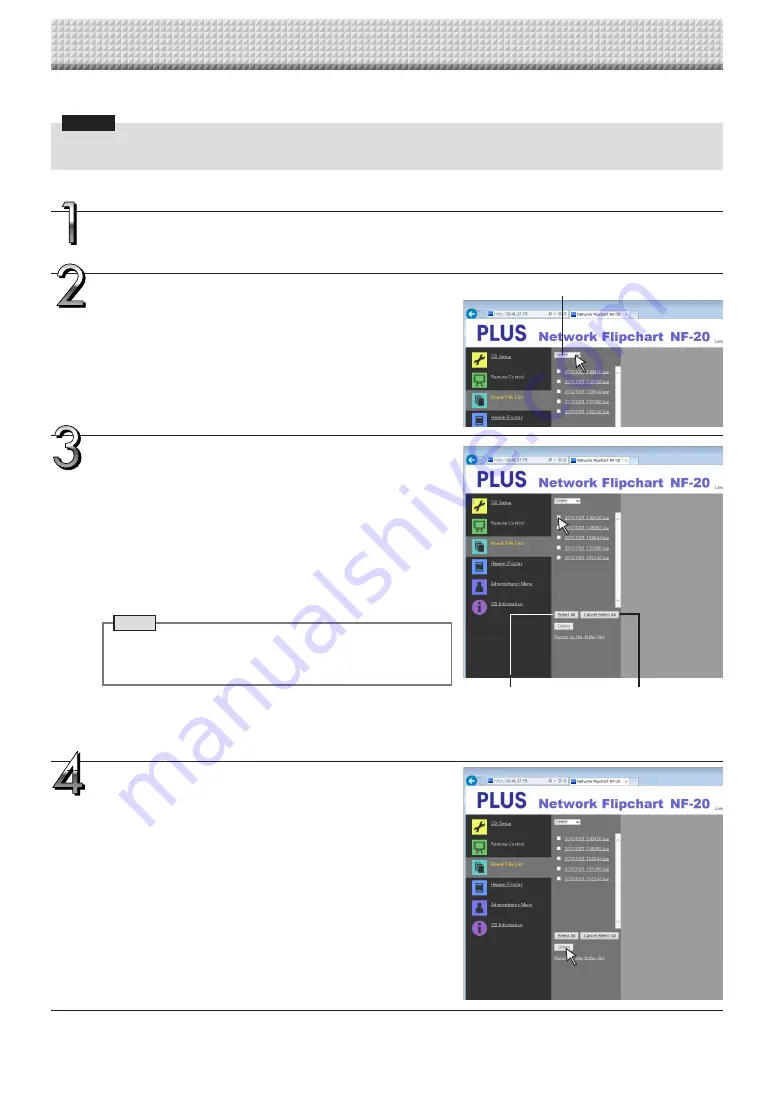
Select [Delete].
When “
▾
” on the [Download/Delete] selection button is clicked, a
pull-down list is displayed. Click [Delete].
When [Delete] is selected, the radio buttons switch to checkboxes
•
.
Select the image file to be deleted.
To select and delete individual files:
Click the checkbox for the image file to be deleted to check it.
To delete all files:
Click the [Select All] button. All the checkboxes are checked. If
there are several files you do not want to delete, uncheck the
checkboxes for those files.
To uncheck the checkboxes for all the files, click [Cancel Select All]
to uncheck all the checkboxes.
Note
• Images are previewed when their file name is clicked.
• Check the scanned images using their preview images
before deleting them.
Delete the file(s).
Be sure to transfer important image files to a computer before
deleting them (data backup). Once deleted, the files cannot be
retrieved.
When the [Delete] button is clicked, the image files whose check-
boxes are checked are deleted.
• When “Invalid” is set at “Delete User Image Data” in “Security
Setting”, the message “No delete authority” is displayed, indicat-
ing that the files cannot be deleted. (See “Security Settings” on
page E-26.)
Deleting image files from the NETWORK FLIPCHART
Notice
• When “Invalid” is set at “Delete User Image Data” in “Security Setting”, files cannot be deleted. This can be changed to
“Valid” with the administrator’s authority. (See page E-26.)
[Download/Delete] selection button
[Select All] button
[Cancel Select All] button
Using the NETWORK FLIPCHART Connected to a Network
Содержание NF-20
Страница 53: ......
Страница 54: ...26 5675 13E...


