background image


10


 | Installing the Board and Driver in a PC


Supporting VGA display


You can use the Md5/DFP board or another board to support 
VGA display.


To support VGA with the Md5/DFP board


1.

Remove the existing VGA board from your computer.

2.

Slide the switches on DIP switch S1 of the Md5/DFP board 
into the positions shown in this table.

3.

Install the Md5/DFP board into your PC (see page 12).

To provide VGA display, the Md5/DFP board must support 
a flat panel that is compatible with VGA resolutions.
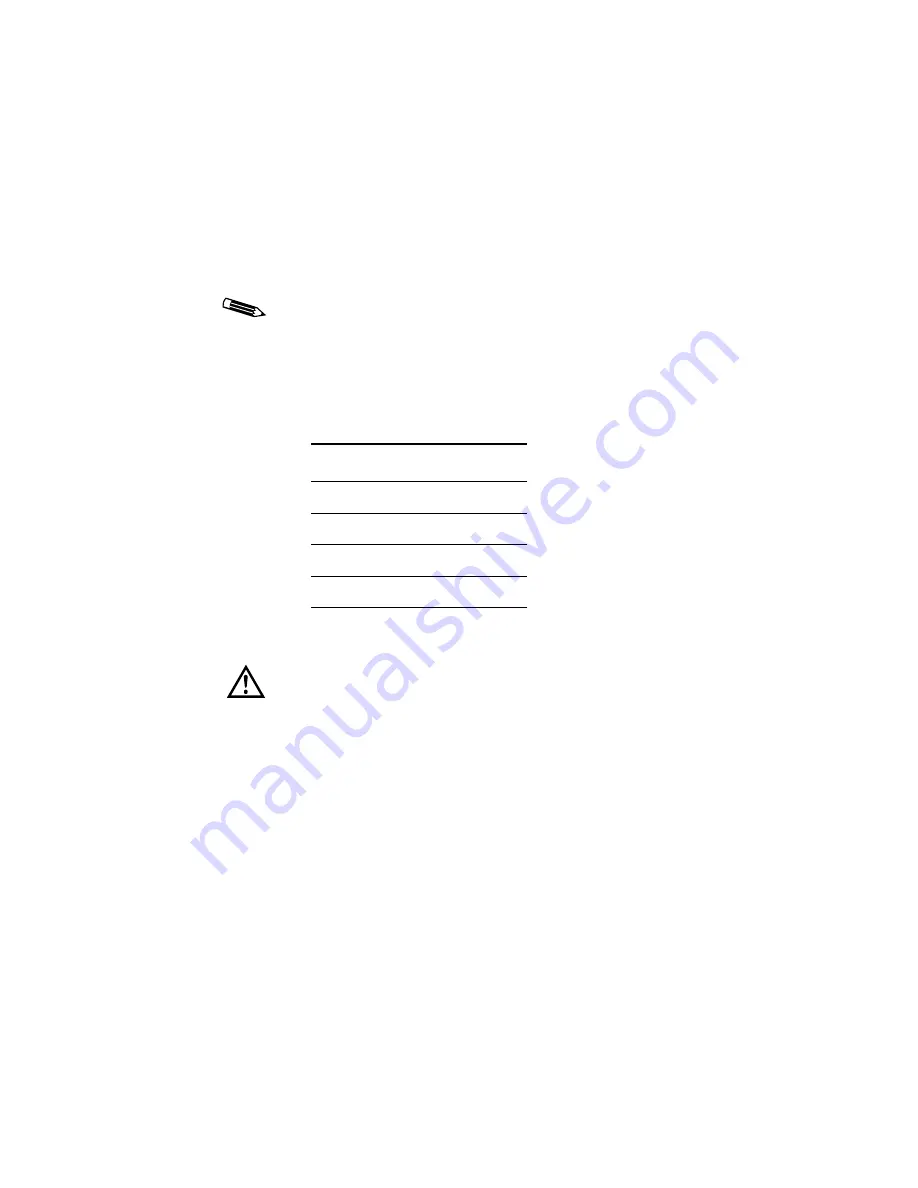
 

DIP Switch S1

Position


 1

OFF


2

ON


3

ON


4

ON


When you use the DOME board to support VGA display,
your system may lock into a reboot cycle during the initial 
installation of the Windows 2000 driver. To bypass this 
problem, press <F8> during the system boot. Then select 


Enable VGA Mode


 on the Windows 2000 Advanced 

Options menu, and press <Enter>.

Содержание DOME Md5/DFP

Страница 1: ...Md5 DFP Display Controller Installation Guide DOME imaging systems inc...

Страница 2: ...for any damages resulting from the use of such information DOME imaging systems inc 400 Fifth Avenue Waltham MA 02451 8738 781 895 1155 phone 781 895 1133 fax Internet address for product information...

Страница 3: ...of the following measures may reduce or eliminate the problem Move the equipment and the receiver to different branches of your AC electrical system Move the equipment away from the receiver with whi...

Страница 4: ...afety Section 1 2 Collateral standard electro magnetic compatibility requirements EN 55011 Class B Limits and methods of measurements for radio interference characteristics of industrial scientific an...

Страница 5: ...iver in a PC 7 Preparing for Board Installation 8 Unpacking the board 8 Enabling or disabling VGA mode 9 Supporting VGA display 10 Installing the Md5 DFP Board 12 Connecting a Digital Display 15 Insta...

Страница 6: ...river 42 Configuring Display Settings on Windows NT 44 Using the DOME tab to change display properties 48 Using the DOME tab online help 49 Setting the screen configuration 49 Changing the resolution...

Страница 7: ...ling the Solaris Driver 75 Configuring Display Settings 77 Using the default display mode 77 Overriding the default display mode 80 Using visual classes 83 Configuring the Windowing Environment 87 Run...

Страница 8: ......

Страница 9: ...FP board and install it into these computers PC Sun PCI workstation This guide also describes how to install and configure the DOME drivers for these operating systems Microsoft Windows 2000 Microsoft...

Страница 10: ...talic type New or technical term book title or variable such as x Bold type File Open Menu selection Select the File menu then Open Key Key name such as Enter A note of important information regarding...

Страница 11: ...entation Sun Solaris documentation This section Provides Chapter 1 Planning the Board Installation An overview of the Md5 DFP board including features and installation requirements Chapter 2 Installin...

Страница 12: ......

Страница 13: ...Planning the Board Installation In This Chapter About the Md5 DFP Board 2 Installation Requirements 4...

Страница 14: ...eudocolor Landscape 1 or 2 8 2048 x 2560 Grayscale Portrait 1 or 2 8 This feature Provides this benefit Short length universal card Works in both 3 3V and 5V PCI slots Wide range of display resolution...

Страница 15: ...sion grayscale Multi boot ROM technology Full operating system support for PCI based computers including these systems MS DOS Microsoft Windows 2000 Microsoft Windows NT Sun Solaris Compatibility with...

Страница 16: ...system specifications operating system and DOME driver All flat panels on systems running Windows NT 4 0 must have the same resolution On systems running Windows 2000 or Solaris multiple flat panels...

Страница 17: ...or later go to Set DIP switches Preparing for Board Installation on page 8 Preparing for Board Installation on page 8 Preparing for Board Installation on page 68 Install board Installing the Md5 DFP B...

Страница 18: ......

Страница 19: ...Windows 2000 Driver 16 Configuring Display Settings on Windows 2000 25 Uninstalling a DOME Device on Windows 2000 33 Troubleshooting for Windows 2000 37 Additional Components for Windows 2000 40 Insta...

Страница 20: ...to support VGA display the Md5 DFP board see page 10 or another VGA board see page 11 Before you install the board read this section carefully Also review the installation requirements for the PC befo...

Страница 21: ...witches This table shows the setting options for this switch You must use DIP switch S1 to enable or disable VGA support DIP Switch S1 On Off 1 VGA disabled VGA enableda a Indicates factory setting 2...

Страница 22: ...in this table 3 Install the Md5 DFP board into your PC see page 12 To provide VGA display the Md5 DFP board must support a flat panel that is compatible with VGA resolutions DIP Switch S1 Position 1 O...

Страница 23: ...Slide the DIP switches on switch S1 into the positions shown in this table DIP Switch S1 Position 1 ON 2 OFF 3 ON 4 ON When you install the Md5 DFP board into a computer with an existing VGA board yo...

Страница 24: ...Be sure to follow the safety precautions described on page 8 before you proceed with board installation To install the board 1 Remove the blank bracket from the back of any available PCI slot Install...

Страница 25: ...DFP board firmly into the slot 3 Make sure the board connector pins are aligned with the slot 4 Secure the mounting bracket with the bracket screw 5 Replace the cover Installing an Md5 DFP board Inst...

Страница 26: ...llation on both Windows 2000 and Windows NT systems you must install all the boards first and then the drivers The Windows NT driver version 4 4 0 or later supports up to 8 Md5 DFP boards 16 screens Y...

Страница 27: ...P board in your computer connect your flat panel to the board For more information refer to the installation guide for the digital display If you are connecting the Md5 DFP board to a DOME digital fla...

Страница 28: ...2000 Professional Press F8 during the system boot and select Enable VGA Mode on the Windows 2000 Advanced Options menu Then press Enter 2 Log on with administrator privileges The System Settings Chang...

Страница 29: ...on the Windows 2000 Advanced Options menu Then press Enter 5 Log on with administrator privileges 6 Insert the WINFP CD and browse to find the Win2k MD5dfp directory 7 Double click Setup exe The initi...

Страница 30: ...and click Next The Setup Type dialog box appears for each Md5 DFP board you install 10 Click Yes on the Digital Signature Not Found dialog box to continue the installation This dialog box appears for...

Страница 31: ...Windows 2000 Driver 19 To modify an existing configuration 1 Insert the WINFP CD and browse to find the Win2k MD5dfp directory 2 Double click Setup exe The Welcome dialog box appears 3 Select Modify...

Страница 32: ...lled as a single head Click Next The Setup Type dialog box appears for each Md5 DFP board you install The Digital Signature Not Found dialog box appears 5 Click Yes to continue the installation The Di...

Страница 33: ...FP board 6 Click Yes 7 Insert the WINFP CD browse to find the Win2k MD5dfp fp 5 0 x yyy directory where x yyy is a number that completes the driver version as in fp 5 0 1 009 8 Continue the installati...

Страница 34: ...ify the configuration of a dual headed board 1 Browse to the Win2k MD5dfp fp 5 0 x yyy directory and double click Setup exe This dialog box appears 2 Choose Modify and click Next The Setup Type dialog...

Страница 35: ...l Add a Display for Board x to add a second display to an existing board installed as a single head The Digital Signature Not Found dialog box appears 4 Click Yes The Digital Signature Not Found dialo...

Страница 36: ...and DOME Md5 DFP Properties dialog box 8 Select Extend my Windows desktop onto this monitor and click Apply This message appears Windows will now apply your new desktop settings The original desktop...

Страница 37: ...can change the display properties such as resolution palette options and brightness using the DOME tab after the display is attached to the Windows 2000 desktop Use this tab To set the default displa...

Страница 38: ...2 Right click the desktop and select Properties Settings The Settings tab appears 3 Select Default Monitor and DOME Md5 DFP Properties from the Display list 4 Select Advanced DOME to select a resolut...

Страница 39: ...click Apply The DOME Display Resolution dialog box appears 2 Click OK within 15 seconds to accept the new settings or ignore the message to revert to the original settings The resolution changes on b...

Страница 40: ...to the DOME tab If you select OK this message appears 4 Click OK You can now use the display Setting brightness In the Brightness field of the DOME tab slide the scroll box left or right or use the le...

Страница 41: ...devices as shown in this table All DOME boards that support multiple displays also support differing palette options on multiple screens attached to the same board This illustration shows the assignm...

Страница 42: ...e specifications of the primary display determine how desktop icons are drawn For example the desktop icons appear gray on a color screen if the primary display is set to a gray palette This table def...

Страница 43: ...Static gray Pseudocolor No Nonlinear static gray Commodity board at 16 bpp Yes Nonlinear static gray Dynamic gray No Nonlinear static gray Static gray Yes Nonlinear static gray Nonlinear static gray Y...

Страница 44: ...Apply or OK Getting information Information about the flat panel board and driver appears on the lower half of the DOME tab Flat panel information includes panel type serial number and on board tempe...

Страница 45: ...ice on the DOME tab and removing the device through the Microsoft control panel The DOME control panel determines if you are uninstalling the devices in the correct order Remember these tips when unin...

Страница 46: ...ystems Tools dialog box appears 3 Click Device Manager 4 Click Display Adapters A list of currently installed display devices appears 5 Highlight the adapter you want to remove Right click and choose...

Страница 47: ...d select Properties Advanced for the sister device 2 Select DOME Uninstall DOME Device 3 Restart the computer 4 Select Start Settings Control Panel Administrative Tools 5 Click Computer Management The...

Страница 48: ...the adapter shown with the Display Warning icon Right click and choose Uninstall 9 Click OK on the Confirm Device Removal dialog box The device is now removed from Windows 2000 10 Restart the compute...

Страница 49: ...ster device If you click Uninstall DOME Device to uninstall the primary display this dialog box appears Single headed display board Use Administrative Tools in the Windows control panel to uninstall a...

Страница 50: ...e DOME driver and other unsigned drivers If you select Ignore the installation program ignores the lack of a valid Catalog file with a digital signature If you select Warn the installation displays th...

Страница 51: ...lation of the Windows 2000 driver Press F8 during the system boot to break the cycle Then select Enable VGA Mode on the Windows 2000 Advanced Options menu and press Enter Overwriting installation file...

Страница 52: ...TQA The DLL installs automatically when you load the Windows 2000 driver DIMPL library The DOME Image Processing Library or the DIMPL library provides a collection of functions for image manipulation...

Страница 53: ...OME screens must be in nonnegative space on the Windows desktop Refer to the PCI or PCX Products Developer s Guide for more information about the Windows NT 4 0 compatible modes You can run Calibratio...

Страница 54: ...privileges 3 Right click the desktop and select Properties Settings The Settings tab appears 4 Click Display Type The Display Type dialog box appears 5 Click Change in the Adapter Type section of the...

Страница 55: ...ck OK The Third Party Drivers dialog box appears prompting you Do you wish to proceed 10 Click Yes A progress bar appears and the Installing Driver dialog box appears with this message The drivers wer...

Страница 56: ...d to support the flat panel through the Settings tab of the Display Properties dialog box You can then use the DOME tab to change display properties To set the display resolution 1 Log on with adminis...

Страница 57: ...ng for display 5 Click OK 6 Click Test The Testing Mode dialog box appears explaining that the new mode is being tested The dialog box on your screen displays the values that exist in your binary cfg...

Страница 58: ...t steps 3 8 to perform the test with a different resolution 9 Select Large Fonts in the Font Size field optional 10 Click OK The display resolution is now set properly for the Md5 DFP board This messa...

Страница 59: ...he default configuration file fp5pcy cfg on your system The DOME tab for VGA mode appears 14 Click OK or Apply to activate all the new settings This message appears Do you want to restart your compute...

Страница 60: ...49 54 for more information on specific configuration options and features To use the DOME tab 1 Right click the desktop and select Properties DOME The DOME tab appears 2 Select your desired settings 3...

Страница 61: ...Apply or OK Each Md5 DFP board supports one or two digital flat panels Keep these points in mind Version 4 4 0 or later of the driver supports up to 8 boards 16 screens The screens are assigned to th...

Страница 62: ...the pull down menu to select a palette Then click Apply or OK Under Windows NT 4 0 the Md5 DFP board supports the palettes in this table This illustration shows the assignment of values on the graysc...

Страница 63: ...causes all icons to be redrawn in black and white The dynamic gray palette accommodates gray mapped Windows colors for the first and last 10 palette entries Nonlinear static gray palette The nonlinea...

Страница 64: ...first and last 10 palette entries Because the frame buffer assumes the Windows palette is in use applications that draw directly to the framebuffer display incorrectly For exam ple icons and button b...

Страница 65: ...ple Md5 DFP screens then more than one screen represents the Windows NT desktop DirectDraw limited screen size Under the Windows NT 4 0 operating system Build 1381 DirectDraw supports screen sizes onl...

Страница 66: ...l This information includes panel type serial number and on board temperature in degrees Celsius The temperature reading of a flat panel is given when you first open the panel and if you later select...

Страница 67: ...ts in the C dome tools directory If you want to use the DOME large fonts you must install them to your display properties To install DOME large fonts 1 Double click My Computer C DOME Tools A list of...

Страница 68: ...appears 7 Click the Scheme pull down arrow and select Windows Standard 8 Click OK To increase cursor size 1 Select Start Settings Control Panel Mouse Pointers The Pointers tab appears 2 Click the Sche...

Страница 69: ...s automatically if the font size changes Icon Icons on the desktopb b If the Item or Font size is too large the icon and text may be cropped If this occurs adjust Icon spacing by right clicking on the...

Страница 70: ...es all dialog boxes to the upper left screen preventing dialog boxes from splitting across screens The DOME DlgFix software installs automatically when you load the Windows NT 4 0 driver Dialog box sp...

Страница 71: ...t the DOS prompt The DOME DlgFix icon appears on your taskbar to indicate that DlgFix is running To add DlgFix to the startup menu Type C dome tools DlgSetup at the DOS prompt After you type this comm...

Страница 72: ...like other screen savers how ever the DOME DPMS Screen Saver does not display anything on the flat panel itself Rather it launches another screen saver that you select to protect the display Then afte...

Страница 73: ...PMS Screen Saver 1 Right click the desktop and select Properties Screen Saver The Screen Saver tab appears 2 Select DOME DPMS Screen Saver from the list of screen savers 3 Set the Wait field with the...

Страница 74: ...t panel before DPMS power off mode is invoked You can select any of the other installed Windows screen savers to protect the flat panel during that time The Settings and Preview buttons enable you to...

Страница 75: ...en saver displays that must elapse before the flat panel enters power off mode in the Invoke DPMS after field 5 If desired select Wake at start of period to force the flat panel to wake up if it is in...

Страница 76: ...voked for the current time period power off mode starts only after a total of 45 minutes of user inactivity After being in power off mode for a long time the flat panel display can take as many as 30...

Страница 77: ...TQA The DLL installs automatically when you load the Windows NT driver DIMPL library The DOME Image Processing Library or the DIMPL library provides a group of functions for image manipulation The lib...

Страница 78: ...later You can run Calibration TQA 2 0 3 or later on a system that includes both DOME boards and other brands of boards Do not change any Windows display settings while the Calibration TQA application...

Страница 79: ...apter Preparing for Board Installation 68 Installing the Md5 DFP Board 71 Connecting a Digital Display 74 Installing the Solaris Driver 75 Configuring Display Settings 77 Configuring the Windowing Env...

Страница 80: ...review the installation requirements for the Sun PCI workstation before you proceed with board installation See pages 4 5 Install the board first then connect the display before you install the driver...

Страница 81: ...facturer s instructions 3 Set DIP switch S1 to disable VGA mode Disabling VGA mode The Md5 DFP board cannot operate as a VGA board in a Sun PCI workstation You must disable VGA on the board This illus...

Страница 82: ...e OFF position If you change the setting for one or more of the switches DIP switch S2 overrides the default display mode programmed on the board See Using the default display mode on page 77 for more...

Страница 83: ...ribed on page 68 before you install the board To install the board 1 Locate the slot you want to use for the board then remove the backplate from the slot The slots are usually labeled on the motherbo...

Страница 84: ...the computer 3 Make sure the board s connectors are aligned with the connectors on the motherboard then press down until the board is firmly seated 4 Secure the board with the screw for the backplate...

Страница 85: ...DFP Board on page 71 for each board Remember these tips when installing multiple boards You can install as many Md5 DFP boards as your system s power supply and available PCI slots can support Each b...

Страница 86: ...install the Md5 DFP board in your system connect your flat panel to the board For more information refer to the installation guide for the digital display If you are connecting the Md5 DFP board to th...

Страница 87: ...asks Adds the device driver Adds the OpenWindows loadable DDX driver Modifies the OWconfig file Installs the DOMEmdlib shared object library To install the driver 1 Log on as root 2 Insert the DOME Md...

Страница 88: ...all to process all packages default all q 5 Press Return to install all packages Messages appear followed by this prompt Do you want to continue with the installation of the package y n 6 Type y Messa...

Страница 89: ...ual classes on page 83 Then read the appropriate section for your windowing environment Configuring the Windowing Environment on page 87 Using the DPMS Screen Saver on page 89 Changing the Console on...

Страница 90: ...river software and reboot your computer if necessary use the video_mode program to check the default display mode Change the directory to opt DOMEmd5dfp util first then type this command video_mode h...

Страница 91: ...display mode For example if you want to program mode T on the first head of the first board in the system type this command video_mode d dev md5dfp0 0 m T Display Mode Resolution Ua a Default setting...

Страница 92: ...on If it does not you must log on as root and create the missing directories with mkdir 2 Find and copy these 10 lines of the OWconfig file in usr openwin server etc directory class XSCREENCONFIG name...

Страница 93: ...a name that is not being used for any other XSCREENCONFIG section device dev md5dfp0 0 This line indicates the installation of an Md5 DFP board to which the system assigned the instance of zero 0 The...

Страница 94: ...ine indicates that you are using two heads 2hd of an Md5 DFP board md5dfp and that the configuration of the board is located in the board file md5dfp 2hd xqa Board files are located in the opt DOMEmd5...

Страница 95: ...o PseudoColor is the most common visual type Some applications run only on displays with a PseudoColor default visual class When the Md5 DFP board is connected to a grayscale display you can configure...

Страница 96: ...efault visual Use the xdpyinfo command to check the default visual of a screen Look at the correct screen and find the visual with the matching ID to verify that it is PseudoColor Look for the lines m...

Страница 97: ...dow id 0x29 depth of root window 8 planes number of colormaps minimum 1 maximum 1 default colormap 0x21 default number of colormap cells 256 preallocated pixels black 1 white 0 options backing store Y...

Страница 98: ...masks 0x7 0x38 0xc0 significant bits in color specification 8 bits visual visual id 0x26 class TrueColor depth 8 planes size of colormap 8 entries red green blue masks 0x7 0x38 0xc0 significant bits i...

Страница 99: ...ystem type openwin dev dev md5dfp0 0 For a two headed system type openwin dev dev md5dfp0 0 dev dev md5dfp0 1 Each screen has a name of this form dev md5dfpy z where y board instance z head number 0 f...

Страница 100: ...the X server and bring up CDE This is the default line 0 Local local_uid console root usr openwin bin Xsun 0 nobanner To use one or more DOME devices Replace the second 0 with the dev option flag and...

Страница 101: ...ff the backlight in the flat panel when the display is not in use This reduces the power consumption of the backlight and extends the life of the display You can enable DPMS through the Style Manager...

Страница 102: ...n from the list of screen savers at the left 5 Use the slider in the Start Saver field to set the time from when the system last receives mouse or keyboard input until the system invokes the screen sa...

Страница 103: ...o Off This setting ensures that the display does not invoke DPMS which means that you do not have to wait for the display to stabilize when you begin to use it again Set the Screen Saver field to On w...

Страница 104: ...halt the system to get to the ok prompt 2 Type setenv output device device node These examples describe how to change the console in Ultra 10 and Ultra 30 systems For more details refer to your Sun do...

Страница 105: ...Board Resolutions In This Appendix Board Resolutions for PCs 94 Board Resolutions for Sun PCI Workstations 95...

Страница 106: ...for PCs This table shows the available resolutions and palettes for the Md5 DFP board in a PC Resolutiona a In pixels width x height Palette 1536 x 2048 Grayscale Pseudocolor 2048 x 1536 Grayscale Pse...

Страница 107: ...e this exact name and either the domegray vda file for grayscale flat panels or the domecolr vda file for color flat panels to specify the flat panel s you are using when you edit the OWconfig file fo...

Страница 108: ......

Страница 109: ...sor increasing size 56 customizing appearance in Windows NT 57 D default monitor mode 77 86 desktop icons 30 dialog boxes fixing 58 59 DIMPL library 40 65 DimplX control 40 65 DIP switch setting in PC...

Страница 110: ...dynamic link library 40 65 E electrostatic discharge minimizing 8 68 emulating a pseudocolor visual class 84 enabling VGA mode PC 9 10 extending life of flat panel display 60 89 F features and benefit...

Страница 111: ...ard 8 14 installing driver 16 18 42 43 portrait mode 2 pseudocolor display 2 83 R reboot cycle breaking 10 39 reducing display power consumption 60 89 removing See uninstalling requirements system 4 r...

Страница 112: ...sabling Sun PCI 69 enabling or disabling PC 10 using another VGA board PC 11 using Md5 DFP board PC 10 visual class 83 86 checking default 84 86 W Windows 2000 system additional boards 21 Calibration...

Отзывы: