Chapter 3
14
Registration and Binding of Camera
PB731P/PB731I
User’s Manual
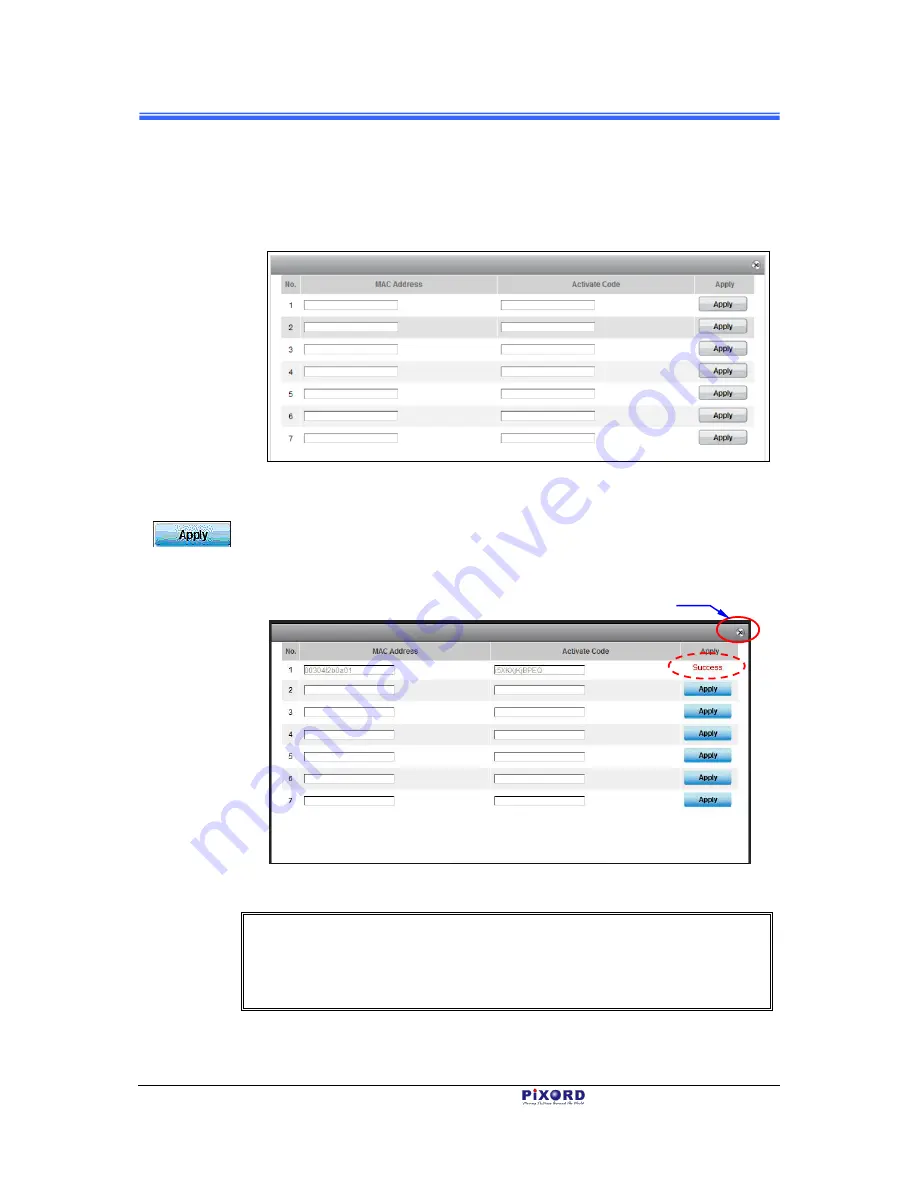
4) When the
Binding
dialog appears, fill in the MAC Address and Activated
Code of the to be added Camera. Note that the required data are available
from the Activation Card provided with each Camera or from the label at the
back of the Camera.
Figure 3-18
“Binding” Dialog for Registration of Additional Camera(s)
5) After the MAC Address and Activate Code of the new Camera is entered,
click the corresponding
Apply
button at the right end column and the button
position will switch into “
Success
” display to indicate successful binding of
the new Camera with iPIXORD as illustrated below. Then click the
Close
button.
Figure 3-19 Sample Display of Successful Binding of the Newly Added Camera
NOTE
The example in the above figure, shows only one new Camera is added.
Actually you can simultaneously add several Cameras into the dialog at the
same time
Close
button
Содержание PB731I
Страница 1: ...PB731P PB731I Wi Fi Network Camera Getting Started Handbook Version 1 21 PiXORD Corporation May 2013...
Страница 12: ...Chapter 2 6 Installation and Setup PB731P PB731I User s Manual...
Страница 35: ...PB731P PB731I Wi Fi Network Camera Webpage Setting User s Guide Version 1 01 PiXORD Corporation June 2013...


