38
EN
ENGLISH
PROPANE GAS CARE AND MAINTENANCE
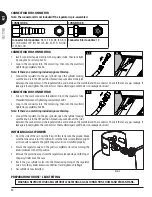
WARNING: Do not do any cleaning or maintenance on any grill parts until all parts are cool! Be sure that
the valve on the LP Gas Cylinder is closed and in the OFF position.
CLEANING INTERIOR OF GRILL:
• We recommend cleaning off food residue immediately after cooking by gently scrubbing grates with wire bristle brush and
then turning burners to “HIGH” for approximately 5 minutes. The heat from the burners will burn off most food/grease residue
from grates & heat tents and turn it to an ash like substance which will fall to the bottom of the firebox or grease tray. After the
grill cools
(approximately 30 minutes) remove grates and heat tents and brush the ash and any grease out of the firebox. Clean
and replace grease cup. Inspect the heat tents for damage or deterioration before reinstalling in the grill.
• Use only mild dish washing detergents, hot water, a nylon scrub pad and a BBQ wire brush cleaning tool
• Always rinse all surfaces thoroughly after cleaning
• Porcelain surfaces. Because of glass-like composition, most residue can be wiped away with a solution of baking soda
and water or specially formulated cleaner. Use non-abrasive scouring powder such as baking soda for stubborn stains.
NOTE: Grease Drip Trays and Grease Cup should be emptied and cleaned after each use to prevent flare‒ups and /or
grease fires.
MAINTAINING EXTERIOR OF GRILL:
• To protect your grill from excessive rust, the unit must be kept clean and covered at all times when not in use.
• For painted surfaces, wash with mild detergent and non-abrasive cleaner or warm soapy water.
• For plastic and rubber parts, wash with warm soapy water and wipe dry. Do not use Citrisol, abrasive cleaners, grill
cleaner on plastic parts. Damage to and failure of parts can result.
• Exterior painted surfaces can be re-newed using High Heat BBQ Paint. ex. Rustoleum High Heat Semi-Gloss.
BURNER CLEANING AND MAINTENANCE:
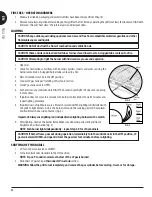
1. Turn the gas OFF at the LP Gas Cylinder and the burner control knobs.
2. Lift off the cooking grids and the heat tents covering the burners.
3. Remove the screw attaching the burners at the back of the grill.
4. Gently and carefully, tilt the back of the Burner up and slide it backwards off the valve orifice, then lift out of the grill.
5. Wipe clean the orifice face.
6. Clean out any of the Burner holes which may have clogged. Use a toothpick or thin wire.
7. Remove and clean off any and all food residue or other coating on the Burner. Replace the Burners by following the above steps
in reverse. CHECK to make sure that the Burners are installed with the valve orifice INSIDE the Burner.
NOTE:
• Visually check burner flames for proper operation (see pictorial in “Burner Assembly/Maintenance” under Proper
Care and Maintenance). Spiders or other insects can nest in the burner causing gas blockage.
• For safe grilling and peak performance of your grill, perform these checks at least twice per year or after extended
periods of storage.
REPLACING THE BATTERY IN THE IGNITER:
Unscrew the electrical ignition button and remove the old battery. Replace with new AA battery. Note: The negative (-) side of
the battery goes in first. Please refer to the mark on the side of the cap.

