background image

130

Ch

ap

te

r

14

Cu

st

om

isin

g t

h

e A

u

d

io

 S

et

tin

g re

la

te

d

wi

th

 A

u

d

io

 V

is

u

al

AV

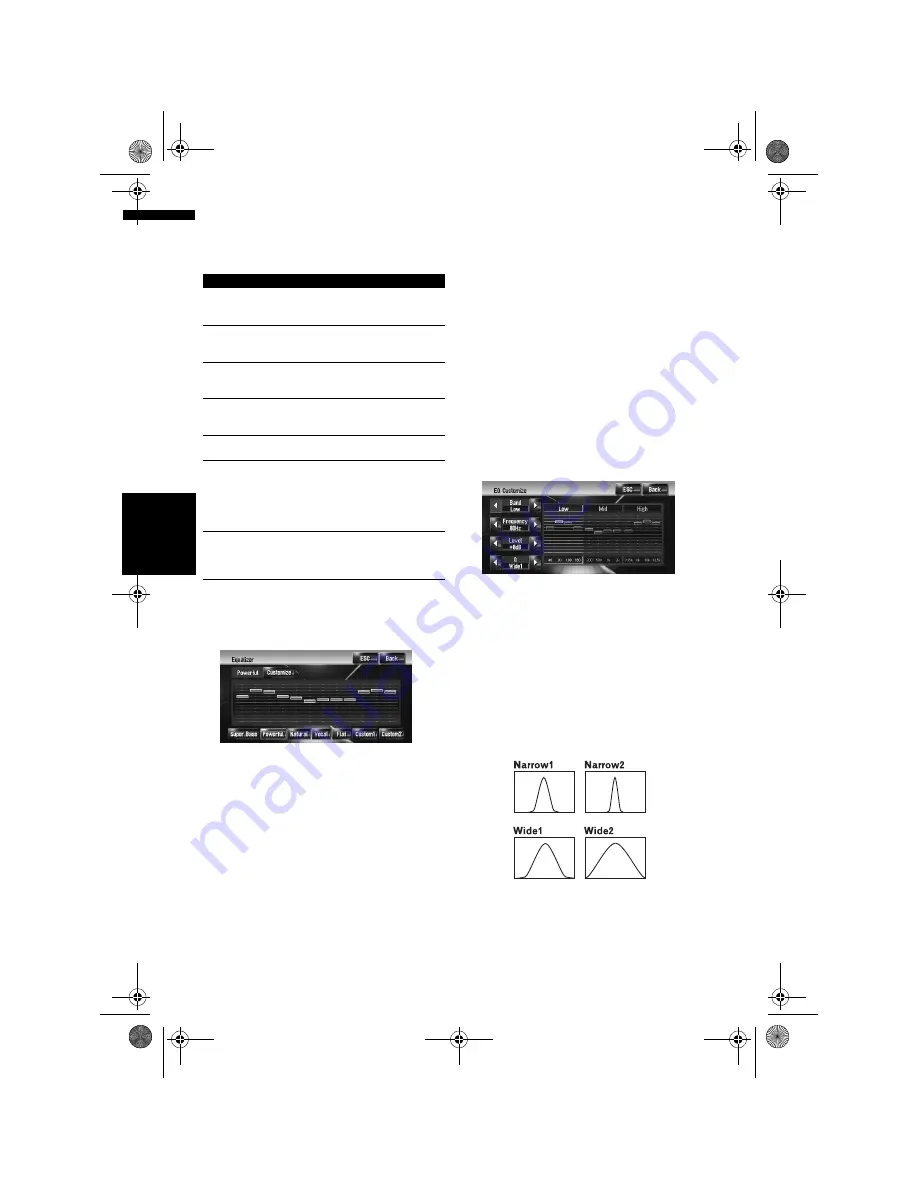
Recalling equaliser curves

There are six stored equaliser curves which you 
can easily recall. Here is a list of the equaliser 
curves:

1

Touch [Equalizer] in the Audio Settings 
menu.

2

Touch desired equaliser.

When Flat is selected, no supplement or 
correction is made to the sound. This is 
useful to check the effect of the equaliser 
curves by switching alternatively between 
Flat and a set equaliser curve.

Adjusting equaliser curves

You can adjust the currently selected equaliser 
curve setting as desired. 
• A  separate 

Custom1

 curve can be created for 

each source. If you make adjustments when a 
curve 

Super Bass

Powerful

Natural

Vocal

Flat

, or 

Custom1

 is selected, the 

equaliser curve settings will be memorised in 

Custom1

.

• A 

Custom2

 curve can be created common to 

all sources. If you make adjustments when the 

Custom2

 curve is selected, the 

Custom2


curve will be updated.

The adjusted Custom1 curve is memorised for 
each of the source selected, but one curve is 
shared for the following sources.
In the built-in DVD drive, different curves can 
be memorised for a DVD-Video and a CD (CD-
DA or MP3).

AM

 and 

FM

EXT 1

 and 

EXT 2

AUX

 and 

AV INPUT

You can adjust the centre frequency, level and 
the Q (curve characteristics) of each band 
(

Low

/

Mid

/

High

).

Band

:

You can select the band you want to adjust.

Frequency

:

You can select which frequency to be set as 
the centre frequency.

Level

:

You can adjust the decibel (dB) level of the 
selected band.

Q

:

You can select the details of the curve char-
acteristics. (The following figure shows the 
characteristic image.)

1

Touch [Equalizer] in the Audio Settings 
menu.

2

Touch [Customize].

The details setting screen appears.

Equaliser curve

Super Bass

Super Bass

 is a curve in which only lowrange is 

boosted.

Powerful (Default)

Powerful

 is a curve in which lowrange and highrange 

sounds are boosted.

Natural

Natural

 is a curve in which lowrange and highrange 

sounds are slightly boosted.

Vocal

Vocal

 is a curve in which the midrange sounds, such 

as the human vocal range, is boosted.

Flat

Flat

 is a flat curve in which nothing is boosted.

Custom1

Custom1

 is an adjusted equaliser curve that you cre-

ate. A separate custom curve can be created.

Custom1 and Custom2 are adjusted equaliser curves 

that you create. Adjustments can be made with a 3-

band parametric equaliser.

Custom2

Custom2

 is an adjusted equaliser curve that you cre-

ate. If you select this curve, the effect is reflected all 

audio source.

MAN-HD1BT-SOFTW-EN.book  Page 130  Thursday, April 20, 2006  3:47 PM

Содержание AVIC-HD1BT

Страница 1: ...LISH HDD AV NAVIGATION HEAD UNIT AVIC HD1BT Don t forget to register your product on www pioneer co uk or www pioneer eur com Operation Manual MAN HD1BT SOFTW EN book Page 1 Thursday April 20 2006 3 47 PM ...

Страница 2: ...s shown in the examples may differ from the actual screens The actual screens may be changed without notice for performance and function improvements MAN HD1BT SOFTW EN book Page 2 Thursday April 20 2006 3 47 PM ...

Страница 3: ...t the Data for the Map Database Page 7 This provides the date when the Map Database was recorded Copyright Page 8 This provides the copyright of the Map Database To find the operation procedure from what you want to do When you have decided what you want to do you can find the page you need from the Table of Con tents To find the operation procedure from a menu name If you want to check the meanin...

Страница 4: ...ion The system can acquire traffic information and perform navigation using the traffic informa tion This chapter describes ways of viewing traffic icons that are displayed on the map and operation related traffic information Using Hands free Phoning When you are using a mobile phone featuring Bluetooth technology by connecting the Blue tooth unit to the navigation system you can operate your mobi...

Страница 5: ...dio Setting related with Audio Visual Using the audio source various audio visual settings are available to suit your tastes This chapter describes how to change the settings Operating Your Navigation System with Voice This section describes navigation operations such as searching the destination and per forming audio operations by voice Appendix Please read the appendix to learn more about your n...

Страница 6: ...r example NAVI indicates that the description is related to the operation for navi gation control NAVI AV indicates that the description is related to both operation for navigation control and AV control About the definition of terminology Front Display and Rear Display In this manual the screen that is attached to the body of this navigation unit will be referred to as the Front Display Any addit...

Страница 7: ...s You shall not use the Software to operate a service bureau or for any other use involving the processing of data for other persons or entities Pioneer and its licensor s shall retain all copy right trade secret patent and other proprietary ownership rights in the Software The Software is copyrighted and may not be copied even if modi fied or merged with other products You shall not alter or remo...

Страница 8: ...ranty is pro hibited by any country or local law which cannot be preempted 4 EXPORT LAW ASSURANCES You agree and certify that neither the Software nor any other technical data received from Pio neer nor the direct product thereof will be exported outside the country or district the Country governed by the government having jurisdiction over you the Goverment except as authorised and as permitted b...

Страница 9: ...l not be liable for any damages arising out of the use of the data except for damages caused by gross negli gence or intent of Tele Atlas Data Source 2005 Tele Atlas N V BEV GZ 1368 2003 DAV IGN France Michelin data Michelin 2005 Geonext DeAgostini Ordnance Survey of Northern Ireland Norwegian Mapping Authority Public Roads Adminis tration Mapsolutions Swisstopo Topografische ondergrond Copyright ...

Страница 10: ...f these copyrights shall cause legal proceedings Swisstopo BEV GZ 1368 2006 Topografische ondergrond Copyright dienst voor het kadaster en de openbare registers Apeldoorn 2006 2006 INCREMENT P CORP ALL RIGHTS RESERVED All rights reserved Shell International Petroleum Company Limited Company trademarks other than approved in this sec tion The marks of companies displayed by this product to indicate...

Страница 11: ...pter 2 Basic Operation Flow from Startup to Termination 17 How to Use Navigation Menu Screens 18 Displaying Navigation menu 18 Navigation menu overview 18 Basic Navigation 19 How to calculate your destination by using Ad dress Search 20 Checking and modifying the route 24 When the route guidance starts 25 Cancelling the Route Guidance 25 Modifying the Route Calculation Conditions 26 Items that use...

Страница 12: ... free phoning 68 Receiving a phone call 70 Making a phone call 70 Transferring the phone book 73 Registering a phone number in Dial Favourite 73 Editing the Phone Book data 74 Editing the received call or dialled number history 75 Chapter 9 Modifying the General Settings for Navigation Functions Entering the Settings Menu 77 Setting the Volume Related to the Guidance and Phone 77 Customising the R...

Страница 13: ... playlist or tracks 112 Assigning another candidate for title information 116 Chapter 12 Using the AV Source M CD iPod TV Operating the Multi CD Player 119 Selecting M CD as the source 119 Screen configuration 119 Touch key operation 119 Operating the iPod 121 Selecting iPod as the source 121 Screen configuration 121 Touch key operation 121 Browsing for a song 122 Operating the TV tuner 123 Select...

Страница 14: ...ation manually 150 Location screen A and B 151 Other Voice Commands 152 Other voice commands for navigation operation 152 Other voice commands for AV operation 154 Category list for vicinity search 155 Appendix Returning the Navigation System to the Default or Factory Settings 159 Setting items to be deleted 160 If system errors frequently occur 161 Returning the navigation system completely to th...

Страница 15: ...divert your attention in any way from the safe operation of your vehicle Always observe safe driving rules and follow all exist ing traffic regulations If you experience diffi culty in operating the system or reading the display park your vehicle in a safe location and apply the handbrake before making the necessary adjustments Never allow others to use the system unless they have read and underst...

Страница 16: ...ful if used while driving To prevent such functions from being used while the vehicle is in motion there is an interlock system that senses when the handbrake is set and when the vehicle is moving If you attempt to use the functions described above while driving they will become disabled until you stop the vehicle in a safe place and apply the handbrake Please keep the brake pedal pushed down befo...

Страница 17: ...on by using touch panel key Variety of View Modes Various types of screen display can be selected for navigation guidance Map Mode Mixed Mode Street List Mode Driver s View and Twin Map View The split screen mode is also available Rear View Rear view camera screen and Nav igation map screen Vehicle Dynamics You can also display information on vehicle speed acceleration and voltage etc The rear vie...

Страница 18: ...ity will become available once the temperature inside the vehicle returns to normal When recording please pay attention to these points Pioneer does not compensate for the contents that could not be recorded or any loss of recorded data due to a malfunction or failure of the navigation system The data recorded on the navigation system is not allowed to be used without a permission from its right h...

Страница 19: ...also be changed afterward Customising the Regional Settings Page 77 How to read the current position screen Page 31 Setting the time Page 78 To protect the LCD screen from damage be sure to touch the touch keys with a fin ger The stylus is supplied for special cali brations Do not use the stylus for normal operations 3 Press the MENU button Displays the navigation menu 4 Assign a destination by us...

Страница 20: ... check traffic information or select the RDS TMC station If you are using the mobile phone featuring Blue tooth technology by connecting the Bluetooth unit ND BT1 to the navigation system you can configure Bluetooth settings or check the outgo ing incoming call history Traffic On Route and Traffic List can be active only when the navigation system get available traffic information from a RDS TMC s...

Страница 21: ...is in motion To enable these functions you must stop in a safe place and apply the handbrake see page 14 Interlock for details Basic flow of operation 1 Park your vehicle in a safe place and apply the handbrake 2 Press the MENU button to display the navigation menu 3 Select the method of searching for your destination 4 Enter the information about your desti nation to calculate route 5 Confirm the...

Страница 22: ...wed down to six or less a list of the matched streets automati cally appears When you enter the same characters as those entered previously the system automatically displays the character that follows the entered characters Auto fill in function When entering the characters the system will automatically search the database of all possible options If there is only one let ter that could possibly fo...

Страница 23: ...t text with marks such as or 11 0 9 You can input text with numbers 4 7 12 11 10 1 3 6 2 5 9 13 8 12 Street Touch if you want to return the street input mode This is available only when 8 is blank 13 Centre This can be selected when you enter a city or area name first Touch this button to display the central point of the entered city or area Touching OK searches the route to the cen tral point Pro...

Страница 24: ...o input When the route is not set route calculation starts immediately Checking and modifying the route Page 24 When the route is already set Location con firmation screen is shown To check the location at the map Page 23 Touching OK with no input the central point of the house number range is dis played and Location confirmation screen appears Route calculation starts When the route calculation i...

Страница 25: ...n 5 Back Returns previous screen 2 4 1 5 To check the location at the map Location confirmation screen 1 Calculating the route to the destination Route calculation starts When the route cal culation is completed Route Confirmation screen appears If you press the MAP button or MENU button during route calculation the calcu lation is cancelled and the map screen appears 2 Scrolling the map The map d...

Страница 26: ... destination 3 Travel time to destination 4 Sets the displayed route Sets the displayed route as your route and starts the route guidance When the route guidance starts Page 25 5 Displaying multiple routes You can select a desired route from multiple route options Calculated routes are shown in dif ferent colours Touching to switch to another route Touching OK returns to the previous dis play If y...

Страница 27: ...nce set to Street List Mode or Mixed Mode and enter a street not recorded on the hard disk drive the screen changes to Map Mode When you return to the route returns to the original view and resumes route guidance Basic items on the guidance This section describes only the basic items that are displayed on the Map Mode screen Details of the map screen Page 31 1 Current location 2 Distance to the de...

Страница 28: ...nce or the main road Determine which condition takes priority for route calculation Fast Calculate a route with the shortest travel time to your destination as a priority Short Calculate a route with the shortest distance to your destination as a priority Main Road Calculate a route that passes major arterial road as a priority Avoid Toll Road This setting controls whether toll roads including tol...

Страница 29: ...ils This function is not available if your vehicle has deviated from the route 1 Touch Destination in the navigation menu and then touch Route Overview Route confirmation screen appears Route Overview is displayed only when the route is set 2 Touch Profile 3 Touch or to scroll the list Scroll the list as necessary 4 Touch Back You can return to the previous display When a long distance route is ca...

Страница 30: ...oute to pass through these loca tions Adding a waypoint Up to 5 waypoints can be selected and selected points can be sorted automatically or manually 1 Touch Destination in the navigation menu and then touch Route Overview 2 Touch Waypoints The waypoint menu screen appears 3 Touch Add Switch the display to search for points After searching for a point display it on a map then touch OK to add to th...

Страница 31: ...he near est waypoint distance in a straight line from the current location as waypoint 1 and sort the other points including your destination in order of distance from your current loca tion Manual You can manually sort destination and way points Touch the destination and waypoints on the left side of the screen in the order you want to visit The touched destination and waypoints are displayed on ...

Страница 32: ...30 Chapter 2 Basic Operation NAVI MAN HD1BT SOFTW EN book Page 30 Thursday April 20 2006 3 47 PM ...

Страница 33: ...und your current position 2 Press the MAP button again 3 Touch the mode name to select the mode you want to display You can display the view mode screen by touching Map in the navigation menu and touching View Mode How to view the map of the cur rent location This example shows the case where Second Maneuver Arrow is set to View Map Mode Displays standard map Driver s View The map from the driver ...

Страница 34: ...lay may show a dif ferent speed than your vehicle s actual speedometer because your unit measures speed in a different way You can change the items indicated on the left and right meters Setting the Vehicle Dynamics Display Page 38 Rear View Rear view image is displayed on the left hand side of the screen while the map of your sur roundings is indicated on the right If the Camera Input is set to O...

Страница 35: ...motorway exit numbers and motorway signs may be displayed when in the vicinity of interchanges and exits If the data for these items are not contained in the hard disk drive the information is not available even if there are the signboards on the actual road City Map When City Map in the Map menu is On in certain metropolitan city areas a more detailed City Map is available at the 50m 0 05 mi map ...

Страница 36: ...e etc 5 Compass The red arrow indicates north If the scale is less than 50 km 25 mi touching the map changes the direction that it is displayed in north up heading up When the scale of the map is greater than 50 km 25 mi it is fixed to north up Heading up The map display always shows the vehicle s direction as proceeding toward the top of the screen North up The map display always has north at the...

Страница 37: ...40 21 Mute Voice Guidance icon Touch to turn on or off the mute setting of Voice Guidance You can select between display and non display Selecting display or non display for the Mute Voice Guidance icon Page 40 22 Second Maneuver Arrow The turning direction two corners ahead appears You can select between display and non display Selecting display or non display for the Second Maneuver Arrow Page 4...

Страница 38: ... near the sides of the screen to scroll through quickly During Twin Map View the map on the left hand side cannot be scrolled Touch the map on the right hand side to scroll the maps 1 Scroll cursor The position of scroll cursor shows the location selected on the current map When the scale is 200 m 0 25 mi or lower the road appears light blue in the vicinity of the scroll cursor 2 Direction line Th...

Страница 39: ...istering a loca tion in Address Book faster than using the navigation menu You can customise the shortcuts displayed on screen The shortcuts described here are pre pared as default setting Changing a shortcut Page 41 When the Bluetooth unit is connected to the navigation system you can use shortcuts related to phone functions Items marked with an asterisk cannot be removed from the shortcut menu 1...

Страница 40: ...ion Acceleration in a forward direction is dis played The sign indicates acceleration while the sign indicates deceleration Lateral Acceleration Acceleration in a side direction such as when turning is displayed The sign indicates a right turn while the sign indicates a left turn Angular Velocity Displays the vehicle s turning angle over one second how far it has turned in a second Slope Displays ...

Страница 41: ...ou can operate the following items 2 To finish the setting touch OK Close Up View You can select the method to display the close up view of the intersection 2D Displays the close up view with the 2D map 3D Displays the close up view with Driver s View Off Do not display the close up view City Map You can select whether to display or not the city map when in certain metropolitan city areas On Autom...

Страница 42: ...raffic Incident Selects whether to display or hide the traffic notification icon on the map when incidents are on your route Checking traffic information manually Page 63 View Displays the icon on the map Hide Hides the icon from the map Notification icon will not be available when your vehicle deviate from route Second Maneuver Arrow Selects whether to display or hide the second corner ahead of t...

Страница 43: ...g Volume Page 77 Phone Book Displays Phone Book Calling a number in the Phone Book Page 71 Editing the Phone Book data Page 74 Dial Favourite 1 to 5 You can make a call to the phone number reg istered in Dial Favourite Registering a phone number in Dial Favourite Page 73 Whole Route Overview Displays the entire route currently set Checking the entire route overview at the map Page 27 Traffic On Ro...

Страница 44: ...turns previous screen 7 To finish the selection touch OK Viewing the information of a specified location Page 36 Browsing the Map Colour Expla nation You can browse the type of the roads and areas displayed on the map 1 Touch Map in the navigation menu then touch Map Legend 2 Touch the type which you want to see 3 Touch or to switch to the next page or previous page On this screen you can operate ...

Страница 45: ... of the navigation sys tem must be connected correctly You can also change the brightness of the screen between daytime and nighttime by Dimmer Operating the picture adjustment Page 140 Changing the Setting of Naviga tion Interrupting Screen Setting whether or not to switch to the navigation screen from the AV screen automatically when your vehicle approaches a guidance point such as an intersecti...

Страница 46: ...44 Chapter 4 Modifying Map Configurations NAVI MAN HD1BT SOFTW EN book Page 44 Thursday April 20 2006 3 47 PM ...

Страница 47: ...h the distance is not limited within the selected country but in Vicinity Search the distance for the search is limited to within a 16 km 10 mile radius The following three methods are available for searching facilities by POI Searching a POI from a name of the facilities directly Searching for POIs by specifying a category first Searching for POIs by specifying a city name first Searching a POI f...

Страница 48: ...the same store name applies to different locations the number of outlets appears next to the chain s name touch the name of the POI to display a list of those POIs with city name and street name touch to set the POI as your destination Searching for POIs by specify ing a category first 1 Touch Destination in the navigation menu and then touch POI Search 2 Touch the country code key of the desti na...

Страница 49: ... in your sur roundings Use it to find a POI to visit during a journey Searching range is approximately 16 km 10 miles square from the current location 1 Touch Destination in the navigation menu and then touch Vicinity Search The list of POI categories appears 2 Touch the desired category The category already set will have a red tick mark When only a few types of the detailed categories are selecte...

Страница 50: ...sed when Vicinity Search is selected in Short Cut Selection Changing Shortcut Page 41 1 Scroll the map and move the scroll cursor to the place where you want to search for POI 2 Touch The shortcut menu appears 3 Touch See Step 2 of Searching for the facilities around the current position for the following operations Searching for the facilities around the current position Page 47 The distance indi...

Страница 51: ...calcula tion starts 6 Input the house number When the route is not set route calculation starts immediately Checking and modifying the route Page 24 When the route is already set Location con firmation screen is shown To check the location at the map Page 23 Route Calculation to Your Home Location or to Your Favourite Location If your home location is registered the route home can be calculated by...

Страница 52: ...alculation starts immediately Checking and modifying the route Page 24 When the route is already set Location con firmation screen is shown To check the location at the map Page 23 You can also see the destination by touch ing on the right of the list Registering deleting POI Short cuts You can register up to six shortcuts to your favourite POI You can also change or delete the registered shortcut...

Страница 53: ...tegory adds that category to the shortcuts Deleting a POI shortcut 1 Touch Destination in the navigation menu and then touch Vicinity Search 2 Touch Set 3 Touch Delete Displays a list of already registered POI short cuts 4 Touch the category to be deleted A red check appears on the selected shortcut All None A red check will appear or disappear on all registered categories 5 Touch Delete Deletes t...

Страница 54: ...52 Chapter 5 Setting a Route to Your Destination NAVI MAN HD1BT SOFTW EN book Page 52 Thursday April 20 2006 3 47 PM ...

Страница 55: ...tion menu Only one location can be registered default Address Book entry Register here other points you often visit Once locations are registered you can set the route by selecting an item from Address Book The items in Address Book are automatically updated in alphabetic order However Home location and Favorite location always appear at the top if you registered them Registering Your Home and You...

Страница 56: ...er 2 Display the shortcut menu and touch The location is registered and the Edit regis tered information screen appears Editing the entry in Address Book Page 55 3 Touch OK Completes the registration Registering location by Address Book 1 Touch Address Book in the Destination menu 2 Touch Add 3 Select the search method search the loca tion and display the map 4 When the map of the location you wan...

Страница 57: ...ot equal to 0 and current sort is not by distance form current position 7 It is the default sorting order Active if the list item number is not equal to 0 and current sort is not by alphabeti cally 8 Sorts the items in the list in order of the recently used items Active if the List item number is not equal to 0 and current sort is not by last used 9 Add The screen for selecting the method for regi...

Страница 58: ...system and the mobile phone featuring Bluetooth technology is also con nected you can make a phone call to the reg istered phone number 3 by touching Dialling the entry in the Address Book Page 72 When you approach the registered loca tion while travelling When the location with a sound effect and an image are registered comes into approx 300 m 0 19 miles radius from the vehicle position the sound...

Страница 59: ... the pronunciation of your home If nothing is entered in the text box you cannot use that item as the voice com mands Entering or changing a phone number 1 Touch Phone 2 Input a phone number then touch OK The Address Information menu appears To change a registered phone number delete the existing number and then enter a new one Selecting an icon to appear on the map 1 Touch Icon 2 Touch the desire...

Страница 60: ...dify Location The map of the selected area and its sur roundings appears 2 Touch the screen to change its position then touch OK Deleting the entry in Address Book Items registered in the Address Book can be deleted All entries of the data in the Address Book can be deleted at once 1 Touch Destination in the navigation menu then touch Address Book 2 Touch Delete Delete from Address Book screen app...

Страница 61: ...History Items in the Destination History can be deleted All entries of the data in the Destination History can be deleted at once 1 Touch Destination in the navigation menu then touch Destination History 2 Touch Delete Delete from history screen appears 3 Select the location you want to delete A tick mark appears by the selected location On this screen you can select the following items All Select...

Страница 62: ...60 Chapter 6 Registering and Editing Locations NAVI MAN HD1BT SOFTW EN book Page 60 Thursday April 20 2006 3 47 PM ...

Страница 63: ...ng traffic information on a map Suggesting a route to avoid traffic jam by using traffic information The term traffic jam in this section indicates the following types of traffic information slow queuing and stationary traffic and closed blocked roads This information is always taken into consideration when checking your route and the information related with these events cannot be turned off If y...

Страница 64: ... information cannot be displayed on one screen touch or to view the remaining information 4 Touch Back to return to the list with traffic information A list with traffic information appears again Checking traffic information on the route All traffic information on the current route is dis played on screen in a list 1 Touch Info Phone in the navigation menu and then touch Traffic On Route The curre...

Страница 65: ...traffic information manually Touching notification icon on the map screen allows you to check traffic information on your route while icon is displayed Only if there is any traffic information on your route notification icon is displayed on the navigation map screen Notification icon will not be available when your vehicle deviate from route 1 Set Show Traffic Incident to View Show Traffic Inciden...

Страница 66: ... all traffic information 4 Touch OK The selected traffic information icon is added to the screen The following types of traffic incidents can not be deselected and are always dis played and taken into consideration slow queuing and stationary traffic and closed blocked roads 5 Touch Back Selecting preferred RDS TMC service provider manually A default preferred TMC service provider for each country...

Страница 67: ...name or frequency will be shown instead If available providers cannot be displayed on one screen touch or to view the remaining providers When the tuning has failed select another service provider or try again after moving to another location MAN HD1BT SOFTW EN book Page 65 Thursday April 20 2006 3 47 PM ...

Страница 68: ...66 Chapter 7 Using Traffic Information NAVI MAN HD1BT SOFTW EN book Page 66 Thursday April 20 2006 3 47 PM ...

Страница 69: ... auto matically attempts to reconnect the mobile phone previously connected Even when the connection is cut for some reason the system automatically reconnects the specified mobile phone except for the case where the connec tion is cut by the mobile phone operation You can open Phone Menu directly by pressing and holding the MENU button You can check the signal strength for connec tion between you...

Страница 70: ...69 The default device name displayed on the mobile phone is PIONEER NAVI The default password is 1111 Operating from the navigation system 1 Activate the Bluetooth wireless technol ogy on your mobile phone For some mobile phone no specific action is necessary in activation for Bluetooth wireless technology For details refer to the instruction manual of your mobile phone 2 Touch Info Phone in the n...

Страница 71: ...ore mobile phones are registered and you want to manually select the mobile phone to be used You want to reconnect a disconnected mobile phone Connection cannot be established automati cally for some reason Unregistered mobile phones cannot be con nected 1 Activate the Bluetooth wireless technology on your mobile phone For some mobile phone no specific action is necessary in activation for Bluetoo...

Страница 72: ...your mobile phone featuring Bluetooth wireless tech nology is connected You can receive a hands free call only when the mobile phone is con nected Answering an incoming call The system informs you that it is receiving a call by displaying a message and producing a ring sound once 1 When there is an incoming call touch When there is an incoming call you can reject the call by touching During a call...

Страница 73: ...ill be deleted from the oldest one You can clear the dialled number or received call history Clearing the dialled number or received call history Page 75 Calling a number in the Phone Book After finding the list in the Phone Book you want to call you can select the number and make the call Before using this function you need to trans fer the phone book stored in your mobile phone to the navigation...

Страница 74: ...all To cancel the call after the system starts dial ling touch 4 To end the call touch at the top right of the screen Dialling a facility s phone number You can make a call to facilities with phone number data 1 Perform POI Search or Vicinity Search and display the detail information Operation of POI Search Page 45 Operation of Vicinity Search Page 47 2 Touch of the entry you want to call The deta...

Страница 75: ...ing screen appears Yes Deletes all phone numbers stored in the phone book and then transfers the data No Stay the current entries and then adds new data to the phone book Duplicate data can not be consolidated If you want to keep the existing phone book select No 4 Check that the following screen is dis played and operate your mobile phone to transfer the phone book entries The phone book entries ...

Страница 76: ...book Customising the incoming call picture for a phone book entry You can customise a picture for the phone book record Some pictures are already stored in the hard disk drive and you can also import JPEG for mat pictures such as a picture on your digital camera by using CD R RW If you burn the pic tures into a CD R RW by your PC and insert that to the navigation system you can use them Here a met...

Страница 77: ...ete 4 Touch Yes All history data is deleted and the current location screen appears To cancel the deletion touch No Notes for hands free phoning General notes Connection to all mobile phones featuring Bluetooth wireless technology is not guaran teed The line of sight distance between this naviga tion system and your mobile phone must be 10 meters or less when sending and receiving voice and data v...

Страница 78: ...igation system You cannot make a call to the entry of an unknown user no phone number in the received call history If calls are made by operating your mobile phone no history data will be recorded in the navigation system About phone book transfer With some mobile phones it may not be possi ble to transfer all items in the phone book at one time In this case transfer item one by one from your mobi...

Страница 79: ...te the following items Guidance This setting controls the guidance volume of navigation When you set this to a guidance is out put When you set this to no guidance is output Beep This setting controls the beep tone volume of navigation Phone Ringtone This setting controls the incoming ring tone volume Phone Voice This setting controls the incoming voice vol ume The Phone Ringtone and Phone Voice a...

Страница 80: ...ime and the current location of your vehicle is shown If necessary adjust the time difference Touching or changes the time difference display in one hour incre ments The time difference can be set from 3 to 3 hours 4 If necessary set to summer time Summer time is off by default Touch Summer Time to change the time if you are in the summer time period This turns the dis play below summer time On 5 ...

Страница 81: ...ng status of the 3D sensor and cable connection status etc can be checked Checking the connections of leads and installation positions Check that leads are properly connected between the navigation system and the vehicle Please also check whether they are connected in the correct positions 1 Touch Settings in the navigation menu then touch Hardware 2 Touch Connection Status The Connection Status s...

Страница 82: ...depending on the vehicle Checking sensor learning status and driving status 1 Touch Settings in the navigation menu then touch Hardware 2 Touch 3D Calibration Status The 3D Calibration Status screen appears 1 Distance Driving distance is indicated 2 Speed Pulse Total number of speed pulses is indicated 3 Learning Status Current driving mode is indicated 4 Degree of learning Sensor learning situati...

Страница 83: ...ystem Correcting the installation angle improves the accuracy of sensor learning even if the unit is not facing centre Select the orienta tion of the LCD panel from the left centre and right 1 Touch Settings in the navigation menu then touch Hardware 2 Touch Installation Angle Setup 3 Check the direction the LCD panel faces and touch the corresponding item Left Select this when the angle is 5 or m...

Страница 84: ...e Background Pic ture In the menu operation screen you can customise a picture for the background Some pictures are already stored in the hard disk drive and you can also import JPEG format pictures such as a pic ture on your digital camera by using CD R RW If you burn the pictures into a CD R RW by your PC and insert that to the navigation system you can use them as background pictures The follow...

Страница 85: ...e Audio data part CD DA part for importing pictures When storing pictures on a CD R RW cre ate a folder named Pictures in the CD R RW and store the picture files in this folder Up to 200 picture files can be used in total including pictures are already stored in the hard disk drive and pictures in the CD R RW When you burn a CD R RW limit the number of folder hierarchy levels to eight You can only...

Страница 86: ...just the current position and direction of the vehicle displayed on the map 1 Touch Settings in the navigation menu then touch Modify Current Location 2 Scroll the position where you want to set then touch OK 3 Touch the arrow key on the screen to set the direction then touch OK Restoring the Default Setting Reset various settings registered to the naviga tion system and restores to the default or...

Страница 87: ...gain Selecting a source 1 Press the AV button to switch Audio oper ation screen 2 Touch the source icon to select the desired source You can also press the AV button to switch the source Press the AV button repeatedly to switch between the following sources CD ROM MP3 DVD built in DVD drive LIBRARY Music library FM FM tuner AM AM tuner iPod iPod M CD multi CD TV television AV INPUT video input AUX...

Страница 88: ... ACC OFF If the Auto ANT mode is set to Power the vehicle s aerial can be stowed only when the ACC is set to OFF Auto ANT Page 138 About Steering Remote Control If you operate using the CD SR1 Steering Remote Control sold separately the follow ing buttons can be used for operation PHONE MENU button Switches to Phone menu when Bluetooth unit is connected VR ACTIVATION OFF HOOK button Press to accep...

Страница 89: ...ion about the source being played 4 AV Settings key Displays the AV Settings menu 5 Hide key Touch Hide to hide the touch panel keys and detailed information If you touch the screen they are displayed again 6 Audio Settings tab Switches the setting items to those for Audio Settings 7 System Settings tab Switches the setting items to those for System Settings 8 Setting Items Customising the Audio S...

Страница 90: ...uration 1 Source icon Shows which source has been selected 2 Disc title indicator Shows the disc title currently playing when available 3 Playback method indicator Shows which playback method has been selected 4 Track indicator Shows the track number currently playing 5 Track title indicator Shows the track title currently playing when available 6 Artist name indicator Shows the artist name curren...

Страница 91: ... skips to the start of the next track Touching 7 once skips to the start of the cur rent track Touching again will skip to the previ ous track Touch and hold Fast rewind or forward Keep touching 7 or 9 to perform fast rewind or forward You can also perform these operations by using the TRK 4 6 button Fast rewind is cancelled when it reaches the beginning of the first track on the disc 4 Using to s...

Страница 92: ... title will be shown instead of the file name 5 Artist name indicator Shows the artist name currently playing only when ID3 tag has been encoded on the MP3 file 6 Play time indicator Shows the elapsed playing time of the current track 7 Folder and track list Shows contents of the folder currently playing or temporarily displayed 8 Bit rate Shows bit rate of the file currently playing Touch key ope...

Страница 93: ... of changes the settings as fol lows Track Repeat Repeat just the current track Folder Repeat Repeat the folder currently playing If you select another track or perform fast for ward rewind during Track Repeat the repeat play is cancelled If you select another folder or perform fast for ward rewind during Folder Repeat the repeat play is cancelled You can perform track search within that folder wi...

Страница 94: ...176 Playing MP3 file on the DVD R RW is not supported Operating the DVD For safety reasons Video image cannot be viewed while your vehicle is in motion To view Video image you must stop in a safe place and put on the handbrake before setting your route see page 14 Interlock for details You can play a DVD Video using the built in DVD drive of the navigation system This section describes operations ...

Страница 95: ...nds the icon 1 or 3 changes into or When this happens fast rewind fast forward continues even if you release 7 or 9 To resume playback at a desired point touch You can also perform these operations by using the TRK 4 6 button 3 Using to stop playback 4 Displaying the DVD menu You can display the menu by touching Menu or Top Menu while a disc is playing Touching either of these keys again lets you ...

Страница 96: ...es where to return to the DVD returns to the specified point and begins play back from that point 14 Switching previous page of touch keys 15 Selecting the DVD menu item 16 Using to decide the item When you select a certain video item play back starts from the selected item When you select the item with submenu next menu screen will appear The way to display the menu differs depending on the disc ...

Страница 97: ...een configuration 1 Source icon Shows which source has been selected 2 Band indicator Shows which band the radio is tuned to FM1 to FM3 3 PTY indicator Shows the programme type of current station when available 4 TRFC indicator Shows the status of traffic announcement 5 NEWS indicator Shows the status of news programme 6 TEXT indicator Shows when the radio text is received 7 STEREO indicator Shows...

Страница 98: ...ion is convenient to prepare differ ent preset list for each band 3 Touch Perform manual tuning To perform manual tuning touch or briefly The frequencies move up or down step by step Touch and hold Perform seek tuning To perform seek tuning keep touching or for about one second and release The tuner will scan the channels until a broadcast strong enough for good reception is found You can cancel s...

Страница 99: ...can display radio text data transmitted by RDS stations such as station information the name of the currently broadcast song and the name of the artist The tuner automatically memorises the three latest radio text broadcasts received replac ing text from the least recent reception with new text when it is received Displaying radio text You can display the currently received radio text and the thre...

Страница 100: ... will standby for traffic announcements If you turned TA function on while tuned in to neither a TP nor another enhanced network s TP station the indicator lights To turn traffic announcements standby off press the TA NEWS button again You can also turn on or off TA function by touching TA on the screen 3 Use the VOL 2 8 button to adjust the TA volume when a traffic announcement begins The newly s...

Страница 101: ...rs on the display if the RDS data for the station received differs from that for the originally stored station Sound may be temporarily interrupted by another programme during an AF fre quency search AF can be turned on or off independently for each FM band Using PI Seek If the navigation system fails to find a suitable alternative frequency or if you are listening to a broadcast and the reception...

Страница 102: ... switches the status between on and off Regional programming and regional net works are organised differently depending on the country i e they may change according to the time country or broad cast area The preset number may disappear on the display if the tuner tunes in a regional sta tion which differs from the originally set station The regional function can be turned on or off independently f...

Страница 103: ...OUNTRY Country music NAT MUS National music OLDIES Oldies music golden oldies FOLK MUS Folk music CLASSICS L CLASS Light classical music CLASSIC Serious classical music OTHERS EDUCATE Educational programmes DRAMA All radio plays and serials CULTURE National or regional culture SCIENCE Nature science and technology VARIED Light entertainment CHILDREN Children s SOCIAL Social affairs RELIGION Religi...

Страница 104: ...ll the preset frequency To register the frequency currently being received to the preset list touch and hold the preset list Touch and hold Storing broadcast stations You can register the frequency currently being received to the preset list You can easily store up to six broadcast frequencies for later recall with the touch of a key Touch to recall the preset frequency Up to 6 stations can be sto...

Страница 105: ... frequen cies will be stored under preset tuning keys P1 P6 in order of their signal strength To cancel the storage process touch Cancel Storing broadcast frequencies with BSM may replace broadcast frequencies you have saved using P1 P6 Tuning in strong signals Local seek tuning lets you tune in only those radio stations with sufficiently strong signals for good reception 1 Touch Local 2 Touch On ...

Страница 106: ...104 Chapter 10 Using the AV Source Built in DVD Drive and Radio AV MAN HD1BT SOFTW EN book Page 104 Thursday April 20 2006 3 47 PM ...

Страница 107: ...4 Source icon Shows which source has been selected 5 Track indicator Shows the track number and track title currently playing 6 Artist name indicator Shows the artist name currently playing 7 Play time indicator Shows the elapsed playing time of the current track 8 Track list Shows tracks of the CD 9 Record status of tracks Recorded track Red Track being recorded Blue Track is not recorded yet Tra...

Страница 108: ...ns to the normal playback screen of the CD in the blank between current track and next track If the CD is scratched or damaged no data can be recorded on that part In such a case the track that falls on that part may be skipped Recording a CD manually You can record only your favourite tracks in the CD 1 REC Mode is set to Manual Switching the recording mode Page 138 The REC Mode cannot be changed...

Страница 109: ...pying and you are advised to check care fully what is lawful copying in the country in which you are making a copy Copying of copy right material such as films or music is unlawful unless permitted by a legal exception or con sented to by the right owners About writing data to the hard disk drive at low temperature Writing to the hard disk drive such as recording music to the music library may be ...

Страница 110: ...ntent delivery For more infor mation visit www gracenote com If no title information exists in the Gracenote Database on the built in hard disk drive the date when the track was recorded is entered automatically If you want to display the title information enter the title manually after recording has finished Changing the title of the playlist or track Page 113 Relationship of groups playlists and...

Страница 111: ... edit the track information Editing a playlist or tracks Page 112 7 Touch and hold Register the track in My Mix Registering a track to My Mix playlist in one action Page 111 8 Repeat play Each touch of changes the repeat range as follows Track Repeat Repeat just the current track Playlist Repeat Repeat just the current playlist No display Repeat the currently selected group Repeat play may stop if...

Страница 112: ...ected playlist is played back Searching the playlist by artist Select the playlist formed according to artists and play it back 1 Touch Search The group selection screen appears 2 Touch Artists Artist playlist appears 3 Touch the artist name Artist playlist you want to play back The first track in the selected playlist is played back Search a playlist by genre Select the playlist formed according ...

Страница 113: ... to My Favorite 4 or My Mix in which you want to register the track 4 Touch Yes The track is registered in the selected My Favourite playlist Registering multiple tracks at a time 1 Play back the playlist that contains the tracks you want to register 2 Touch to display the list of playl ists 3 Touch then touch Add to My Favorites The item displayed in blue is the selected play list 4 Touch the pla...

Страница 114: ...The item displayed in blue is the selected play list 6 Touch The system enters the playlist edit mode To return to the previous screen touch Back Operating the playlist edit mode Album playlist All editing operations are possible The edited contents will be reflected to all groups in the hard disk drive My Mix playlist My Favorite playlist Only 4 6 and 8 can be performed 1 Entering a desired playl...

Страница 115: ...list name or track name Page 114 3 Entering a desired artist name Renaming an artist name in the playlist or track Page 114 4 Changing genre Changing the genre of a track Page 116 5 Changing the order to play back tracks Sorting the tracks in My Mix My Favorite playlist Page 115 6 Deleting the current track Deleting the current track Page 116 7 Updating track title information Assigning another ca...

Страница 116: ...age will not be recognised 1 Enter the playlist edit mode or track edit mode Switching to the edit mode Page 112 2 Touch 3 Enter a new character string and then touch OK The system pronounces the character once and the pronunciation confirmation message appears Touch Yes to fix the change No Returns to the detailed information screen Repeat You can listen to the pronunciation again If the pronunci...

Страница 117: ...playlist can be changed 1 Enter the track edit mode Switching to the edit mode Page 112 2 Touch Sort Tracklists 3 Touch the track that you want to change 4 Touch or to determine the destination 5 Touch the selected track again The destination is fixed 6 Repeat Step 3 to Step 5 to change the playback order of other tracks 7 Touch ESC The new order is fixed and the system returns to the normal playb...

Страница 118: ...on If you delete the tracks in My Mix playlist or My Favorite playlist they are only deleted from the playlist and not from the hard disk drive 1 Enter the track edit mode Switching to the edit mode Page 112 2 Touch Delete This Track 3 Touch Yes Changing the genre of a track 1 Enter the track edit mode Switching to the edit mode Page 112 2 Touch Genres 3 Select the desired genre from the list The ...

Страница 119: ...the candidates screen appears 3 Select the desired album title from the list The title information is updated to the one you selected The disc updates the Gracenote Data base for the Gracenote Music recognition service on your navigation system will be available in the future MAN HD1BT SOFTW EN book Page 117 Thursday April 20 2006 3 47 PM ...

Страница 120: ...118 Chapter 11 Using the AV Source Music Library AV MAN HD1BT SOFTW EN book Page 118 Thursday April 20 2006 3 47 PM ...

Страница 121: ...Shows the disc currently playing 3 Disc title indicator Shows the disc title currently playing 4 Repeat range indicator Shows which repeat range has been selected 5 Track number indicator Shows the track currently playing 6 Track title indicator Shows the track title currently playing 7 Play time indicator Shows the elapsed playing time of the current track 8 Disc number display Shows the disc num...

Страница 122: ...he repeat play range setting will be cancelled If you perform track search or fast forward rewind during Track Repeat the repeat play range changes to Disc Repeat 7 Playing tracks in random order Tracks will play in a random order within the pre viously selected repeat ranges If you perform random play during Track Repeat the repeat play range changes to Disc Repeat 8 Scanning play The first 10 se...

Страница 123: ...songs of albums 5 Album title indicator Shows the album title of the song 6 Artist name indicator Shows the artist name of the current song 7 Play time indicator Shows the elapsed playing time of the current song 8 Song title indicator Shows the title of the current song 9 Playing Song Information Shows the information and status of the current song 10 Song title Artist name and Album title indica...

Страница 124: ...s allows you to search and play songs as you would with an iPod 1 Touch Search If you do nothing about 30 seconds after the Step 1 to the Step 4 is done actual screen returns to the previous screen 2 Touch one of the categories in which you want to search for a song Playlists playlists Artists artists Albums albums Songs songs Genres genres The search screen is displayed The icon on the left indic...

Страница 125: ...which preset has been selected 4 Channel indicator Shows which channel the TV tuner is tuned 5 Preset list display Shows the preset list Touch key operation 1 Touch the source icon and then touch TV to select the TV tuner When the source icon is not displayed you can display it by touching the screen Touch keys 1 Selecting channels from the list The list lets you see the list of channels and selec...

Страница 126: ...hen the touch panel keys are not displayed you can display them by touching the screen Up to 24 stations 12 for each of two TV bands can be stored in memory You can also press the P LIST 8 2 but ton to recall stations assigned to preset tuning keys P1 P12 Storing the strongest broadcast stations sequentially 1 Touch and hold BSSM BSSM starts The 12 strongest broadcast sta tions will be stored unde...

Страница 127: ...vigation system When two exter nal units are connected the navigation system allocates them to external unit 1 or external unit 2 For details concerning operation refer to the external unit s operation manual This section provides information on external unit operations with navigation system that differ from those described in the external unit s operation man ual Operation varies depending on th...

Страница 128: ...depending on the exter nal unit connected In some cases some functions may not be used until you touch and hold the key Operate the external unit by using Function 1 Function 4 The external unit can be operated by transmitting the operating commands set to Function 1 Function 4 The operating commands set to Function 1 Function 4 vary depending on the external unit 1 Touch Function 2 Touch Function...

Страница 129: ...r navigation system to auxiliary equipment featuring RCA output For more details refer to the IP BUS RCA Interconnector owner s manual Selecting AUX as the source 1 AUX Input is set to On Switching the auxiliary setting Page 137 2 Touch the source icon and touch AUX For details refer to Selecting a source Page 85 MAN HD1BT SOFTW EN book Page 127 Thursday April 20 2006 3 47 PM ...

Страница 130: ...128 Chapter 13 Using the AV Source AV EXT AUX AV MAN HD1BT SOFTW EN book Page 128 Thursday April 20 2006 3 47 PM ...

Страница 131: ...n System Settings menu is Full the Non Fading will be displayed instead of Sub Woofer Setting the rear output and subwoofer con troller Page 138 When selecting the FM tuner as the source you cannot select Source Level How to operate the Audio Set tings screen 1 Press the AV button The Navigation screen changes to the Audio source screen of any source 2 Touch AV Settings The AV Settings screen appe...

Страница 132: ...d FM EXT 1 and EXT 2 AUX and AV INPUT You can adjust the centre frequency level and the Q curve characteristics of each band Low Mid High Band You can select the band you want to adjust Frequency You can select which frequency to be set as the centre frequency Level You can adjust the decibel dB level of the selected band Q You can select the details of the curve char acteristics The following fig...

Страница 133: ...ired stage setting The Living Room setting that empha sizes midrange sound hardly has any effect near the maximum volume level When you set staging other than Off the high pass filter HPF setting turns Off Using the high pass filter Page 132 Adjusting a position effect You can select a listener position that you want to make as the centre of sound effects 1 Touch Staging in the Audio Settings menu...

Страница 134: ...reased or decreased Using non fading output When the non fading output setting is on the audio signal does not pass through navigation system s low pass filter for the subwoofer but is output through the RCA output 1 Touch Non Fading in the Audio Settings menu Only when Preout the subwoofer controller setting in System Settings menu is Full you can select Non Fading Setting the rear output and sub...

Страница 135: ...ouch or to adjust the source vol ume 8 to 8 is displayed as the source volume is increased or decreased Sources are set to same source level adjust ment volume automatically CD and ROM MP3 EXT 1 and EXT 2 AUX and AV INPUT Customising the System Set tings Items System Settings lets you perform system set up of different settings for navigation system How to view and operate the System Settings 1 Pr...

Страница 136: ...ging the subtitle language during playback Multi subtitle Page 94 Changing audio language during play back Multi audio Page 94 Setting assist subtitles on or off Assist subtitles offer explanations for the aurally impaired However they are only displayed if they are recorded on the DVD You can turn assist subtitles on or off as desired 1 Touch DVD V Setup in the System Set tings menu 2 Touch Assis...

Страница 137: ...We recommend to keep a record of your code number in case you forget it The parental lock level is recorded on the disc You can confirm it by looking at the disc package included literature or on the disc itself With discs that do not feature a recorded parental lock level you cannot use parental lock With some discs parental lock operates to skip certain scenes only after which nor mal playback r...

Страница 138: ...View can be displayed at all times e g when monitoring an attached trailer etc as a split screen where map information is partially displayed Please be aware that in this setting camera image is not resized to fit but that a por tion of what is seen by the camera is not viewa ble Pioneer recommends the use of a camera which outputs mirror reversed images otherwise screen image may appear reversed ...

Страница 139: ...ted or attenu ated by the following condition When you use a mobile phone via Bluetooth technology dialling talking incoming call When the voice recognition mode is acti vated Off The Volume does not change Operation returns to normal when the cor respond action is ended Even when navigation voice guidance itself cannot be attenuated or muted If you want to mute the navigation guidance voice tempo...

Страница 140: ...e clock is overlaid on the Video image Audio SCRN The clock is not overlaid on the Video image Setting the CD recording mode You can set whether to start recording tracks automatically when you play a CD or to manually trigger recording 1 Touch REC Mode in the System Set tings menu Each touch of REC Mode changes the set tings as follows Auto Records the tracks automatically when a CD is played Man...

Страница 141: ... Step can be set only when the source is OFF 1 Touch FM Step in the System Settings menu Each time you touch FM Step will switch the FM tuning step between 50 kHz and 100 kHz while AF or TA is on The tuning step remains at 50 kHz during manual tuning Selecting the TV signal This setting is required when a Pioneer TV tuner is connected using the AV BUS This setting is not necessary otherwise If the...

Страница 142: ...is set in the built in DVD drive nothing is output When AV is selected the following restric tions are applied to Rear display The Video image and sound are output only when the AV INPUT has them The Video image and sound are output only when the appropriate setting on AV Input is Video Operating the picture adjust ment For safety reasons these functions are not available while your vehicle is in ...

Страница 143: ...ch or to adjust the desired item Each time you touch or increases or decreases the level of desired item 3 Touch ESC to return to the previous screen Switching the Backlight On Off By turning off the backlight of the LCD screen you can turn off the screen display without turn ing off the voice guidance 1 Press and hold the V button The backlight turns off and the screen turns off Press the V butto...

Страница 144: ...Aymara ay 0125 Kannada kn 1114 Sesotho st 1920 Azerbaijani az 0126 Kashmiri ks 1119 Sundanese su 1921 Bashkir ba 0201 Kurdish ku 1121 Swahili sw 1923 Belorussian be 0205 Kirghiz ky 1125 Tamil ta 2001 Bulgarian bg 0207 Latin la 1201 Telugu te 2005 Bihari bh 0208 Lingala ln 1214 Tajik tg 2007 Bislama bi 0209 Laotian lo 1215 Thai th 2008 Bengali Bangla bn 0214 Lithusnian lt 1220 Tigrinya ti 2009 Tibe...

Страница 145: ...ation are as follows The voice operation may not enable for a minute after the navigation system has booted up If you operate using the CD SR1 Steering Remote Control sold separately the follow ing buttons can be used for operation VR ACTIVATION OFF HOOK button Same function as VOICE icon VR CANCEL ON HOOK button Return to previous screen Depending on the selected languages the interface for voice...

Страница 146: ...e When voice command is possible When voice command is not accepted When you say Voice Help the navigation system pronounces the displayed words that can be vocalised If no voice icon is displayed check to see whether the microphone is properly con nected and turn the power on again If there are multiple pages voice help menu can be switched by using or on the screen You can also switch the page b...

Страница 147: ...his case the default voice command will not function To use the default voice command change or delete the registered voice com mand that is identical to the default voice command An Example of Voice Operation Search for POI in vicinity In this example you want to search for the near est petrol station and set as your destination Give the following verbal commands after switching to the navigation...

Страница 148: ...system pro nounces that message With the location shown on the map set as the destination or waypoint the route calcula tion starts If you say Back return the previous screen Search for the playlist In this example you want to search for the playl ist and play that 1 Touch VOICE icon when the audio source is LIBRARY 2 Say Music Search 3 Say desired group If desired group is already selected you ca...

Страница 149: ...ates have been found the candidate list appears Select the one from the list and pro ceed to next step The voice operation related the telephone is available only when the condition under the hands free phoning feature of this system can be operated and unavailable during a call Using Hands free Phoning Page 67 Voice commands related to navigation Give the following verbal commands after switching...

Страница 150: ...iles Map screen will be changed to selected scale Notes These commands are available only when km mile setting is mile This function is not available in vehicle dynamics mode Map Operation Change Scale XXXX mile yards Scale 25yards 50yards 100yards 0 25miles 0 5miles 0 75miles 1mile 2 5miles 5miles 10miles 25miles 50miles 100miles 250miles Map screen will be changed to selected scale Notes These c...

Страница 151: ...data touch VOICE icon to call the registered location Call Redial Touch VOICE icon to redial Call Call Phone Number Say the number you want to call Touch VOICE icon to dial Note 1 Call Received Call Displaying the received call list Call Call Favorite 1 2 3 4 5 Touch VOICE icon to dial Erase the tracking Other Operation Erase Tracks Touch VOICE icon to delete the tracking Turning on or off the Ove...

Страница 152: ...e disc for playback Operation for FM AV Operation Preset 1 to 6 Switching to that preset station directly AV Operation Change Band Switching the band Operation for AM AV Operation Preset 1 to 6 Switching to that preset station directly Operation for TV AV Operation Preset 1 to 12 Switching to that preset station directly AV Operation Change Band Switching the band Operation for CD AV Operation Cha...

Страница 153: ...e is no route the system starts the route calculation Set as Waypoint Touch VOICE icon to start route calculation Display Map Displaying the map of surroundings on that location Location screen B The following commands can be vocalised Set As Destination Same as above Set as Waypoint Same as above Display Map Same as above Next Seeing the next POI Previous Seeing the previous POI MAN HD1BT SOFTW E...

Страница 154: ... Home Registered Home As Waypoint Call Home Phone Home Dial Home Display Home Show Home Display Destination Destination Map Show Destination Map Operation Map Map Option Zoom Out Out Higher Zoom In In Lower Change Scale Scale Zoom 25 metres Scale 25metres 50 metres Scale 50metres 100 metres Scale 100metres 200 metres Scale 200metres 500 metres Scale 500metres 1 kilometre Scale 1kilometre 2 kilomet...

Страница 155: ...void Interstate Avoid Ferry Avoid Ferries Skip Ferries Avoid Toll Road Avoid Tolls Avoid Pay Cancel Route Delete Route Cancel Guidance Route Profile Profile Cancel Waypoint Delete Waypoint Take Away Waypoint Next Guidance Following Guidance Guidance After This Traffic Information Traffic View Traffic Info Traffic On Route List On Route List Route List Call Dial Ring Call Registered Point Call Addr...

Страница 156: ...e NAVI AV Other voice commands for AV operation Preferential voice command Other voice command AV Input Video Input MCD CD Changer Rock Pop Rock Pop Hip Hop Rap Hip Hop Rap Soul Urban Soul Urban MAN HD1BT SOFTW EN book Page 154 Thursday April 20 2006 3 47 PM ...

Страница 157: ...TERMARCHE IP JET LECLERC LOTOS MAXOL METANO MIGROL MOL MORRISONS MORRISONS SAFEWAY MURCO NESTE OCTA OK OKQ8 OMV ORLEN PAP OIL PETRONOR PNN PREEM Q8 RAIFFEISEN Petrol Station REPSOL SAINSBURY SB SHELL SLOVNAFT ST1 STAR STATOIL SUPER U TAMOIL TEBOIL TESCO TEXACO TOTAL UNO X WESTFALEN Petrol Station Others Category name Hotel AC B B HOTELS BALLADINS BASTION HOTELS BEST WESTERN CAMPANILE CARLTON CENTE...

Страница 158: ...fts Novelties and Souvenirs Jewellery Clocks and Watches Opticians Garden Centres and Stores Florists Office Equipment and Statio nery Toys and Games Shopping Others Category name Cash Dispenser Bank AARGAUISCHE KANTONAL BANK ABN AMRO BALOISE BANK SOBA BANQUE CANTONALE DE FRI BOURG BANQUE CANTONALE DE GENEVE BANQUE CANTONALE DU VALAIS BANQUE CANTONALE NEU CHATELOISE BANQUE CANTONALE VAU DOISE BANQ...

Страница 159: ...ent Office City Centre Category name Trans port Airport Train Station Ferry Terminal Border Crossing Airport Terminal Category name Car Dealer ALFA ROMEO ASTON MARTIN AUDI BENTLEY BMW BOSCH CADILLAC CHEVROLET CHRYSLER CITROEN DAEWOO DAF DAIHATSU EUROMOBIL FERRARI FIAT FORD HONDA HYUNDAI HYUNDAI TRUCKS IVECO JAGUAR JEEP KIA LADA LAMBORGHINI LANCIA LAND ROVER LEXUS LINCOLN LOTUS MACK MAN MASERATI MA...

Страница 160: ...ir VSCI Repair Vehicle Repair Facility Others Category name Automo tive Body Shops Car Glass Replacement General Car Repair and Servic ing Sales and Installation of Car Accessories Tyre Service Category name Rental Car Agency ADA ALAMO AVIS BUDGET CAR GO EUROMOBIL Rental EUROPCAR HERTZ HYRBILEN ITALY BY CAR KAV AUTOVERHUUR KENNING MABI HYRBILAR MAGGIORE NATIONAL NATIONAL CAR RENTAL NATIONAL CITER ...

Страница 161: ...clears almost all settings of the audio function The system becomes the same state when the battery of the vehicle is removed or the yellow lead of the navigation system is disconnected Method 2 Restore Factory Settings Clears some items in the Map menu and in the Settings menu Restoring the Default Setting Page 84 Method 3 Reset on start up Clears the setting values stored in the hard disk drive ...

Страница 162: ...Vehicle position information Route conditions Destination menu Auto full in function for cities and streets Point registered in Address Book Sorting order selected in Address Book Information menu Sorting order selected in Traffic List Traffic On Route Traffic Settings TMC Provider Selection Phone Settings Phone Menu Telephone Book Dial Favourite Dialed Numbers Received Calls Phone Menu Map menu S...

Страница 163: ...factory settings initialise the naviga tion system in the following order 1 Turn the ignition switch off 2 Press the RESET button 3 Start the engine After a little time the start up screen comes on for a few seconds 4 Touch and hold the MAP button while the start up screen is displayed The Clear memory screen appears 5 Touch Clear user information from hard disk This reset operation clears all mus...

Страница 164: ... in which you make fine adjustments on the entire screen Make sure to use the supplied stylus for adjustment and gently touch the screen If you press the touch panel forcefully the touch panel may be damaged Do not use a sharp pointed tool such as a ballpoint pen or a mechanical pen Otherwise the screen is damaged Stylus supplied with navigation system 1 Press the V button The Picture Adjust scree...

Страница 165: ...t of 68 900 000 feet 21 000 km continually broadcasts radio sig nals giving time and position information This ensures that signals from at least three can be picked up from any open area on the earth s sur face The accuracy of the GPS information depends on how good the reception is When the signals are strong and reception is good GPS can determine latitude longitude and altitude for accurate po...

Страница 166: ...ith the data of the 3D Hybrid Sensor and used to correct it for improved accuracy To ensure maximum accuracy the dead reckon ing system learns with experience By comparing the position it estimates with your actual position as obtained using GPS it can correct for various types of error such as tyre wear and the rolling motion of your vehicle As you drive the dead reckoning system gradually gather...

Страница 167: ... not possible If GPS positioning has been operat ing for only a short time your vehicle s actual position and the current location mark on the map may diverge considerably Once GPS reception is restored accuracy will be recov ered Vehicles that Cannot Obtain Speed Pulse Data The speed pulse data comes from the speed sensing circuit The location of this speed sensing circuit depends on your vehicle...

Страница 168: ... drive in zig zags If the road has connected hairpin bends If there is a loop or similar road configuration If you take a ferry If you are driving on a long straight road or a gently curving road If you are on a steep mountain road with many height changes If you enter or exit a multi storey car park or similar using a spiral ramp MAN HD1BT SOFTW EN book Page 166 Thursday April 20 2006 3 47 PM ...

Страница 169: ... start and stop manner as in a traffic jam If you join the road after driving around a large car park When you go round a roundabout When starting driving immediately after start ing the engine If you turn your navigation system on while driving Some types of vehicles may not output a speed signal while driving at just a few kilometres per hour In such a case the current location of your vehicle m...

Страница 170: ...on The navigation does not boot up The power cable is not wired cor rectly Turn the system off and the check the wiring The hard disk drive cannot run because the temperature is too low Wait until the inside of the vehicle warms up The hard disk drive is defective Consult your authorised Pioneer dealer You cannot position your vehicle on the map or the positioning error is large The quality of sig...

Страница 171: ...he orange white lead is not con nected Check the connection The display is very dim The vehicle s light is turned ON and Automatic is selected on Day Night Display Read about the Day Night Dis play setting Page 43 and if desired select Day The vehicle cabin temperature is extremely low A Liquid Crystal Display LCD is used and such displays tend to darken when cold Wait for the vehi cle to warm up ...

Страница 172: ...ing and care of the disc on the Hardware Manual The CD format cannot be played back Replace disc Refer to Handing and care of the disc on the Hardware Manual The loaded disc is a type this system cannot play Check what type the disc is Hard ware Manual No picture The handbrake lead is not connected or applied Connect a handbrake lead correctly and apply the handbrake Handbrake interlock is activat...

Страница 173: ...the source manually No sounds are heard The volume level will not rise Cables are not connected correctly Connect the cables correctly The system is performing still slow motion or frame by frame playback with DVD video There is no sound during still slow motion or frame by frame playback with DVD video The system is performing still fast rewind or forward during the MP3 disc playback In the case ...

Страница 174: ...de without con necting the speed signal input the precision of the positioning will be less accurate Vibration detected Please power off the system and check the installa tion Then please re boot the system and press OK The navigation unit is installed in a place where it may be affected by a large vibration Re install the navigation unit in a place where the unit will not be affected by vibration...

Страница 175: ...e destination waypoint s or start ing point are in an area where no road exists e g a mountain and the route calculation is impossible Set a destination and waypoint s on roads Reset the destination after you drive the vehicle to any road Route to destination cannot be cal culated The destination or waypoint s are in an isolated island etc without a ferry and the route calculation is impossi ble I...

Страница 176: ... s Bluetooth wireless technology on The mobile phone is pared con nected with another device Cancel the paring connection and retry Rejection by the mobile phone has received Operate target phone and accept the connection request from the naviga tion system Furthermore check the setting related connection on your mobile phone The target mobile phone can not be found Check whether your mobile phone...

Страница 177: ...ailure the con nection Wait for a while and retry Reading failed If you transferred the data from your mobile phone by a format can not be received with navigation sys tem Disconnection has been made dur ing transfer for some reason Select just a suitable item format and then retry Connect your mobile phone again and retry Calibration failed Please refer to the owner s manual The touch panel calib...

Страница 178: ...nterlock is activated Park your vehicle in the safe place and apply the handbrake Handbrake interlock Page 14 Search error If the title number chapter number time 10 key command which you enter in 10Key Search are not exist This message will appear when DVD drive can not accept that command Enter the available numbers or 10 key command or use another search method Message When What to do This CD c...

Страница 179: ... disk drive Delete some tracks or playlist and try again if you want to record that CD Unable to select appropriate Track info due to multiple entries in the database Some corresponded data is found in Gracenote Database the system can not select one to append a title Enter the title manually or try to retrieve the title by touching Update title All artist names in the playl ist have been deleted ...

Страница 180: ...ay not be taken into con sideration For example if a street is open during the morning only but you arrive later it would be against the traffic regula tions so you cannot drive along the set route When driving please follow the actual traffic signs Also the system may not know some traffic regulations The calculated route is one example of the route to your destination decided by the navi gation ...

Страница 181: ...m the route and searches for another route intelligent rerouting Depending on the situation the sys tem may search a new route that does not return to the original one Route highlighting Once set the route is highlighted in bright green or light blue on the map The immediate vicinity of your starting point and destination may not be highlighted and neither will areas with particularly complex road...

Страница 182: ...und system delivering multi channel audio from up to 6 independent channels Favourite location A frequently visited location such as your workplace or a relative s home that you can register to allow easy routing GPS Global Positioning System A network of satellites that provides navigation signals for a variety of purposes Gracenote Music recognition service Music recognition technology and relat...

Страница 183: ... session Multi session is a method of recording more than 2 sessions in one disc Multi subtitle Subtitles in up to 32 languages can be recorded on a sin gle DVD letting you choose as desired Optical digital output By transmitting audio signals in a digital signal format the chance of sonic quality deteriorating in the course of transmission is minimized An optical digital output is designed to tra...

Страница 184: ...for variable bit rate Generally speaking CBR constant bit rate is more widely used But by flexi bly adjusting the bit rate according to the needs of audio compression it is possible to achieve compression prior ity sound quality Voice guidance The giving of directions by a recorded voice while in guidance mode Voice recognition The technology that allows the system to understand the driver s voice...

Страница 185: ...n Navigation menu Destination menu Information menu P 20 P 50 53 P 49 53 P 48 P 45 P 47 P 26 P 25 P 49 53 P 50 59 P 62 P 61 P 64 P 64 P 70 P 74 P 71 73 P 73 P 71 75 P 71 75 P 68 MAN HD1BT SOFTW EN book Page 183 Thursday April 20 2006 3 47 PM ...

Страница 186: ...184 Appendix NAVI AV Map menu P 41 P 43 P 41 P 43 P 42 P 43 P 43 P 39 P 39 P 39 P 39 P 40 P 40 P 40 P 40 P 40 MAN HD1BT SOFTW EN book Page 184 Thursday April 20 2006 3 47 PM ...

Страница 187: ...185 Appendix NAVI AV Setting menu P 79 P 80 P 81 P 81 P 81 P 77 P 78 P 78 P 79 P 79 P 77 P 84 P 84 P 53 P 84 P 82 MAN HD1BT SOFTW EN book Page 185 Thursday April 20 2006 3 47 PM ...

Страница 188: ... menu Changing a shortcut Page 41 Registration P 48 Vicinity Search P 41 Overlay POI P 77 Volume Dial Favourite 1 to 5 Phone book Whole Route Overview Traffic On Route P 27 Learning Route Avoid Motorway Avoid Ferry P 26 Avoid Toll Road P 26 Route Condition Destination P 37 Route Options Traffic List Day Night Display P 54 P 71 74 P 71 73 P 27 P 62 P 61 P 43 Shortcut menu P 26 P 26 MAN HD1BT SOFTW ...

Страница 189: ...gs menu System Settings menu Page 1 System Settings menu Page 2 P 129 P 132 P 131 P 133 P 131 P 132 P 132 P 134 P 137 P 135 P 137 P 136 P 138 P 136 P 138 P 137 P 138 P 138 P 138 P 139 P 139 P 139 MAN HD1BT SOFTW EN book Page 187 Thursday April 20 2006 3 47 PM ...

Страница 190: ...188 Appendix NAVI AV MAN HD1BT SOFTW EN book Page 188 Thursday April 20 2006 3 47 PM ...

Страница 191: ...MAN HD1BT SOFTW EN book Page 1 Thursday April 20 2006 3 47 PM ...

Страница 192: ...ONEER ELECTRONICS AUSTRALIA PTY LTD 178 184 Boundary Road Braeside Victoria 3195 Australia TEL 03 9586 6300 PIONEER ELECTRONICS OF CANADA INC 300 Allstate Parkway Markham Ontario L3R OP2 Canada TEL 1 877 283 5901 PIONEER ELECTRONICS DE MEXICO S A de C V Blvd Manuel Avila Camacho 138 10 piso Col Lomas de Chapultepec Mexico D F 11000 TEL 55 9178 4270 Published by Pioneer Corporation Copyright 2006 b...

Отзывы: