


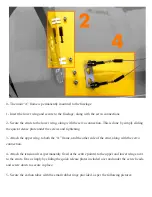


0- The main “A” frame is permanently mounted to the fuselage
1- Insert the lower wing and secure to the fuselage, along with the servo connections
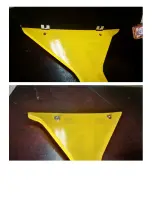
2- Secure the struts to the lower wing, along with the servo connection. This is done by simply sliding
the quick release plate under the screws and tightening.
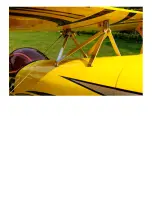
3- Attach the upper wing to both the “A” frame, and the other side of the strut, along with the servo
connection.
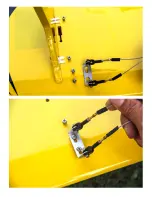
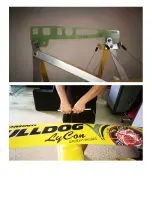
4- Attach the tension wires (permanently fixed at the centre points) to the upper and lower wings next
to the struts. Do so simply by sliding the quick release plates included over and under the screw heads,
and screw down to secure in place.
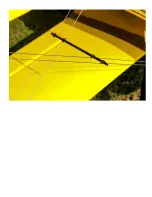
5- Secure the carbon tubes with the small rubber rings provided, as per the following pictures:
Содержание Pitts Challenger
Страница 1: ...Pitts Challenger 87 2 20m 100cc MANUAL...
Страница 7: ......
Страница 8: ......
Страница 9: ......
Страница 10: ......
Страница 11: ......
Страница 13: ......
Страница 14: ......
Страница 15: ......
Страница 17: ......
Страница 18: ......
Страница 19: ......
Страница 21: ......
Страница 22: ......
Страница 23: ......
Страница 24: ......
Страница 25: ......
Страница 26: ......
Страница 28: ......
Страница 29: ......
Страница 30: ......
Страница 32: ...the pushrods provided...
Страница 33: ......
Страница 34: ......
Страница 35: ......
Страница 37: ......
Страница 38: ......
Страница 39: ......
Страница 40: ......
Страница 41: ......
Страница 43: ......
Страница 44: ......
Страница 45: ......
Страница 47: ......
Страница 48: ......
Страница 49: ......
Страница 50: ......
Страница 51: ......
Страница 52: ......
Страница 54: ......
Страница 55: ......
Страница 56: ......
Страница 58: ......
Страница 60: ......
Страница 61: ...Note that the two laser cut holes are for the fuel and smoke tank vents...
Страница 63: ......
Страница 64: ......
Страница 66: ......
Страница 67: ......
Страница 68: ......
Страница 69: ......
Страница 71: ......
Страница 72: ......
Страница 74: ......
Страница 75: ......
Страница 76: ......
Страница 78: ......
Страница 80: ......
Страница 82: ......
Страница 83: ......
Страница 84: ...6 Secure the elevator tension wires as per picture below All this can be done in just a few minutes...