

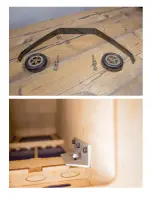

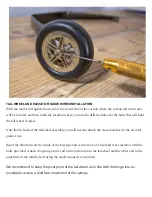


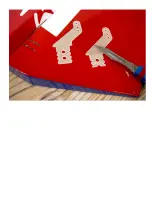


TAIL WHEEL AND ELEVATOR GUIDE WIRES INSTALLATION:
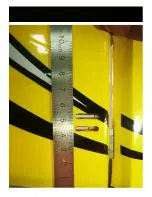
With the model still upside down, draw the centre line of the section where the carbon tail wheel unit
will be located, and then mark the location where you need to drill the holes for the bolts that will hold
the tail wheel in place.
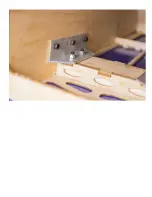
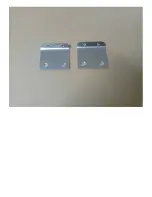
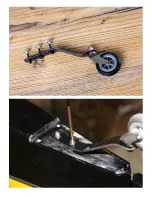
Note that in front of the tailwheel assembly you will need to attach the cross member for the elevator
guide wires.
Insert the blind nuts on the inside of the fuselage and secure the tail wheel and cross member with the
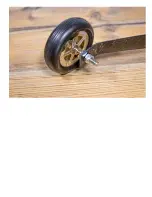
bolts provided. Attach the spring at one end to the metal arm on the tailwheel and the other end to the
underside of the rudder itself using the small woodscrew provided.
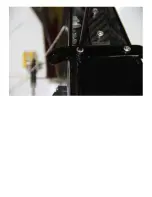
We recommend to keep the pivot point of the tail wheel as in line with the hinge line as
possible to assure a bind free movement of the springs.
Содержание Pitts Challenger
Страница 1: ...Pitts Challenger 87 2 20m 100cc MANUAL...
Страница 7: ......
Страница 8: ......
Страница 9: ......
Страница 10: ......
Страница 11: ......
Страница 13: ......
Страница 14: ......
Страница 15: ......
Страница 17: ......
Страница 18: ......
Страница 19: ......
Страница 21: ......
Страница 22: ......
Страница 23: ......
Страница 24: ......
Страница 25: ......
Страница 26: ......
Страница 28: ......
Страница 29: ......
Страница 30: ......
Страница 32: ...the pushrods provided...
Страница 33: ......
Страница 34: ......
Страница 35: ......
Страница 37: ......
Страница 38: ......
Страница 39: ......
Страница 40: ......
Страница 41: ......
Страница 43: ......
Страница 44: ......
Страница 45: ......
Страница 47: ......
Страница 48: ......
Страница 49: ......
Страница 50: ......
Страница 51: ......
Страница 52: ......
Страница 54: ......
Страница 55: ......
Страница 56: ......
Страница 58: ......
Страница 60: ......
Страница 61: ...Note that the two laser cut holes are for the fuel and smoke tank vents...
Страница 63: ......
Страница 64: ......
Страница 66: ......
Страница 67: ......
Страница 68: ......
Страница 69: ......
Страница 71: ......
Страница 72: ......
Страница 74: ......
Страница 75: ......
Страница 76: ......
Страница 78: ......
Страница 80: ......
Страница 82: ......
Страница 83: ......
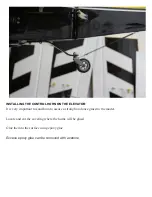
Страница 84: ...6 Secure the elevator tension wires as per picture below All this can be done in just a few minutes...