


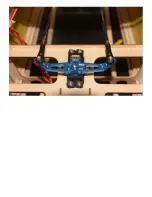


RUDDER SERVO INSTALLATION:
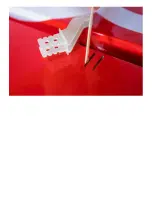
Screw the rudder servo to the allocated tray inside the fuselage
Centre the servo with your transmitter and attach the double servo arm
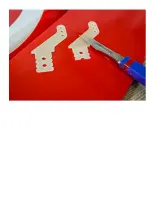
Attach the provided pull pull wires to the rudder control horns and thread the pull pull wire carefully
through the fuselage slots all the way back to the actual rudder servo.
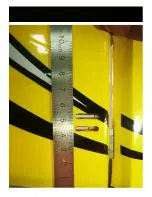
Attach the ball links to the rudder servo horn and pull through any excess pull pull wire until both sides
are tight and without slop. Tension should be similar to that of the strings on a guitar.
With everything correctly in place, crimp the small copper tubes firmly onto the wires to permanently
fix the wires in place, before sliding over the heat shrink.
Содержание Pitts Challenger
Страница 1: ...Pitts Challenger 87 2 20m 100cc MANUAL...
Страница 7: ......
Страница 8: ......
Страница 9: ......
Страница 10: ......
Страница 11: ......
Страница 13: ......
Страница 14: ......
Страница 15: ......
Страница 17: ......
Страница 18: ......
Страница 19: ......
Страница 21: ......
Страница 22: ......
Страница 23: ......
Страница 24: ......
Страница 25: ......
Страница 26: ......
Страница 28: ......
Страница 29: ......
Страница 30: ......
Страница 32: ...the pushrods provided...
Страница 33: ......
Страница 34: ......
Страница 35: ......
Страница 37: ......
Страница 38: ......
Страница 39: ......
Страница 40: ......
Страница 41: ......
Страница 43: ......
Страница 44: ......
Страница 45: ......
Страница 47: ......
Страница 48: ......
Страница 49: ......
Страница 50: ......
Страница 51: ......
Страница 52: ......
Страница 54: ......
Страница 55: ......
Страница 56: ......
Страница 58: ......
Страница 60: ......
Страница 61: ...Note that the two laser cut holes are for the fuel and smoke tank vents...
Страница 63: ......
Страница 64: ......
Страница 66: ......
Страница 67: ......
Страница 68: ......
Страница 69: ......
Страница 71: ......
Страница 72: ......
Страница 74: ......
Страница 75: ......
Страница 76: ......
Страница 78: ......
Страница 80: ......
Страница 82: ......
Страница 83: ......
Страница 84: ...6 Secure the elevator tension wires as per picture below All this can be done in just a few minutes...