


MOTOR INSTALLATION:
The Pitts is provided with the firewall pre-mounted at the factory, laser marked where the centre-line is,
ready for you to simply square your engine to it.
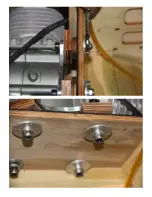
The engine box come with the appropriate engine incidences applied, so all you need to do is make sure
that this any standoffs are all the same size to assure a correct engine incidence.
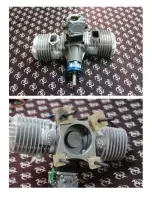
You can measure the distance between your engines mounting plate and prop hub, and compare the
distance between the firewall and spinner location, in order to calculate the size of standoffs required.
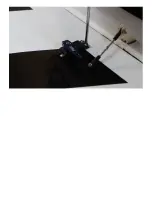
Once measured and marked out, drill your appropriate mounting holes and securely screw your engine
to the firewall using your preferred method , be that nut and bold or blind nut method.
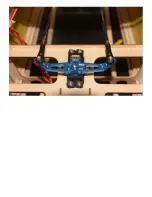
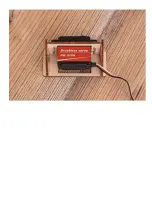
Finally ecure the engines ECU to the engine box, we recommend on top of the firewall however this
may vary depending on your installation.
Содержание Pitts Challenger
Страница 1: ...Pitts Challenger 87 2 20m 100cc MANUAL...
Страница 7: ......
Страница 8: ......
Страница 9: ......
Страница 10: ......
Страница 11: ......
Страница 13: ......
Страница 14: ......
Страница 15: ......
Страница 17: ......
Страница 18: ......
Страница 19: ......
Страница 21: ......
Страница 22: ......
Страница 23: ......
Страница 24: ......
Страница 25: ......
Страница 26: ......
Страница 28: ......
Страница 29: ......
Страница 30: ......
Страница 32: ...the pushrods provided...
Страница 33: ......
Страница 34: ......
Страница 35: ......
Страница 37: ......
Страница 38: ......
Страница 39: ......
Страница 40: ......
Страница 41: ......
Страница 43: ......
Страница 44: ......
Страница 45: ......
Страница 47: ......
Страница 48: ......
Страница 49: ......
Страница 50: ......
Страница 51: ......
Страница 52: ......
Страница 54: ......
Страница 55: ......
Страница 56: ......
Страница 58: ......
Страница 60: ......
Страница 61: ...Note that the two laser cut holes are for the fuel and smoke tank vents...
Страница 63: ......
Страница 64: ......
Страница 66: ......
Страница 67: ......
Страница 68: ......
Страница 69: ......
Страница 71: ......
Страница 72: ......
Страница 74: ......
Страница 75: ......
Страница 76: ......
Страница 78: ......
Страница 80: ......
Страница 82: ......
Страница 83: ......
Страница 84: ...6 Secure the elevator tension wires as per picture below All this can be done in just a few minutes...