7
Chapter 1: Introduction
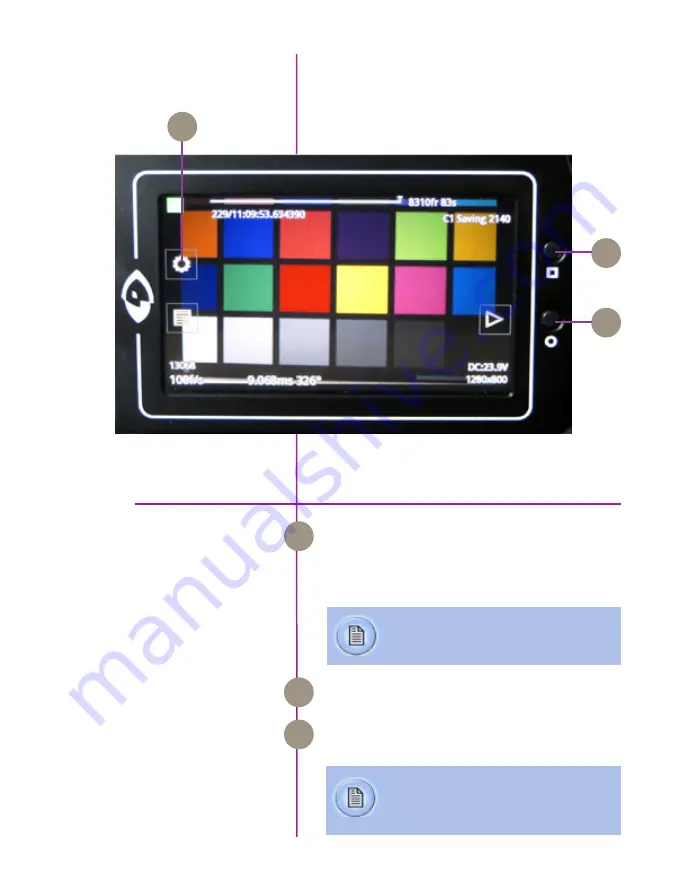
lcd panel controls
Turns on / off ‘Menu’ icons. Exiting the menu is an
electronic reset of the touch screen. Reset takes about
5 seconds. Double-clicking the square button also
resets the screen.
Turns on/off all on-screen displays.
Displays the main ‘capture and setting’ control
interface.
Menu
OSD Display
Menu
A
B
A
C
B
C
Image shown is of the LCD screen flipped around and folded back
into the side of the camera
Mount camera onto suitable support.
Attach and adjust appropriate lens.
See ‘Chapter 3: Miro LC Touch Screens’ for a
brief description of the various ‘Menu’ screens.
Содержание MIRO LAB
Страница 18: ...12 Phantom Miro LAB LC R Series Camera Manual ...
Страница 58: ...52 Phantom Miro LAB LC R Series Camera Manual ...
Страница 72: ...66 Phantom Miro LAB LC R Series Camera Manual ...
Страница 83: ...77 Chapter 9 Support Support 9 Miro LC Rear View Body Type I Miro LC Front View Body Type I ...
Страница 85: ...79 Chapter 9 Support Miro LC Left View Body Type I Miro R Right View Body Type I ...
Страница 86: ...80 Phantom Miro LAB LC R Series Camera Manual Miro LC Right View Body Type II ...
Страница 87: ...81 Chapter 9 Support Miro R Bottom View Body Type I Miro R Top View Body Type I ...
Страница 88: ...82 Phantom Miro LAB LC R Series Camera Manual Miro LC Bottom View Body Type II Miro LC Top View Body Type II ...
Страница 89: ...83 Chapter 9 Support Miro LAB Rear View Body Type III Miro LAB Front View Body Type III ...
Страница 91: ...85 Chapter 9 Support Miro LAB Bottom View Body Type I Miro LAB Top View Body Type I ...
Страница 105: ......


