


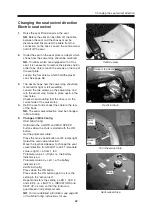


Changing/moving the charging socket
45
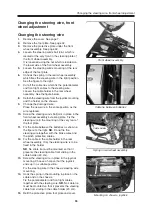
Removing the charging socket
1.
Remove the cover. See page 7.
2.
Unscrew the guard cap for the charging socket.
This applies when moving the charging socket
from the right to the left side, for example.
3.
When the charging socket is moved, the cover
cap must also be unscrewed from the cover and
moved to the cut-out on the other side.
4.
Unscrew the charging socket from the side
mounting on the chassis.
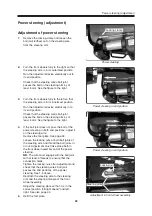
5.
Disconnect the charging cable contact from the
electronics. Remove the electronics. See page 42.
6.
Release the charging cable from the quick-action
fasteners on the base plate and chassis.
7.
If there is an electrical fault in the charging socket
or cable, the whole jack panel must be replaced.
See "Removing the jack panel" on page 43.
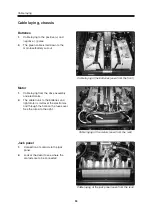
Changing/moving the charging socket
Charging socket, right side
Charging socket, cable laying to left side
Charging socket in chassis
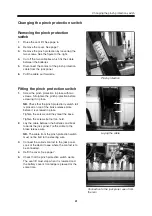
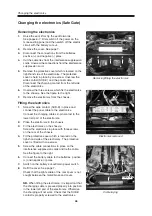
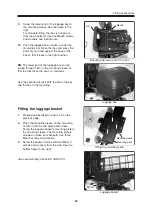
Fitting the charging socket.
1.
Screw the jack panel in place with two screws
on the chassis. See page 43.
This does not apply if the charging socket is
being moved.
2.
Screw the charging socket in place in the side
mounting on the chassis with two screws.
Do not tighten the screws too hard.
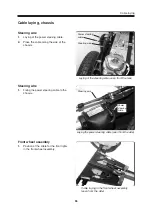
3.
Lay the cable from the charging socket and
down to the jack panel. See the figure to the
right. Fix the charging cable to the quick-action
fasteners.
The charging cable must be placed in the cut-
out in the centre of the lower part of the jack
panel.
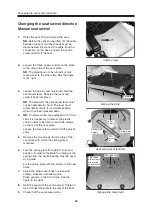
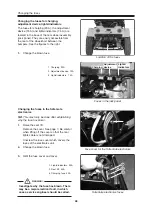
4.
Refit the electronics. See page 42.
Connect the 2-pin contact of the charging cable
in the lower left part of the electronics.
5.
Screw the guard cap in place in the cover.
This applies when moving the charging socket
from the right to the left side, for example.
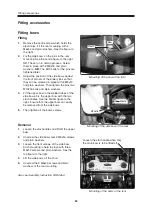
6.
Screw the cover cap in place in the
corresponding holes on the other side.
This applies when moving the charging socket
from the right to the left side, for example.
7.
Refit the cover. See page 7.
Check that the lights cable of the rear cover is
not caught between the motor/brake and cover.
Cover cap, left side
Guard cap
Cover cap
Содержание Trax
Страница 1: ...SERVICE MANUAL Trax US ...
Страница 2: ......
Страница 57: ...57 Notes ...
Страница 60: ......
Страница 61: ......
Страница 62: ......
Страница 63: ......
Страница 64: ...Order no 201096 US 0 ...