- Connect the power adaptor to the power port
(on the rear) of IP-CAM. Now, the status LED on
the front of IP-CAM will light up.
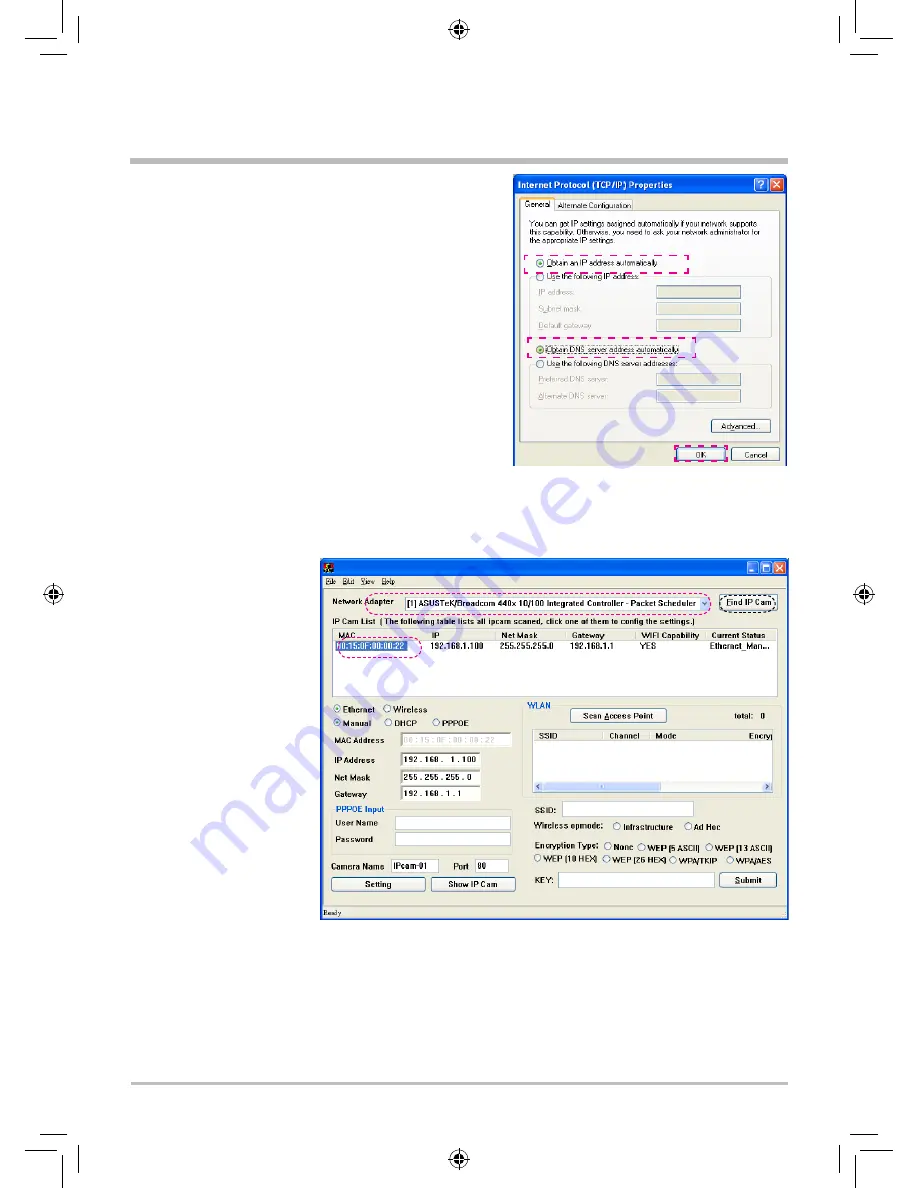
- Set up the connection way inside the PC network:
Please go to
Control Panel ---> Network Connections ---> Choose
Activated LAN connection ---> right click your mouse
---> Select Properties(P)---> Select Internet Protocol
(TCP/IP)---> Select Properties(R)
--->Click Obtain an IP address automatically(O),
Obtain DNS server address automatically(B).
Step 1.
Select your PC’s
Ethernet network card.
Step 2.
Click Find IP Cam with
left mouse button, you
will see
00:15:0F:00:00:22
192.168.1.100
Step 3.
Click 00:15:0F:00:00:22
192.168.1.100 with left
mouse button.
- Open and execute IPCamFinder (as shown in
Figure 5). Press Update to automatically scan the IP-CAM that you just installed . Then, you will
find 00:15:0F:00:00:22 192.168.1.100 in the column of IP Cam List. Click 00:15:0F:00:00:22
with left mouse button. You can see the default settings for IP-CAM.
Figure 5
1.
2.
3.
- Change the default Manual connection mode to DHCP and click Setting once. After clicking
Setting and Find IP Cam once again, a new IP Address 00:15:0F:00:00:22 10.1.10.82 camera
appears in the IP Cam List column. Click on its MAC to make its address data fill in the lower
columns. Finally, click on Show IP Cam button to open Browser and access into network
monitoring screen (as shown in Figure 6).


