INSTALLATION INSTRUCTIONS
(Continued)
23
1. Remove the valve cover on the right side of the outdoor unit
using a Phillips screwdriver. This will expose the valves to
connect the refrigerant lines and also the electrical panel to
connect your power and communication cables.
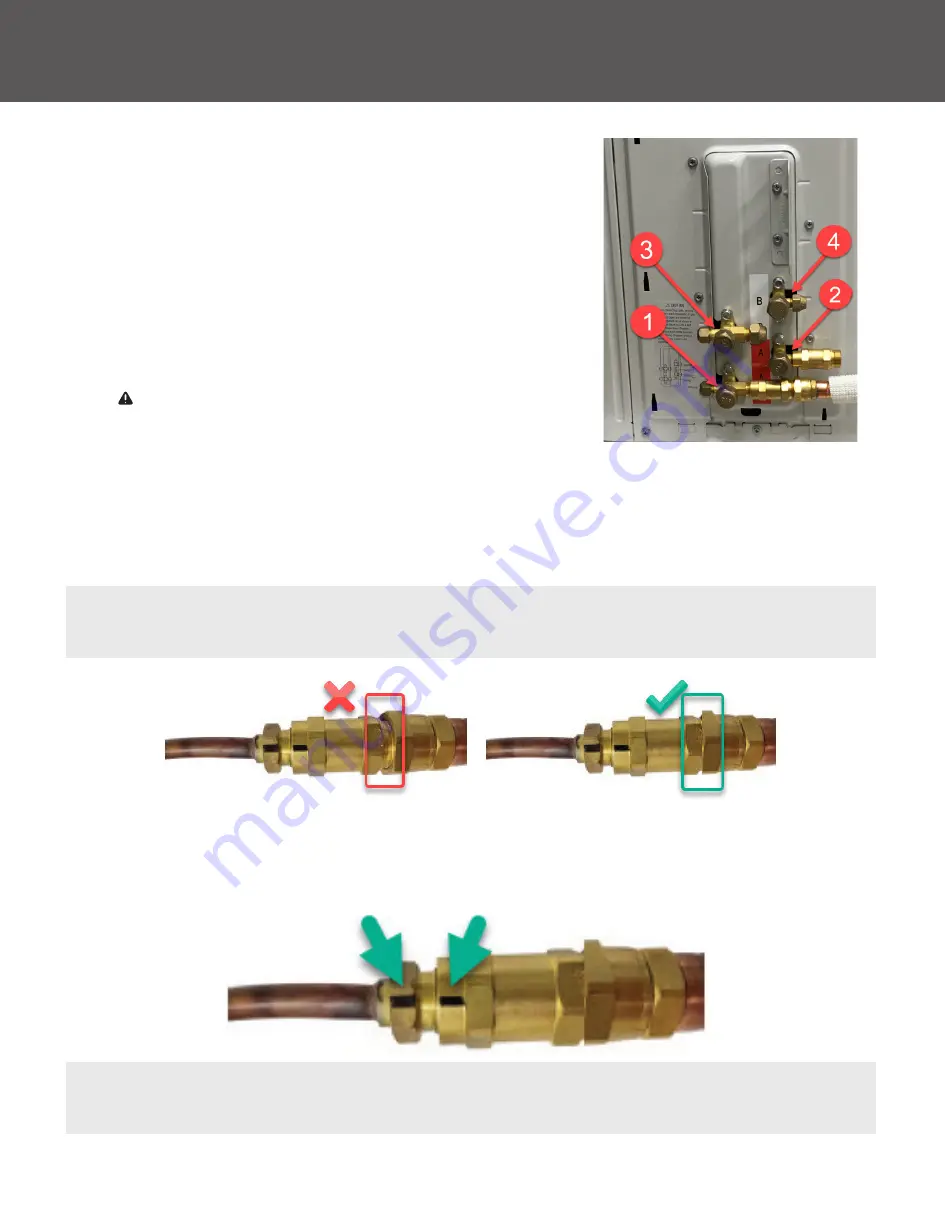
2. Locate the 2 male condenser couplers that are inside the line
set box. Screw the male condenser couplers on to the outdoor
unit in the order of Figure 7.1 until it stops — then give it
another 1/4 turn making sure it is fully sealed.
3. Unrolling the Line Set. Locate line-set box, remove it from the
packaging. Once out of the box, carefully unroll the line-set to
the length needed. Be extremely careful not to kink or damage
the copper piping while unrolling the line set.
Any kinks in the piping will affect the unit’s performance.
4. Align the refrigerant pipes with the corresponding valves so
they are not stressed. The caps are color coded to ensure the
proper connection.
5. Slide a piece of the extra insulation included over the line set, then connect the line set to the indoor
unit. Remove the caps according to color, 1 from the indoor unit, and 1 from the line set. Screw these
together without cross threading them. Once they are tight, give another 1/4 turn to fully seal. (There
should be no threads showing.)
IMPORTANT: Cover up any exposed refrigerant lines with the optional extra foam insulation. Follow the same
steps to connect the other lines.
ATTENTION: Once you have made the connections from the line set to the indoor unit, ensure that the black
lines on the fittings are aligned. If they are not you must re-tighten them until they are aligned.
Figure 7.1
NOTE:
There should be no threads showing. Triple confirm that they are fully tightened. Warranty will be
void if the connections are not fully tightened.
NOTE:
The refrigerant lines must be connected to the valves on the outdoor unit and indoor unit with as
little stress as possible, leave slack.


