Using a Web Browser
3-11
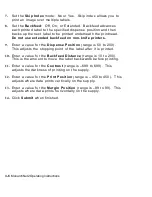
7.
Select
Automatic DNS Settings
to automatically configure the
domain name settings.
8.
Enter the
Domain Name
.
9.
Enter the
Primary DNS Server’s
IP address.
10.
Enter the
Secondary DNS Server’s
IP address.
11.
Select
Enable Network Time
to enable the network time protocol,
which allows the printer to query a time server on the network and
synchronize the clock in the printer.
12.
Enter the
Time Server’s IP
address. The printer waits 20
seconds for the server to respond. The status is displayed within
parentheses: “Waiting for Server,” “Time Server Error,” or the
current date and time.
13.
Enter the
Time Zone Adjustment
in hours and minutes, from
Greenwich Mean Time (GMT). This offset varies by location and
time zone. For example, Eastern/Standard time is five hours
behind GMT. Use –5:00 for the offset. For an offset of 3.5 hours,
use 3:30.
Note:
Changes for Daylight Savings Time are not made
automatically. If your time zone participates in Daylight
Savings Time, change the time zone offset accordingly.
14.
Set the
TCP Window
. 10240 is the default.
15.
Set the
TCP Port
. Port 9100 is the default.
16.
Set the
TCP Timeout
(in minutes). The default is 0, which is no
timeout.
17.
Set the
Keepalive Timer
(in minutes). The default is 1 minute.
18.
Enable or Disable
IP Receive CheckSum
and
Probe Idle
Connections
.
19.
Select
Retry Enable
for LPD/LPR.
Содержание Monarch 9860
Страница 1: ...u 9855 u 9860 Monarch Printers TC7411MN2OI Rev AD 5 07 2007 Paxar Americas Inc All rights reserved ...
Страница 6: ...iv ...
Страница 16: ...1 10 MonarchNet2 Operating Instructions ...
Страница 34: ...2 18 MonarchNet2 Operating Instructions ...
Страница 84: ...4 24 MonarchNet2 Operating Instructions ...
Страница 100: ...6 8 MonarchNet2 Operating Instructions ...
Страница 112: ...iv MonarchNet2 Operating Instructions ...
Страница 113: ......
Страница 114: ......


