-
PMS2000 System
-
Ref.
11/547
PM2044-B
14
NOTA
Eventuali altoparlanti non regolabili, non dotati,
cioè, dell'attenuatore sopra citato, andranno
collegati ai terminali ‘
0V
’ ed ‘
L
’ della linea di
collegamento a tre fili.
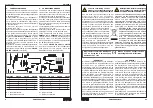
4.4 Attivazione dell'allarme
Nel caso si volesse attivare un segnale d'allarme
(che verrà inviato su tutte le zone), è sufficiente
collocare un interruttore tra i terminali ‘
+24V
’
ed ‘
ALL
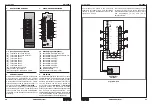
’ (vedi part. [
D
], fig. 4.3.1).
5.
LISTA DELLE PARTI DI RICAMBIO
Pannello frontale serigrafato .....
36/2398-S2
Interruttore .......................................
19/124
Relè 2 scambi 24V 5A .........................
21/26
NOTE
Any loudspeakers that cannot be adjusted, that
is to say that do not have an attenuator as
indicated above, will have to be connected to
the ‘
0V
’ and ‘
L
’ terminals of the three-wire
connecting line.
4.4 Activation of the alarm
If it should be wished to activate an alarm signal
(to be sent out to all the zones), it will be
sufficient to place a switch between the ‘
+24V
’
and ‘
ALL
’ terminals (see detail [
D
], Fig. 4.3.1).
5.
LIST OF SPARE PARTS
Silk-screen printed front panel ...
36/2398-S2
Switch ..............................................
19/124
Relay 2 change-over contacts 24V 5A ..
21/26
6.
TECHNICAL SPECIFICATIONS
6.
CARATTERISTICHE TECNICHE
il
g
a
d
a
t
a
t
r
o
p
p
o
s
a
m
i
s
s
a
m
a
z
n
e
t
o
P
s
i
a
l
e
r
i
e
d
i
b
m
a
c
s
t
t
a
w
0
0
5
d
e
t
r
o
p
p
u
s
r
e
w
o
p
m
u
m
i
x
a
M
s
t
c
a
t
n
o
c
r
e
v
o
e
g
n
a
h
c
y
a
l
e
r
e
h
t
y
b
il
g
a
d
a
t
a
t
r
o
p
p
o
s
a
m
i
s
s
a
m
e
t
n
e
r
r
o
C
s
i
a
l
e
r
i
e
d
i
b
m
a
c
s
A
5
d
e
t
r
o
p
p
u
s
t
n
e
r
r
u
c
m
u
m
i
x
a
M
s
t
c
a
t
n
o
c
r
e
v
o
e
g
n
a
h
c
y
a
l
e
r
e
h
t
y
b
i
d
a
s
e
r
p
a
ll
a
d
X
A
M
o
t
n
e
m
i
b
r
o
s
s
A
)
V
4
2
+
(
e
n
o
i
z
a
t
n
e
m
il
a
A
m
0
0
1
e
h
t
m
o
r
f
n
o
it
p
r
o
s
b
a
X
A
M
t
e
k
c
o
s
y
l
p
p
u
s
-
r
e
w
o
p
-
PMS2000 System
-
Ref.
11/547
PM2044-B
35
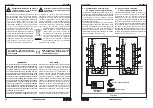
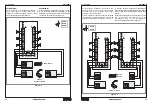
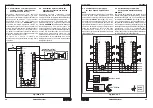
¡ATENCIÓN!
S i s e d e s e a c o n f i g u ra r l a i n s t a l a c i ó n
siguiendo cuanto mostrado en la fig. 4.1.3,
es decir utilizando la potencia máxima, es
INDISPENSABLE
cortar los puentes
X101
,
X102
y
X103
(detalle [
A
], fig. 3.1.1).
No efectuar dicha operación puede conllevar
daños permanentes a los amplificadores.
LET OP!
In het geval men de installatie zou willen
configureren aan de hand van hetgeen op
afbeelding 4.1.3 is weergegeven, dat wil zeggen
met gebruik van het maximum vermogen, dan
DIENEN ABSOLUUT
de bruggen
X101
,
X102
e
X103
(details [
A
], afb. 3.1.1) te worden
losgeknipt. Het niet in acht nemen van deze
handeling kan een blijvend slechte werking van
versterkers tot gevolg hebben.
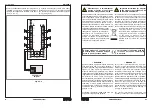
Fig./Afb. 4.1.3
X101
X102
X103


