3
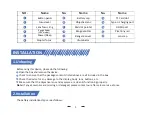
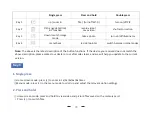
. Mount Installa�on
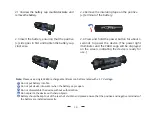
Install 3 screws in the front, middle and rear posi�ons.
Use the Allen wrench and �ghten the screws clockwise.
If there is any horizontal devia�on, you may use the two shims to adjust. Select the appropriate shim size and
place it in the corresponding screw posi�on, then repeat the above steps.
To ensure the best user experience, we highly recommend using our original mount. This is included in the product
packaging).
1
2
3
4
5
11
bracket and accessories: (mount �ghtening
screws, Allen wrench (D4.0mm) and shims) from
the box.
of the mount with two screws facing the
objec�ve lens direc�on, a�ach the flat side of
the mount on the bo�om of the device. Adjust
the mount to your preferred posi�on (A�en�on:
the end of the moun�ng bracket facing the
eyepiece cannot exceed the junc�on edge of the
rubber eyecup and the focusing ring. Failure to
follow this direc�on may result in eye damage
during use).
R
emove the thermal imaging device,moun�ng
Posi�on the device upside down, place the end

