44
English
Adjusting Position
1
Press <POSITION> to display the
[Position] menu.
0
0
0
0
Position
Default
Default
H-position
H-size
V-position
V-size
Over scan
Off
2
Select the item to adjust with .
●
Unadjustable items are greyed out.
Adjustable items differ depending on the signal,
input and the display mode.
3
Adjust with .
4
Press <POSITION> to exit from adjust
mode.
■
To return to the previous screen
Press <RETURN>.
■
To reset to defaults
When [Default] is selected, pressing <ENTER> resets
the adjustment values of all the displayed menus to
default.
When adjusting each item, pressing <DEFAULT>
resets the adjustment value of the item to default.
Note
●
When using Screen Transfer input, [Position] cannot
be set.
●
Settings for [Position] are memorised separately for
each input signal.
About [Position] setting
Even if the display is installed vertically, the
adjustment direction of the position and size does not
change.
When [Image rotation] is set to [180 degrees], the
adjustment direction becomes opposite of that in [Off]
state. (see page 84)
Note these points for adjustment.
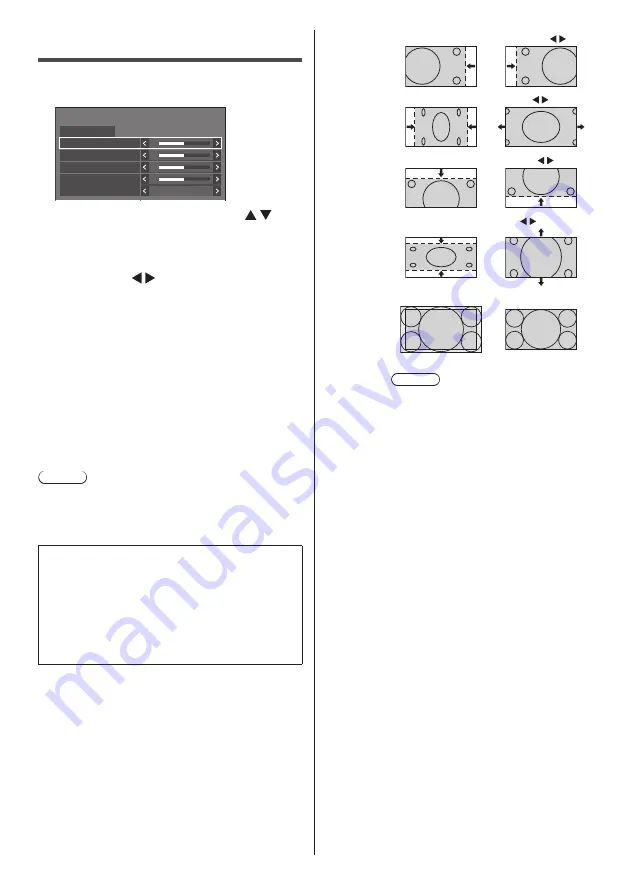
[H-position]
Adjust the horizontal position with .
[H-size]
Adjust the horizontal size with .
[
V-position
]
Adjust the vertical position with .
[
V-size
]
Adjust the vertical size with .
[Over scan]
Turn image over scan On/Off.
[On]
[Off]
Note
●
This is enabled when the screen mode
is set to [Full], [Zoom1] or [Zoom2].
Note this setting is disabled when using
USB / MEMORY VIEWER input, multi
screen display of the multi display or
digital zoom.


