


2. Disassembly Instructions
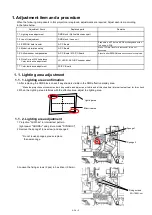
1. Hexlobe (TORX type) driver
When disassembling the top cover.
Part No. : TZSH07035
2. One-sided screw removal tool
When disassembling the optical block.
Part No. : TZSH07036
3. Hex wrench
When separating a lighting block and DMD block.
Please use the Hex wrench on the commercially available.
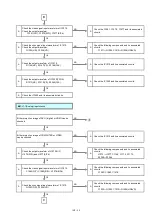
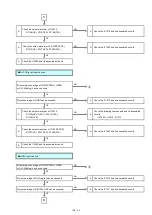
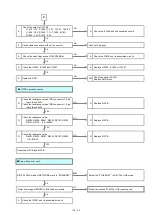
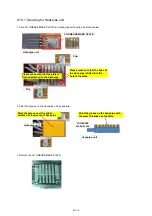
2. 1. Flowchart for Disassembly
* Before Disassembly the projector, turn off the POWER switch and disconnect the power plug from the wall outlet.
* Please wear protective gloves, not to be hurt with a metal part or a shield board.
* When assembling, reverse the disassembly procedures.
* When tore off sticky tapes and sponges, please use a new thing without reusing it on the occasion of assembling.
2. 3.
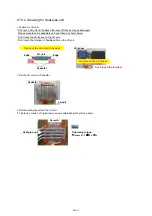
2. 6.
Tools
2. 7.
Complete status of the unit
2. 2.
Removal of Top cover, Front cover and
Side cover R
Removal of A-P.C.Board Block
2. 9.
2. 5.
2. 8.
2. 4.
Removal of Optical Block
Removal of D-P.C.Board
Removal of B-P.C.Board
Removal of P-P.C.Board
Removal of LD unit, LED-B Unit and
LED-R Unit
Removal of Phosphor wheel
T10H (2.72mm), 80mm or more in length
3 mm
DIS-4
Содержание PT-RZ470 Series
Страница 6: ...6 2 Specifications...
Страница 7: ...7...
Страница 9: ...INF 2 1 The name of each part 1 1 Projector body 1 2 Control panel...
Страница 10: ...INF 3 1 3 Connecting terminals 1 4 Remote control...
Страница 11: ...INF 4 2 OSD Menu Navigation...
Страница 12: ...INF 5...
Страница 13: ...INF 6...
Страница 26: ...INF 19 5 Select Log SYSTEM and click Get button 6 Log is displayed...
Страница 84: ......