Chapter 1
Preparation — Precautions for use
ENGLISH - 19
f
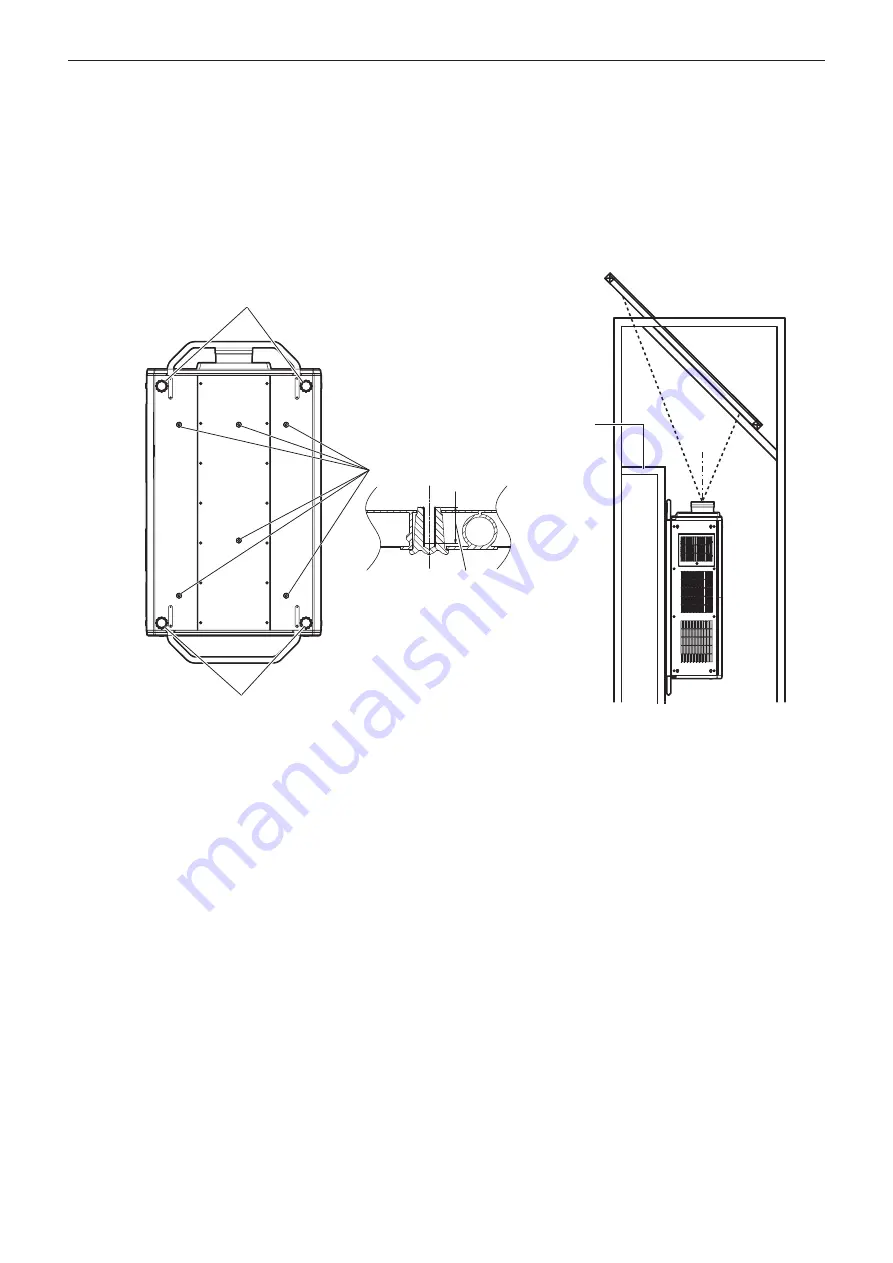
When installing and using the projector in a method other than the floor installation using the adjustable feet,
remove the adjustable feet (4 locations) and use the six screw holes to fix the projector to a mount (as shown in
the figure).
For the screws to fix the projector, use commercially available ISO 898-1 standard screws (made of carbon steel
or alloy steel).
(Screw diameter: M10, thread engagement length: 18 mm (23/32") or more, tapping depth inside the projector:
30 mm (1-3/16"))
f
Use a torque screwdriver or Allen torque wrench to tighten the fixing screws to their specified tightening torques.
Do not use electric screwdrivers or impact screwdrivers.
(Screw tightening torque: 20 ± 1 N·m)
Screw holes to fix the projector
Adjustable feet
Position of screw holes to fix projector and
adjustable feet
Adjustable feet
Tapping depth (common for 6
locations)
30 mm (1-3/16")
Mount
f
Do not stack three or more projectors.
f
Do not use the projector supporting it by the top.
f
Do not block the ventilation ports (intake and exhaust) of the projector.
Содержание PT-RQ35KU
Страница 61: ...ENGLISH 61 Chapter 3 Basic Operations This chapter describes basic operations to start with...
Страница 101: ...Chapter 4 Settings PICTURE menu ENGLISH 101 Note f f sRGB is available for RGB signal input only...
Страница 200: ...200 ENGLISH Chapter 5 Operations This chapter describes how to use each function...


