24
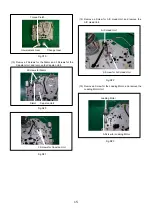
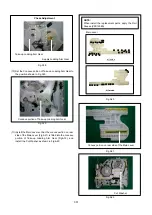
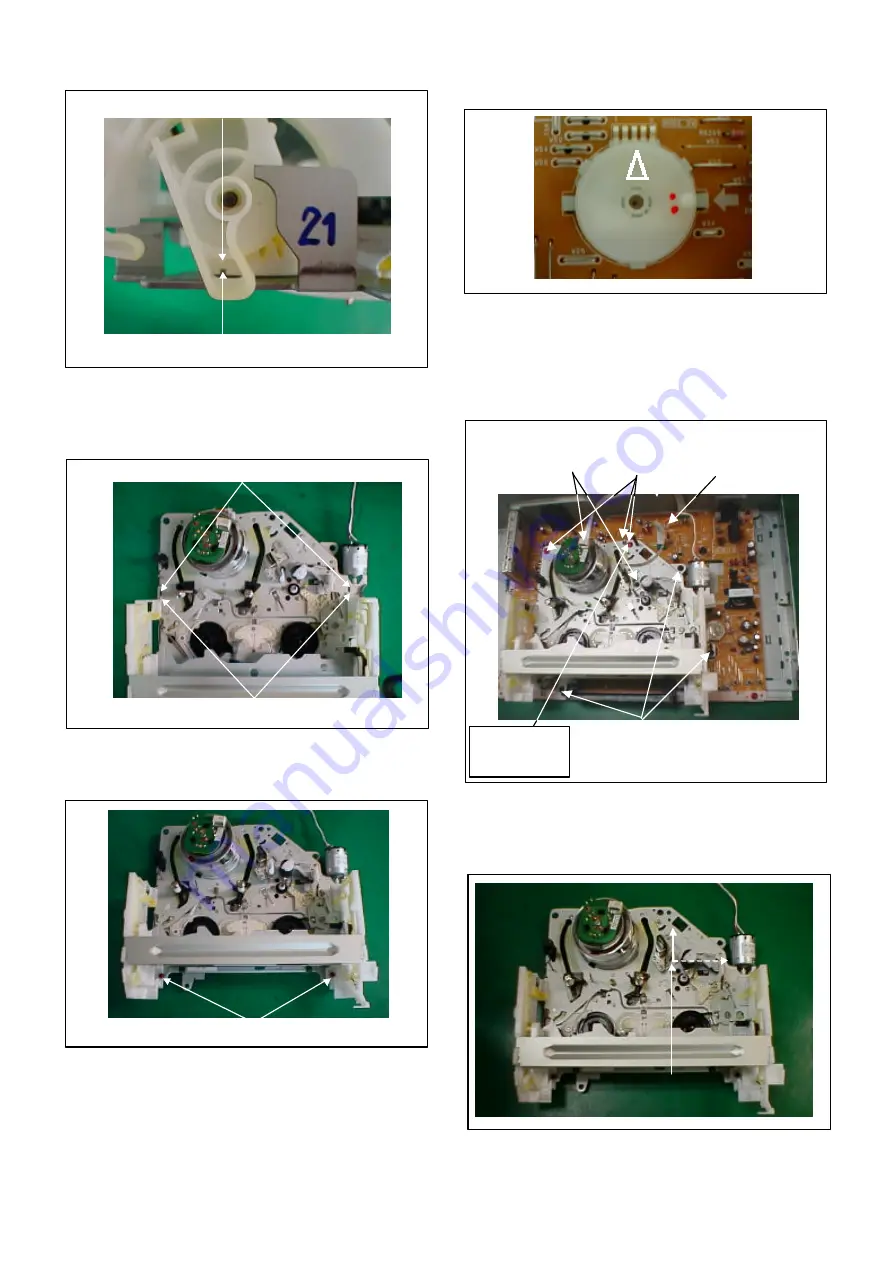
Fig.A46
(32) Insert the convex portions of Side Plate R & L into the
grooves of Chassis.
Fig.A47
(33) Tighten the 2 Screws.
Fig.A48
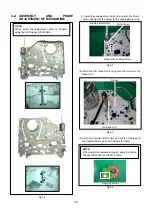
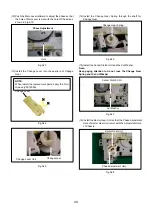
(34) Place the Mode Switch to EJECT position.
Fig.A49
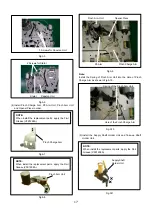
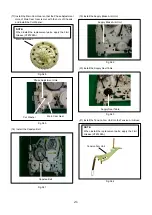
(35) Install the Mechanism Chassis onto the Main C.B.A., and
tighten three Black Screws and three Red Screws with
earth lead, and connect two Flexible Card Connectors
(Cylinder and A/C Head) and P1531.
Fig.A50
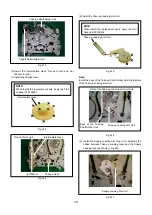
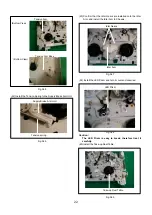
PHASE ADJUSTMENT OF P4 CAP
(36) Adjust the P4 Cap so that the Direction of P4 Cap is on
y-axis with tolerance ± 5 °.
Fig.A51
Sharp edge of Wiper Arm R
Sector Gear Hole
Grooves of Chassis
Convex portions
2 Screws
P1531
Flexible Cad
Connectors
3 Red
Screws
3 Black Screws
Tighten with
Earth Read
x
y
± 5°
P4 Cap
Содержание NV-HV61GN
Страница 20: ...3 1 2 DETAIL OF DISASSEMBLY METHOD 1 REMOVAL OF THE TOP PANEL Remove 2 Screws A Remove 2 Screws B Fig D2 20 ...
Страница 21: ...2 REMOVAL OF THE BACK PANEL Remove 2 Screws C Remove Screw D Unlock 4 Tabs E Fig D3 21 ...
Страница 29: ...10 2 CASING PARTS SECTION 29 ...
Страница 30: ...10 3 PACKING PARTS SECTION 30 ...
Страница 31: ...11 REPLACEMENT PARTS LIST 31 ...
Страница 41: ...C4537 ECJ2VC1H560G CHIP CAPACITOR 41 ...
Страница 44: ...D2002 B0AAED000003 DIODE 44 ...
Страница 47: ...Q1152 2SC3311ASA TRANSISTOR 47 ...
Страница 49: ...R1502 ERJ3GEYJ273V CHIP RESISTOR 49 ...
Страница 54: ...W519 ERJ3GEY0R00V CHIP JUMPER 54 ...
Страница 109: ...4 1 3 PARTS NAME OF R4 MECHANISM Fig M2 ...
Страница 139: ...34 ...

