214
4
4
.
.
9
9
.
.
5
5
.
.
P
P
i
i
n
n
g
g
E
E
x
x
e
e
c
c
u
u
t
t
i
i
o
o
n
n
On the Switch Tools Configuration Menu, pressing "P" opens the Ping
Execution screen as shown in Fig. 4-9-7. On this screen, you can execute the
ping command from the Switching Hub to confirm communications with
connected terminals and other devices.
Fig. 4-9-7 Ping Execution
Screen Description
Target IP Address: Displays the IP address of the target of the ping. The factory
default setting is 0.0.0.0.
Number of
Request
Displays the number of times of ping. The factory default setting is
10 times.
Timeout Value
Displays the time before timeout occurs. The factory default setting
is 3 seconds.
Result
Displays the ping result.
Available commands are listed below.
I Set the IP address of the target of the ping.
Press "I." The command prompt changes to "Enter new Target IP Address >."
Enter the IP address.
N Set the number of times of ping.
Press "N." The command prompt changes to "Enter new Request Times >." Enter
the number of times between 1 and 10.
T Set the time before timeout occurs.
Press "T." The command prompt changes to "Enter new Timeout Value >." Set
the time between 1 to 5 seconds.
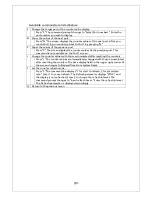
E Execute the ping command. Or, clear the display.
PN23249K/PN23249A Local Management System
Switch Tools Configuration -> Ping Execution
Target IP Address: 0.0.0.0
Number of Requests: 10
Timeout Value: 3 Sec.
=============== Result ===============
-------------------------------- <COMMAND> -----------------------------------
Set Target [I]P Address [E]xecute Ping
Set [N]umber of Requests [S]top Ping
Set [T]imeout Value [Q]uit to previous menu
Command>
Enter the character in square brackets to select option
Содержание M24PWR
Страница 5: ...5 malfunction When stacking Switching Hubs leave a minimum of 20 mm space between them is required ...
Страница 24: ...24 command If you enter a command or setting not available an error message is shown in the explanation field ...
Страница 26: ...26 ...
Страница 32: ...32 ...
Страница 45: ...45 ...
Страница 65: ...65 ...
Страница 74: ...74 Quit to previous menu Quits the Advanced Switch Configuration Menu and returns to the Main menu ...
Страница 77: ...77 setting and the management VLAN status of VLAN ID 1 is UP ...
Страница 92: ...92 Press S Q Return to the previous menu ...
Страница 94: ...94 ...
Страница 118: ...118 Q Return to the previous menu ...
Страница 121: ...121 ...
Страница 126: ...126 ICMP Type Displays the ICMP type ...
Страница 132: ...132 802 1p Priority Displays priority of IEEE802 1p TCP SYN Flag Displays the TCP SYN flag ICMP Type Displays ICMP type ...
Страница 152: ...152 Threshold Displays the threshold of the number of packets per second ...
Страница 169: ...169 Fig 4 7 49 Display of values accumulated after resetting the counters ...
Страница 181: ...181 Q Return to the previous menu ...
Страница 207: ...207 Q Return to the previous menu ...
Страница 228: ...228 RSTP MIB IEEE 802 1w IEEE8021 PAE MIB IEEE802 1X IEEE8023 LAG MIB IEEE 802 3ad ...
Страница 233: ...233 IEEE 802 3af standard ...


