144
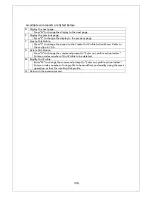
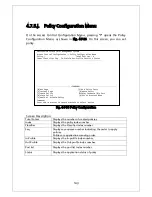
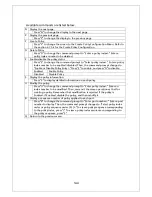
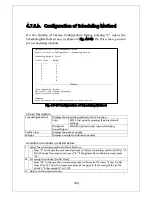
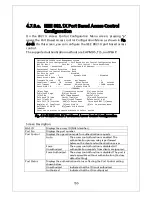
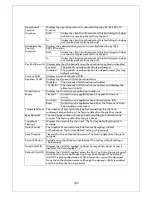
Available commands are listed below.
N Display the next page.
Press "N" to change the display to the next page.
P Display the previous page.
Press "P" to change the display to the previous page.
C Create Policy.
Press "C" to change the screen to the Create Policy Configuration Menu. Refer to
the section 4.7.5.k for the Create Policy Configuration.
D Delete Policy.
Press "D" to change the command prompt to "Enter a policy index>." Enter a
policy index number to be deleted.
E Enable/disable the policy status.
Press "E" to change the command prompt to "Select policy index>." Enter a policy
index number to be enabled/disabled. Then, the command prompt changes to
"Enable or Disable Policy Entry>." Press "E" to enable, and press "D" to disable.
Enabled
Enable Policy.
Disabled
Disable Policy.
S Display the policy information.
Press "S " to display detailed information on each policy.
U Modify the policy.
Press "U" to change the command prompt to "Enter policy index>." Enter an
index number to be modified. Then, carry out the same operation as that for
creating a policy. Remember that modification is rejected if the policy is
Enabled. If Enabled, disable the policy, and then modify it.
B Display a sequence number of policy applied to each port.
Press "B" to change the command prompt to "Enter port number>." Enter a port
number to display. Then, the command prompt changes to "Select policy index
order or policy sequence order (I/S)>." To view a policy sequence corresponding
to the policy index, press "I." To view a policy index sequence corresponding to
the policy sequence, press "S."
Q Return to the previous menu.
Содержание M24PWR
Страница 5: ...5 malfunction When stacking Switching Hubs leave a minimum of 20 mm space between them is required ...
Страница 24: ...24 command If you enter a command or setting not available an error message is shown in the explanation field ...
Страница 26: ...26 ...
Страница 32: ...32 ...
Страница 45: ...45 ...
Страница 65: ...65 ...
Страница 74: ...74 Quit to previous menu Quits the Advanced Switch Configuration Menu and returns to the Main menu ...
Страница 77: ...77 setting and the management VLAN status of VLAN ID 1 is UP ...
Страница 92: ...92 Press S Q Return to the previous menu ...
Страница 94: ...94 ...
Страница 118: ...118 Q Return to the previous menu ...
Страница 121: ...121 ...
Страница 126: ...126 ICMP Type Displays the ICMP type ...
Страница 132: ...132 802 1p Priority Displays priority of IEEE802 1p TCP SYN Flag Displays the TCP SYN flag ICMP Type Displays ICMP type ...
Страница 152: ...152 Threshold Displays the threshold of the number of packets per second ...
Страница 169: ...169 Fig 4 7 49 Display of values accumulated after resetting the counters ...
Страница 181: ...181 Q Return to the previous menu ...
Страница 207: ...207 Q Return to the previous menu ...
Страница 228: ...228 RSTP MIB IEEE 802 1w IEEE8021 PAE MIB IEEE802 1X IEEE8023 LAG MIB IEEE 802 3ad ...
Страница 233: ...233 IEEE 802 3af standard ...


