4.2 Starting KX-TVM Maintenance Console
Getting Started
37
4.
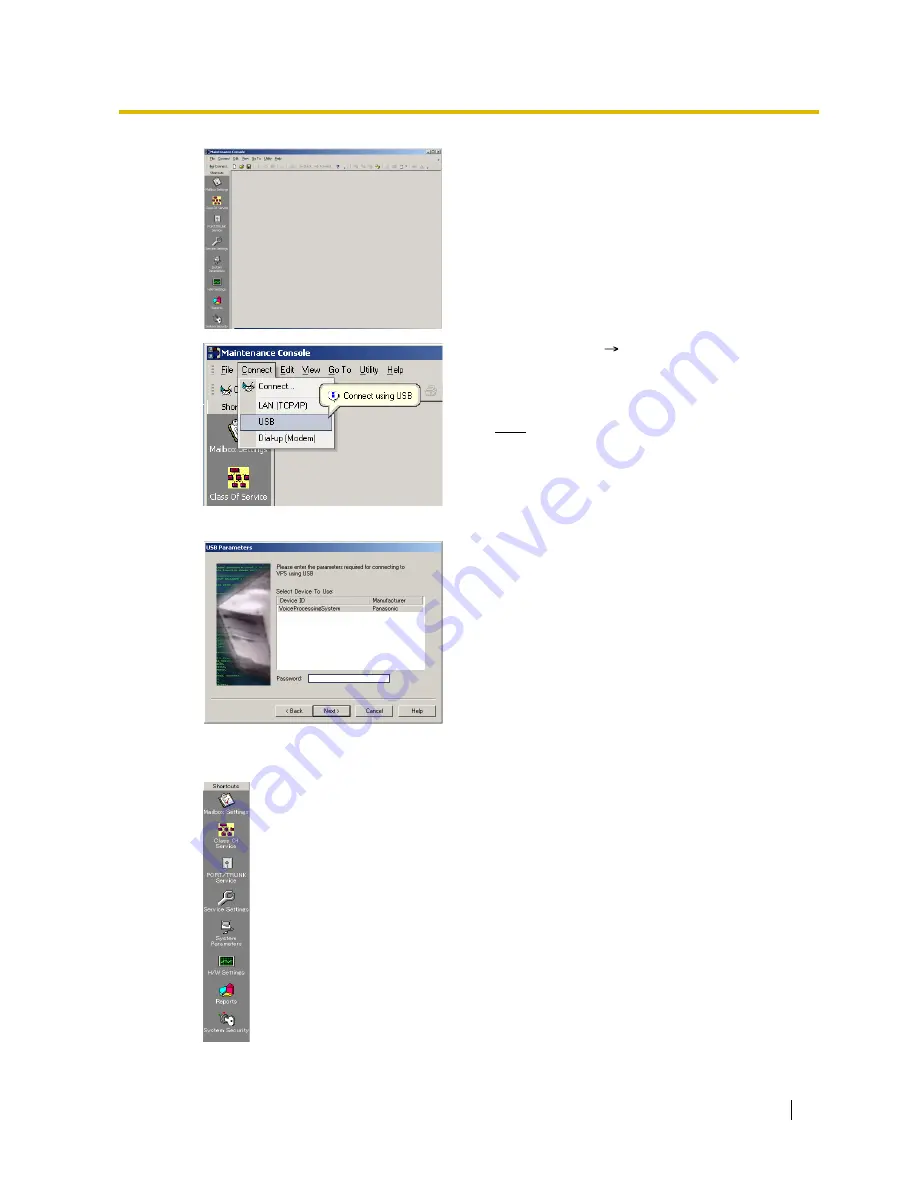
The main window is displayed.
5.
Click
"Connect"
"USB"
from the menu bar, or
click
"Connect"
on the shortcut bar, select
"USB"
in the Connection Mode dialogue box and click
"Next"
.
Note
•
To connect to the VPS via USB, the KX-
TVM USB driver must be installed on the
PC, as explained above in "Installing KX-
TVM Maintenance Console".
6.
Select the VPS as the desired USB device, enter the
password (default: 1234), then click
"Next"
.
7.
Click
"Finish"
when the message
"Connected!"
is
displayed.
8.
You may now begin programming the VPS. To
choose the area you would like to begin
programming, click the desired icon in the Shortcuts
menu.


