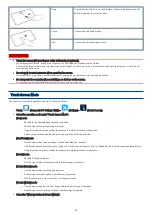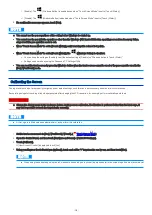
[Enable]: The
(Windows Button) is enabled even when “Touch Screen Mode” is set to [Touch (Water)].
[Disable]: The
(Windows Button) is disabled when “Touch Screen Mode” is set to [Touch (Water)].
4.
If a confirmation message appears, touch [Yes].
N O T E
n
You cannot use the pen regardless of the setting before Windows is started up.
n
You cannot use the pen with the operations other than the Windows (PIN input of Bitlocker, operating screen from Recovery Drive,
etc.) even if the pen operation mode is set.
n
When “Touch Screen Mode” is set to [Touch (Water)], multi touch input is reduced to 2 points.
n
When “Touch Screen Mode” is set to [Touch (Water)], the
(Windows Button) is disabled.
You can keep the setting as [Enable] even if the default setting is [Disable] on “Windows button in Touch (Water)”.
Settings can be made by using the Panasonic PC Settings Utility.
n
You can reset the touch screen by pressing Windows button when the touch screen cannot be used or the pen cannot be used in the
[Pen] / [Pen/Touch] mode.
Calibrating the Screen
Pen input and touch input are properly configured under default settings, so calibration is not necessary under normal circumstances.
If accurate pen input or touch input is no longer possible after changing the LCD resolution, for example, perform calibration as follows.
C A U TI O N
n
Change the display mode to the landscape before starting screen calibration. If calibration is performed other than the landscape, it
may not be possible to touch the target marks correctly.
N O T E
n
At first, sign in to Windows as an administrator, and perform this calibration.
1.
Set the touch screen mode to [Pen] / [Pen/Touch] / [Touch]. (
2.
Open the Control Panel, and then touch [Hardware and Sound] - [Tablet PC Settings].
3.
Touch [Calibrate].
If [User Account Control] is displayed, touch [Yes].
4.
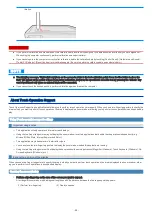
Using your finger or the dedicated pen (optional), touch each of the “+” target marks one by one, and then touch [Yes].
N O T E
n
When using the dedicated pen (optional), make sure dedicated pen (optional) is perpendicular to the screen to get the most accurate cal-
-
19
-
Содержание FZ-M1 Series
Страница 49: ...n You can also touch on the task tray and then touch Disconnect 49...
Страница 76: ...To remove the card 1 Draw the card straight out 2 Close the cover 76...
Страница 91: ...Other Functions 91...
Страница 139: ...3 Check the model number The model number C starting with FZ M1 is described 139...


