


Chapter 4
Settings — [ADVANCED MENU] menu
76 - ENGLISH
5) Press
qw
to switch to [ON].
6) Press
as
to select [START] or [WIDTH].
7) Press
qw
to adjust the starting position or correction width.
8) Press
as
to select [MARKER].
9) Press
qw
to switch to [ON].
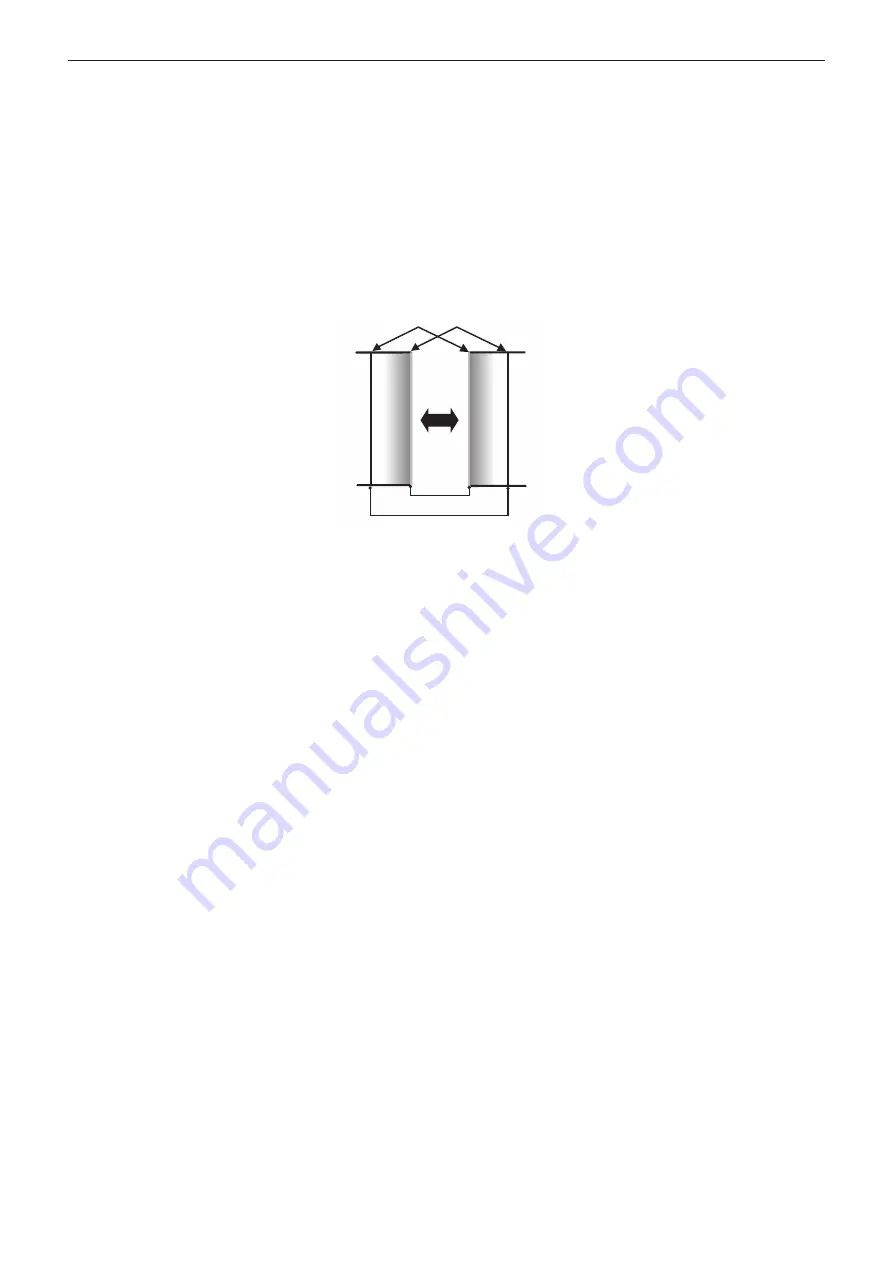
f
A marker for image position adjustment is displayed. The position where the red and green lines overlap for
the projectors to be joined will be the optimal point. Make sure to set the correction width for the projectors
to be joined with the same value. Optimal joining is not possible with projectors that have different correction
widths.
The optimal point is the point at which these lines overlap.
Green line
Red line
10) Press
as
to select [BRIGHTNESS ADJUST].
11) Press the <ENTER> button.
f
The
[BRIGHTNESS ADJUST]
screen is displayed.
f
By setting [AUTO TESTPATTERN] to [ON] on the
[EDGE BLENDING]
screen, the black test pattern is
displayed when you enter the
[BRIGHTNESS ADJUST]
screen.
12) Press
as
to select [NON-OVERLAPPED BLACK LEVEL].
13) Press the <ENTER> button.
f
The
[NON-OVERLAPPED BLACK LEVEL]
screen is displayed.
f
[RED], [GREEN], and [BLUE] can be adjusted individually if [INTERLOCKED] is set to [OFF].
14) Press
as
to select an item, and press
qw
to adjust the setting.
f
Once the adjustment is completed, press the <MENU> button to return to the
[BRIGHTNESS ADJUST]
screen.
15) Press
as
to select [UPPER], [LOWER], [LEFT], or [RIGHT] in [BLACK BORDER WIDTH].
16) Press
qw
to set the region (width) of the [BLACK BORDER WIDTH] adjustment.
17) Press
as
to select [UPPER KEYSTONE AREA], [LOWER KEYSTONE AREA], [LEFT KEYSTONE
AREA], or [RIGHT KEYSTONE AREA].
18) Press
qw
to adjust the tilt of the border between [NON-OVERLAPPED BLACK LEVEL] and [BLACK
BORDER LEVEL].
19) Press
as
to select [BLACK BORDER LEVEL].
20) Press the <ENTER> button.
f
The
[BLACK BORDER LEVEL]
screen is displayed.
f
[RED], [GREEN], and [BLUE] can be adjusted individually if [INTERLOCKED] is set to [OFF].
21) Press
as
to select an item, and press
qw
to adjust the setting.
f
Once the adjustment is completed, press the <MENU> button to return to the
[BRIGHTNESS ADJUST]
screen.
22) Press
as
to select [UPPER], [LOWER], [LEFT], or [RIGHT] for [OVERLAPPED BLACK LEVEL].
Содержание DLP PT-FRZ50
Страница 38: ...38 ENGLISH Chapter 3 Basic Operations This chapter describes basic operations to start with ...
Страница 130: ...130 ENGLISH Chapter 5 Operations This chapter describes how to use each function ...
Страница 167: ...ENGLISH 167 Chapter 7 Appendix This chapter describes specifications and after sales service for the projector ...
Страница 188: ...Index 188 ENGLISH WAVEFORM MONITOR 92 Web control 134 WHITE GAIN 65 WIRED LAN 122 Z ZOOM 70 ...


