237
Appendix
Appendix D Printing Secured Print and Sample Set Jobs
D.1
Storing Secured Print/Sample Set Jobs
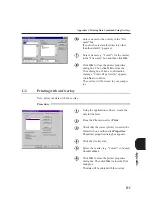
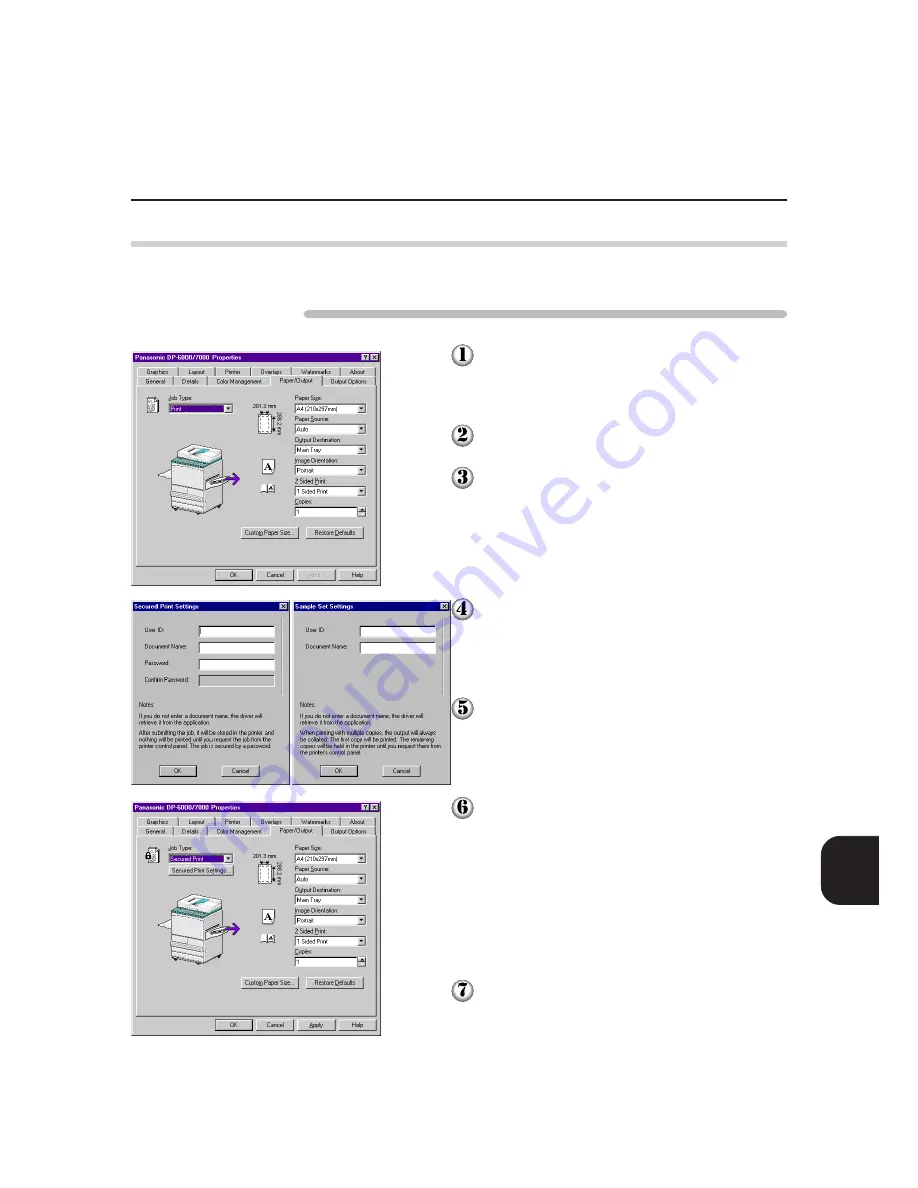
The following procedure describes how to store a Secured print or Sample set job:
Procedure
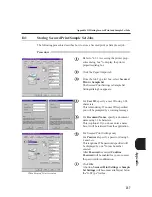
Refer to "4.3.1 Accessing the printer prop-
erties dialog box" to display the printer
properties dialog box.
Click the Paper/Output tab.
From the Job Type list box, select
Secured
or
Sample Set
.
The Secured Print Settings or Sample Set
Settings dialog box appears.
For
User ID
, specify a user ID using 1-24
characters.
This is mandatory. If no user ID is specified,
you will be prompted by a warning message.
For
Document Name
, specify a document
name using 1-24 characters.
This is optional. If you do not enter a name
here, it will be retrieved from the application.
For Secured Print Settings only
For
Password
, specify a password using 1-
4
numbers
.
This is optional. The password specified will
be displayed by one * for each number
entered.
After
Password
is entered,
Confirm
Password
will be enabled for you to re-enter
the password for confirmation.
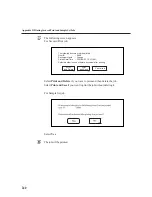
Click
OK
.
A button,
Secured Print Settings
or
Sample
Set Settings
will become available just below
the "Job Type" list box.
When Secured Print is created
Содержание DA-PC700
Страница 38: ...This page is intentionally left blank ...
Страница 39: ...Setup 2 1 Connecting Interface Cables 26 2 2 Memory Allocation 28 ...
Страница 53: ...This page is intentionally left blank ...
Страница 54: ...This page is intentionally left blank ...
Страница 55: ...This page is intentionally left blank ...
Страница 56: ...This page is intentionally left blank ...
Страница 88: ...This page is intentionally left blank ...
Страница 106: ...This page is intentionally left blank ...
Страница 129: ...115 Setup for Windows Networking 7 Example of config txt 7 4 Changing Printer and Workgroup Name ...
Страница 144: ...This page is intentionally left blank ...
Страница 163: ...Setting Print Mode 11 1 Print Mode Operation 150 11 2 PCL 6 Settings 151 ...
Страница 171: ...157 Setting Print Mode 11 Select A3 and then touch Save Select Close until the menu screen appears 11 2 PCL 6 Settings ...
Страница 172: ...This page is intentionally left blank ...
Страница 173: ...Printing Reports Lists 12 1 Types of Reports Lists 160 12 2 How to Print Report List 180 ...
Страница 176: ...162 12 1 Types of Report List ...
Страница 179: ...Printing Reports Lists 165 12 1 Types of Report List 12 ...
Страница 181: ...Printing Reports Lists 167 12 1 Types of Report List 12 ...
Страница 183: ...Printing Reports Lists 169 12 1 Types of Report List 12 ...
Страница 185: ...Printing Reports Lists 171 12 1 Types of Report List 12 ...
Страница 187: ...Printing Reports Lists 173 12 1 Types of Report List 12 ...
Страница 189: ...Printing Reports Lists 175 12 1 Types of Report List 12 ...
Страница 191: ...Printing Reports Lists 177 12 1 Types of Report List 12 ...
Страница 193: ...Printing Reports Lists 179 12 1 Types of Report List 12 ...
Страница 195: ...Configuring by the Tools Mode Screen 13 1 Tools Mode 182 13 2 System Meter Settings 184 ...
Страница 260: ...This page is intentionally left blank ...
Страница 261: ...memo ...

