106
7
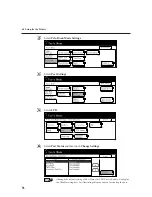
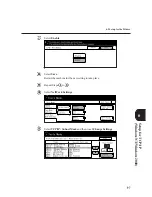
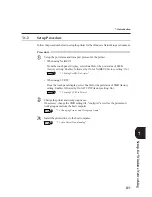
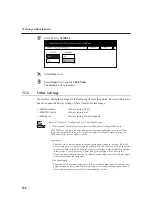
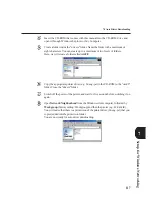
Select
On
for
NetBEUI
.
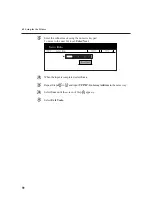
Select
Save
twice.
Select
Close
twice and then
Exit Tools
.
The machine will be rebooted.
7.2.2
Other Settings
If necessary, define the settings for the following items at the printer. However, there is no
need to change the factory setting of these items for normal usage.
• SMB Print Mode
(Factory setting: PCL*)
• SMB PJL Switch
(Factory setting: On)
• SMB Spool
(Factory setting: Hard Disk spool)
Refer to "Chapter 13 Configuring by the Tools Mode Screen".
• * If the optional PostScript software kit is installed, factory setting will be Auto.
• With SMB, you can store the print data output from the application in the spool file of
the printer temporarily to be processed for printing. Set the spool mode by using the
SMB spool of the receive buffer capacity.
Spool mode:
The mode which stores print data output from the application in the spool file of the
printer temporarily to be processed for printing. You can choose to save the spool file
in either the RAM disk which has used the printer memory or the hard disk connected
to the printer. As the processing of print data after spooling will be done in the
printer, the application in the client is released sooner. Requests from multiple clients
can be processed at the same time.
Non spool mode:
The mode which processes printing while the print data output from the application is
being received by the printer. When the printer is processing printing request from a
client, printing request from other clients cannot be received.
7.2 Setting NetBEUI in Printer
Содержание DA-PC700
Страница 38: ...This page is intentionally left blank ...
Страница 39: ...Setup 2 1 Connecting Interface Cables 26 2 2 Memory Allocation 28 ...
Страница 53: ...This page is intentionally left blank ...
Страница 54: ...This page is intentionally left blank ...
Страница 55: ...This page is intentionally left blank ...
Страница 56: ...This page is intentionally left blank ...
Страница 88: ...This page is intentionally left blank ...
Страница 106: ...This page is intentionally left blank ...
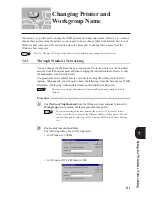
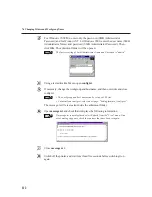
Страница 129: ...115 Setup for Windows Networking 7 Example of config txt 7 4 Changing Printer and Workgroup Name ...
Страница 144: ...This page is intentionally left blank ...
Страница 163: ...Setting Print Mode 11 1 Print Mode Operation 150 11 2 PCL 6 Settings 151 ...
Страница 171: ...157 Setting Print Mode 11 Select A3 and then touch Save Select Close until the menu screen appears 11 2 PCL 6 Settings ...
Страница 172: ...This page is intentionally left blank ...
Страница 173: ...Printing Reports Lists 12 1 Types of Reports Lists 160 12 2 How to Print Report List 180 ...
Страница 176: ...162 12 1 Types of Report List ...
Страница 179: ...Printing Reports Lists 165 12 1 Types of Report List 12 ...
Страница 181: ...Printing Reports Lists 167 12 1 Types of Report List 12 ...
Страница 183: ...Printing Reports Lists 169 12 1 Types of Report List 12 ...
Страница 185: ...Printing Reports Lists 171 12 1 Types of Report List 12 ...
Страница 187: ...Printing Reports Lists 173 12 1 Types of Report List 12 ...
Страница 189: ...Printing Reports Lists 175 12 1 Types of Report List 12 ...
Страница 191: ...Printing Reports Lists 177 12 1 Types of Report List 12 ...
Страница 193: ...Printing Reports Lists 179 12 1 Types of Report List 12 ...
Страница 195: ...Configuring by the Tools Mode Screen 13 1 Tools Mode 182 13 2 System Meter Settings 184 ...
Страница 260: ...This page is intentionally left blank ...
Страница 261: ...memo ...


