24
Useful Information
Handling and Maintenance
In such cases, turn on the computer and move it as follows.
A
Hold the computer so that its keyboard side is facing the ground and level.
B
While keeping the computer level, rotate it 90 degrees or more clockwise.
C
Return the computer to position
A
, and rotate it 90 degrees or more counterclockwise.
D
Return the computer to position
A
.
E
Tilt the computer 90 degrees or more to the left so that the left side of the computer tilts down.
F
Return the computer to position
A
, and tilt it 90 degrees or more to the right so that the right side of the com-
puter tilts down.
CAUTION
●
Hold the computer
fi
rmly when moving it. Strong shocks from dropping the computer may result in damage.
Maintenance
If drops of water or other stains get on the surface of the LCD panel, wipe them off immediately. Failure to do so may
result in staining.
To clean the LCD panel
Use the soft cloth included with the computer. (For further information, refer to “Suggestions About Cleaning the LCD
Surface”
Reference Manual
“Screen Input Operation”.)
To clean areas other than the LCD panel
Wipe with a soft dry cloth such as gauze. When using detergent, dip a soft cloth in water-diluted detergent and wring it
thoroughly.
CAUTION
Do not use benzene, thinner, or rubbing alcohol since it may adversely affect the surface causing discoloration, etc.
Do not use commercially-available household cleaners and cosmetics, as they may contain components harmful to
the surface.
Do not apply water or detergent directly to the computer, since liquid may enter inside of the computer and cause
malfunction or damage.
Dispose of Computer
Preparation
Remove all peripherals (SD memory card etc.).
Erase the stored data. (
Reference Manual
“Hard Disk Data Erase Utility”)
CAUTION
Never disassemble the computer except before disposal.
Refer to page 3 for precautions when disposing of the computer.
1. Turn off the computer, and disconnect the AC adaptor.
2. Turn over the computer, remove the battery pack, and wait for about 3 minutes.
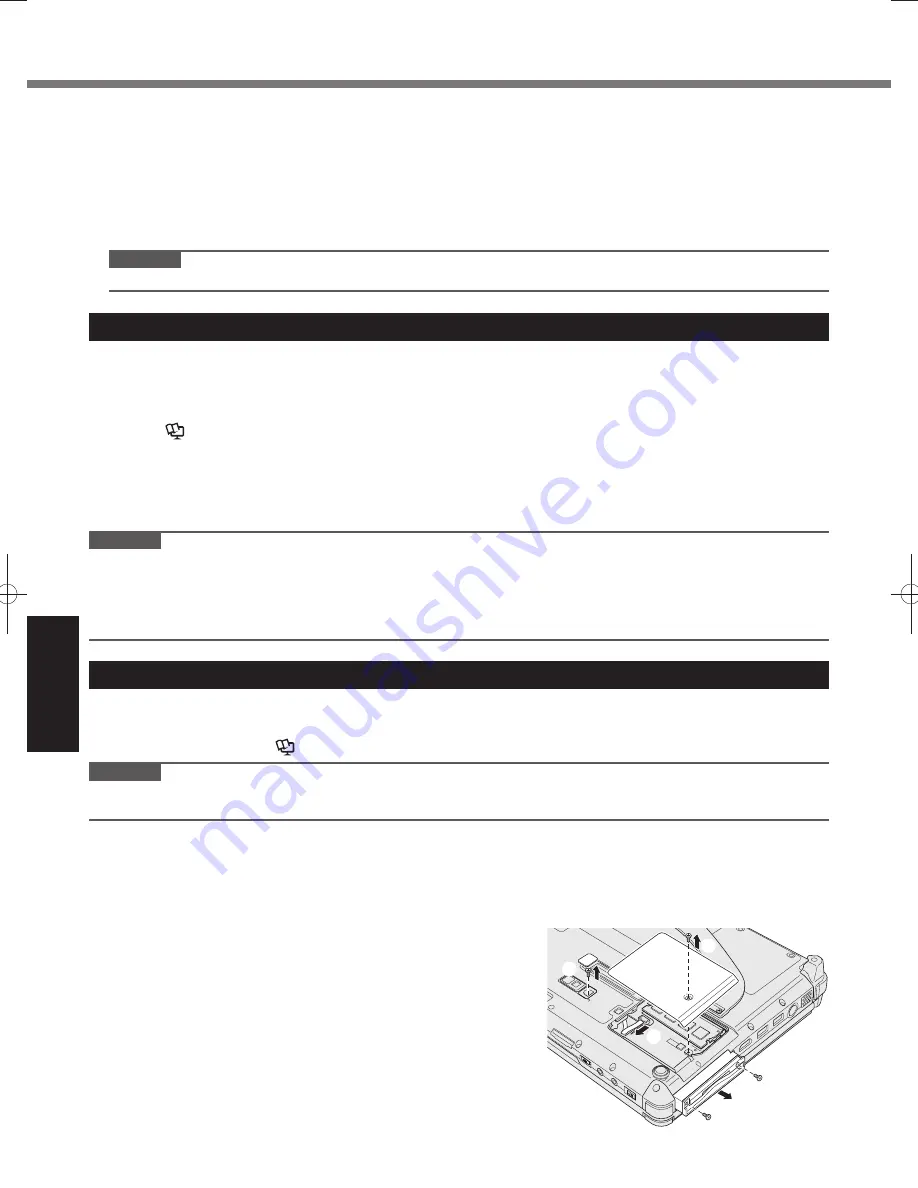
3. Remove the RAM module cover and the module on the side.
A
Remove the screw (1), and then remove the cover.
<For model with Smart Card slot>
B
Remove the label, and then remove the screw (1).
C
Pull out the connector in the direction of the arrow.
D
Remove the screws (2), and remove the board if one is installed.
Ŏ
Ō
ŋ
ō
Содержание CF-C2 series
Страница 46: ...46 MEMO ...
Страница 47: ...47 ...


