Installation/Troubleshooting
11
[For assistance, please call: 1-800-272-7033]
1.5
Connecting the Camera to a Router Not
Supporting UPnP
To allow access from the Internet with a router not supporting UPnP, follow the
procedures below.
1.
Select [Static] on the Network page.
2.
Enable port forwarding on the router.
Using the IP address and port number note written on step 1-(3), enable port
forwarding on the router. See the router manual for how to enable port
forwarding.
3.
Register with the Viewnetcam.com service.
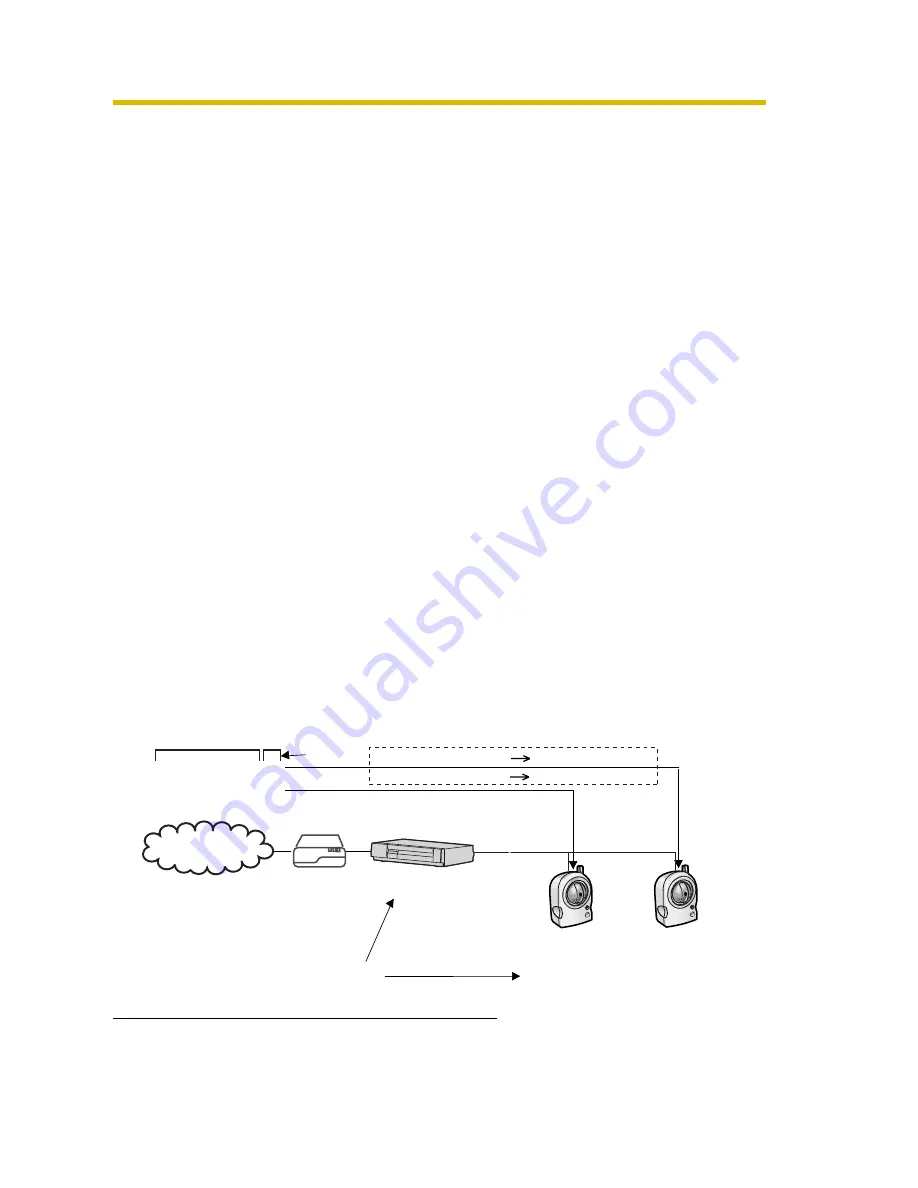
Port Forwarding feature
*1
The port forwarding feature is required to allow access from the Internet with a
router not supporting UPnP. It exchanges a private IP address to a global one.
Each camera must be assigned a unique port number.
(1)
Access the camera (see page 8 of the Operating Instructions in the
Setup CD-ROM).
(2)
Click [Setup] tab at the top of the page.
(3)
Select [Static] on the Network page.
•
The Static IP Address Configuration page is displayed. Make a
note of the IP address and port number, since they are required to
enable port forwarding on the router.
(4)
Click [Save] without changing the settings.
(5)
Click [Restart].
*1
"Port forwarding" may be called "Address translation", "Static IP Masquerade", "Virtual server"
or "Port mapping" in other products.
Global IP address
of the router
vvv.xxx.yyy.zzz:80
vvv.xxx.yyy.zzz:81
vvv.xxx.yyy.zzz:80 192.168.0.253:80
vvv.xxx.yyy.zzz:81 192.168.0.252:81
Port No.
Port Forwarding feature
Private IP address
192.168.0.1
192.168.0.252
Port No. 81
192.168.0.253
Port No. 80
Router
Modem
CATV
xDSL
Optical cable
Internet


