Digital Video Recorder
23
6.
Move to
Save Image Files
, and check the box to save the image as a JPG file when a selected camera detects
motion. The file will be saved in the
temp/RecordExt
under program installation folder automatically. The Save
Image files function operates regardless of the recording schedule.
NOTE:
The hard disk drive for saving image files must have at least 700MB free space.
NOTE:
The recording speed might decrease when the image files from multiple cameras are saved at the same
time.
7.
Move to
Move to preset
, and check the box to move the target camera to the preset location when a selected
camera detects motion. Select the camera and preset ID from a drop-down list. Preset values can be set
individually by the user who logs in the system.
8.
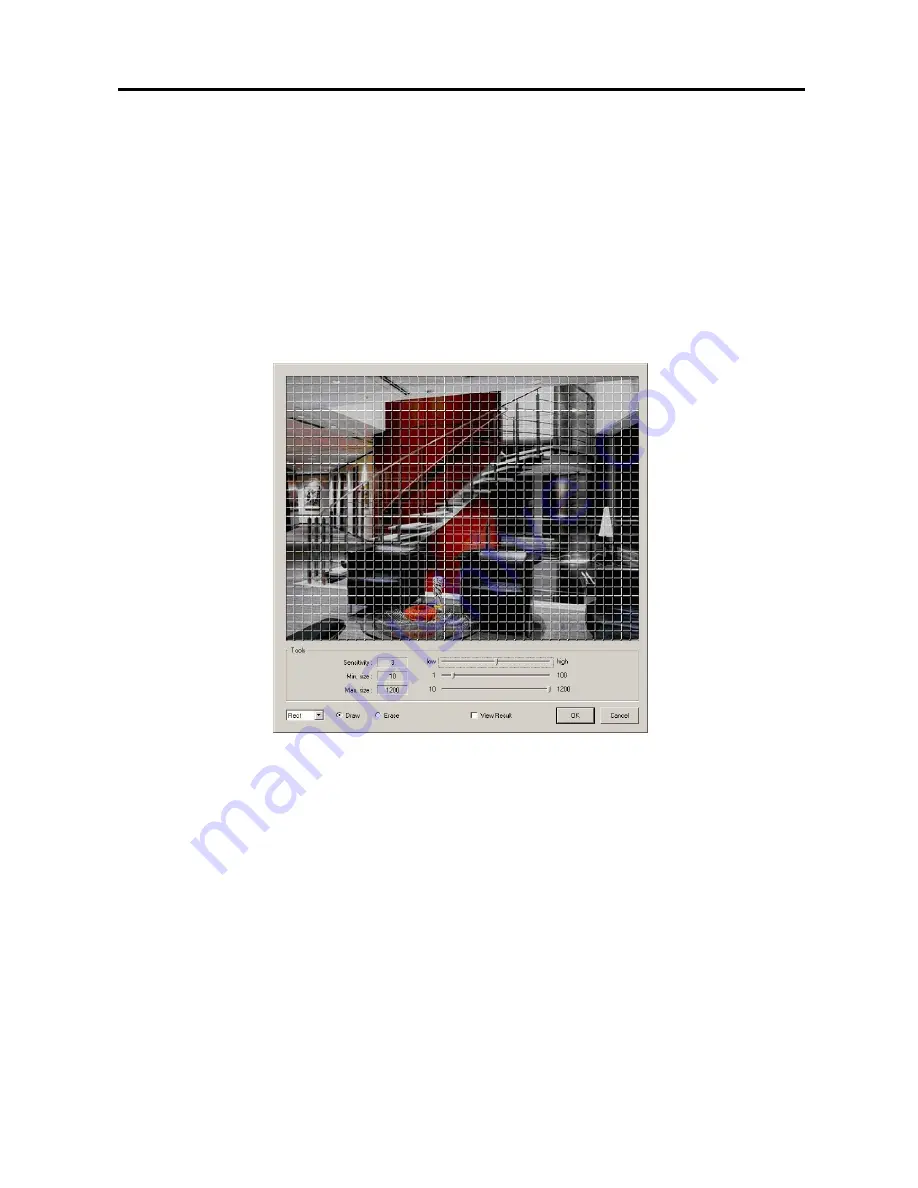
Click the
Set up zone...
button, and a zone setup window appears.
9.
The setup screen is made up of a 40x30 grid. First, click the
Draw
radio button and select a tool to use from the
drop-down list, and then set up the detection zone on the image. See the
Setting Up Cameras – Set Privacy
area
section for setting up the detection zone.
10.
Move to
Sensitivity
, and set the motion detection sensitivity (1 to 5) by holding down and dragging the pointer.
NOTE:
The higher the number, the more sensitive it is.
11.
Move to
Min. size
, and set the minimum number of blocks (1 to 100). If you set the Min. size value to
10
, the
DVR will only react to the motion when it detects motion (activity) in at least 10 connected blocks within the
selected zone established in step 9. The Min. size should not exceed the selected block numbers for detection.
NOTE:
When selecting multiple detection area groups, the minimum number of blocks (Min. size) should not
exceed the block numbers of the smallest detection area.
12.
Move to
Max. size
, and set the maximum number of blocks (from the preset
Min. size
value to 1200). If you set
the Max. size value to
100
, the DVR will ignore the motion which exceeds the 100 blocks.
13.
Move to
View Result
, and check the box to see detection results. You can check that sensitivity and minimum
size are set correctly using this feature. You can save your changes by clicking the
OK
button. Selecting
Cancel
exits the dialog box without saving the changes.
14.
Move to
Show results
, and check the box to show detection results on the monitoring image.
Содержание PDR16-RMT Series
Страница 1: ......
Страница 2: ......
Страница 6: ...User s Manual iv ...
Страница 10: ...User s Manual 4 ...


