18
Monitor Section |
Copyright © P Squared Ltd 2013
Monitor Section
Layout & Function
Channel Layout
Description
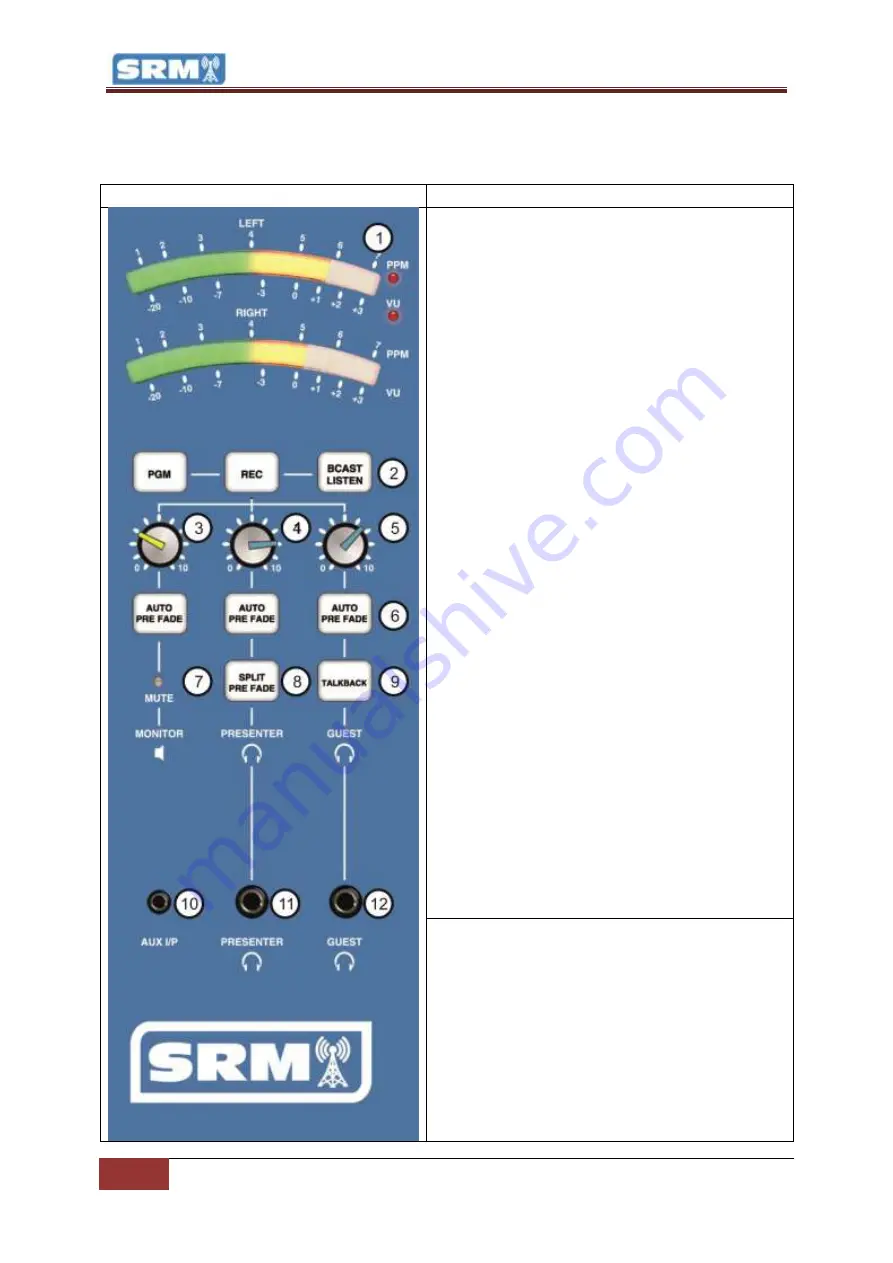
1 - LED Meter Lights:
The LED Meter Lights provide
a visual representation of the audio levels passing
through the selected SRM output bus. The LED’s are
colour coded so you can see quickly when things
are too loud:
Green – Level ok (target for music)
Yellow – Level still ok but getting louder
(target for speech)
Red – Level too high and likely to lead to
distortion
The LED Meters can be switched to display in PPM
or VU modes (see SRM Setup Mode) with PPM set
as the default. In PPM mode, the display shows an
average volume of a short time period so the
display is more consistent and easier to work with.
In VU mode the display shows all volume peaks and
so is more accurate but also more erratic. We
recommend sticking with PPM mode.
The LED Meter section can be set to display the
current volume for any of the following:
PGM – The LED shows the volume for the
Program Output Bus (main desk output)
REC – The LED shows the volume for the
REC Output Bus
BCAST LISTEN (Broadcast Listen) – The LED
shows the volume for the Broadcast Listen
input which is commonly used to monitor a
‘post process’ or ‘off air’ source to ensure
what you are playing is actually being
broadcast.
Pre-Fade – When you activate the Pre-Fade
mode on any channel, the LED display
switches to showing the volume for all Pre-
Fade enabled channels.
2 - PGM / REC / BCAST LISTEN Butons:
These
buttons are used to select the output bus that you
want the LED Meter to display (see above) plus is
sent to the studio MONITORS (speakers) and
PRESENTER & GUEST HEADPHONE. To switch to
PGR, REC or BCAST Listen, just press the button. The
bus that the LED Meter is currently displaying is
indicated by the button being illuminated. One of
these options will be selected at all times.
Please note that when you press a Pre-Fade button


