


17
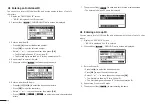
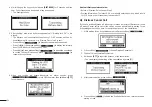
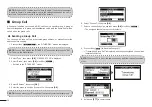
6.
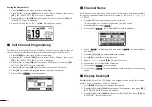
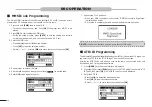
Enter an Group ID Name:
• Press [▲]/[▼]/[◄]/[►] to select the desired characters.
•
Press
[OK]
to input the characters.
• Select “←” or “→” to move the cursor, then press
[OK]
.
•
Press [
]/[
]/[
] to select numbers, characters and
letters.
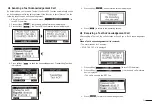
7.
Then press softkey [
] to save, and return to the previous screen.
•
The entered Group ID name is displayed.
■
◆
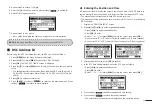
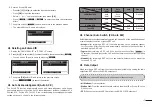
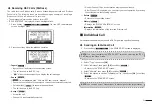
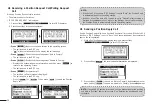
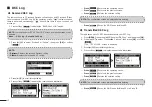
Deleting an Entered ID
1.
Display the “INDIVIDUAL ID” or “GPOUP ID” screen.
2. Press [▲]/[▼] to select the ID you want to delete, then press softkey [
].
•
You can edit an ID and its name by pressing [
].
3.
Then press
[OK]
delete ID, and return to the previous screen.
•
Press [
] to cancel the deletion.
■
◆
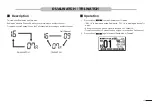
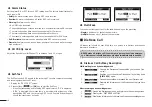
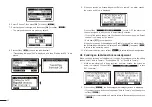
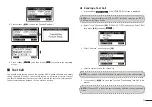
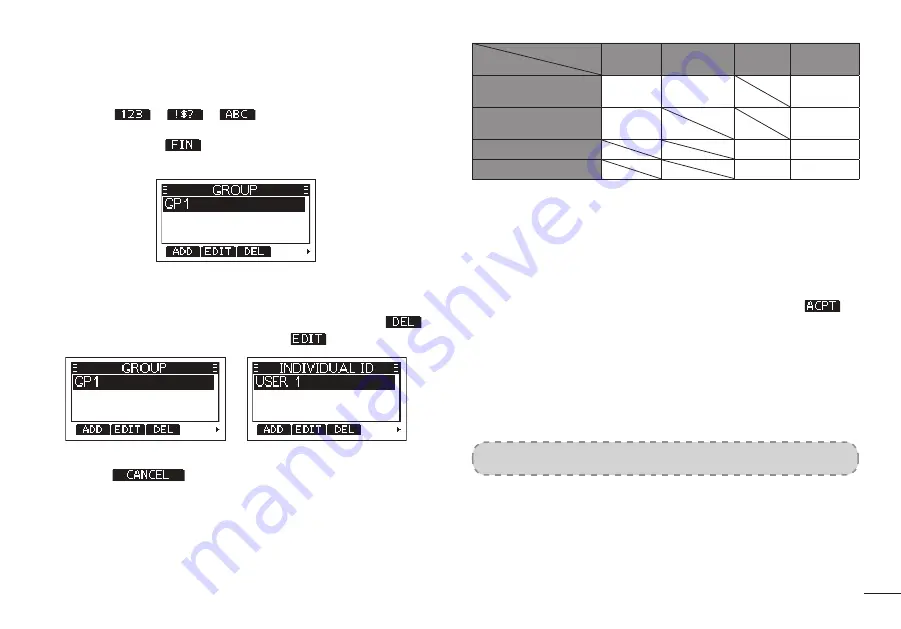
Auto Acknowledgement (Auto ACK)
The Auto ACK function automatically sends an Acknowledgement call when an
appropriate request is recevied. Auto Acknowledgement includes: Individual ACK,
Position ACK, Polling ACK, Test ACK, the corresponding Acknowledgement mode
setting options are shown in the following table:
ACK Mode
ACK Type
Auto
(Able)
Auto
(Unable)
Auto
Manual
Individual ACK
Auto
(Able)
Auto
(Unable)
Manual
Position ACK
Auto
(Able)
Manual
Polling ACK
Auto
Manual
Test ACK
Auto
Manual
■
◆
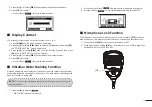
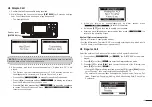
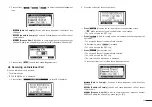
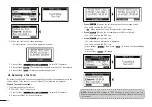
Channel Auto Switch (CH Auto SW)
Select whether or not to automatically switch to Channel 16 or the specified channel;
or select whether to switch or ignore DSC call.
•■
Accept:
After receiving a DSC call, the radio remains on the operating channel
for 10 seconds. After that, the radio automatically switches to the channel that is
specified on the DSC call.
•■
Ingore:
After receiving a DSC call, if you do not press the softkey [
] in
10 seconds, the radio ignores the call, and then remains on the current operating
channel.
•■
Manual:
After receiving a DSC call, you can select whether or not to accept the
received DSC call.
■
◆
Data Output
When receiving a DSC call from the station that is selected in this setting, the radio
outputs the DSC data to the NMEA output port.
NOTE:
You can send Distress calls independent of these settings.
•■
All Stations:
From any station.
•■
Station List:
From the stations that are entered Individual ID or Group ID on the
Menu screen.
•■
OFF:
Does not output any DSC data from the NMEA 0183 Output port.
Содержание MX1100G
Страница 48: ...Ref 12102020...
Страница 49: ......