SoundDrive 16 User's Manual
11
Chapter 1:
Hardware and Software Installation
1
Chapter
I
NSTALLING
S
OUND
D
RIVE
16
Designed to be easy to use and easy to install,
SoundDrive 16 can be used with the preset jumper
settings. If you need to change the default address
settings, see the section "Jumper Settings."
Quick Installation
Hardware Installation
If you are connecting a CD-ROM drive, go to "Installing
a CD-ROM Drive," otherwise continue. Please refer to
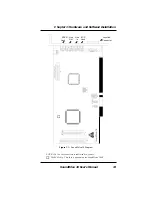
Figures 1.1 and 1.7 for SoundDrive 16 connection loca-
tions.
1.
If you previously installed another sound card,
remove it and all associated files from your
SYSTEM.INI and CONFIG.SYS files.
2.
Turn off the power to your computer, unplug all
power cords and remove the computer cover.
3.
Install the SoundDrive 16 into a 16-bit expan-
sion slot.
4.
If you are connecting external speakers to the
SoundDrive 16, connect the speaker cable to the
SPEAKER jack on the metal bracket.
5.
If you are connecting amplified external speak-
ers to the SoundDrive 16, connect the speaker
cable to the LINE OUT jack on the metal bracket.
6.
If you are connecting a microphone to the
SoundDrive 16, connect the microphone cable
to the MIC jack on the metal bracket.
7.
If you are connecting a MIDI device or a joystick
to the SoundDrive 16, connect the cable to the
joystick port on the metal bracket (refer to Fig-
ure 1.7).
STATIC!
Before
handling the
SoundDrive
16, be sure
to guard
against
electrostatic
discharge.
Be properly
grounded by
touching the
power
supply
housing, or
you may
want to buy
a Ground
strap from
your local
computer
store.
Содержание SoundDrive 16
Страница 1: ...SoundDrive 16 User s Manual ORCHID ...
Страница 6: ...4 SoundDrive 16 User s Manual ...
Страница 12: ...10 SoundDrive 16 User s Manual ...
Страница 38: ...36 SoundDrive 16 User s Manual Chapter 2 Orchid Utilities ...
Страница 72: ...70 SoundDrive 16 User s Manual Appendix A Technical Help ...


