O P T I O N A L M O D U L E I N S T A L L A T I O N
2
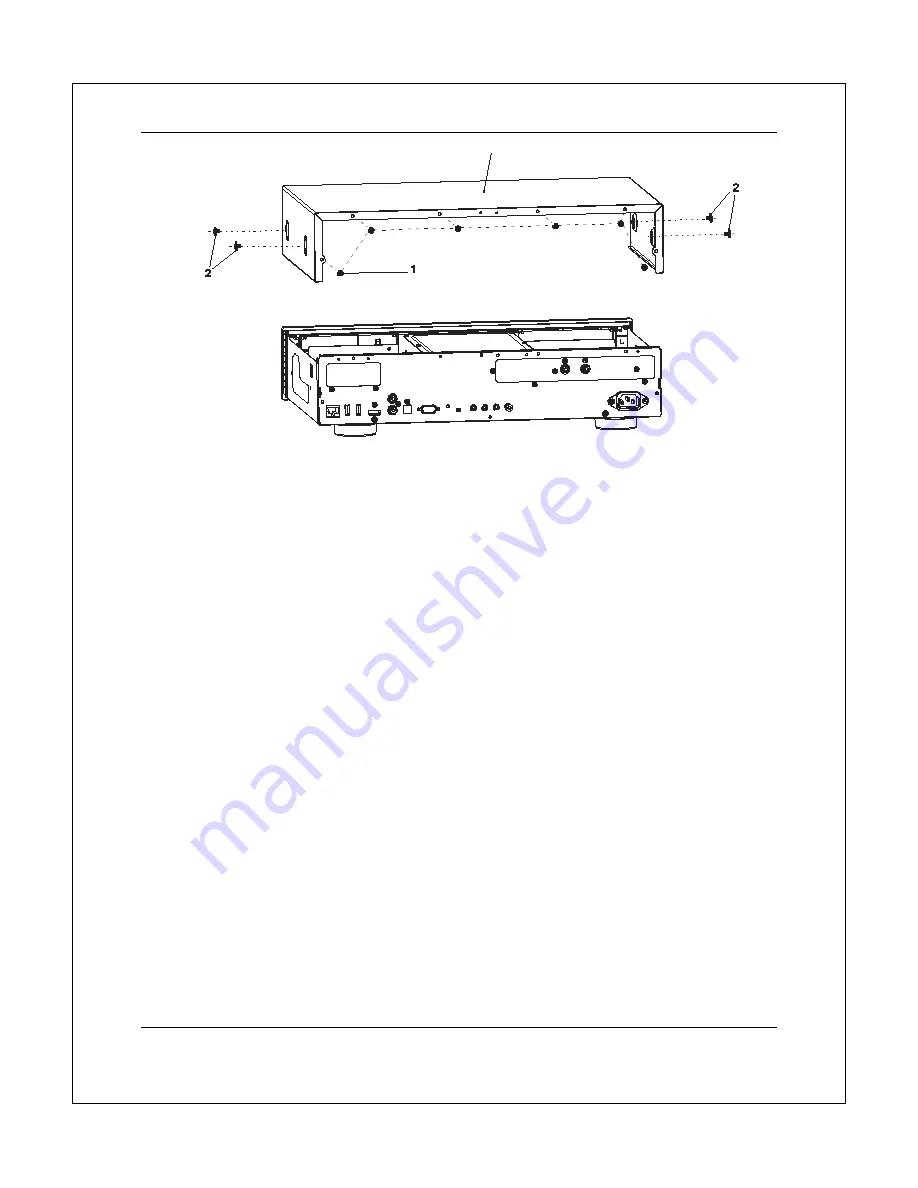
Installing the Top Cover
After a module installation, the top cover of the player must be installed back before the player can be put into
use. The following steps illustrate how to install the top cover.
Step 1
: Place the top cover to its designated position. Align the front edge of the top cover with the
back of the front panel, tilt the top cover so its back side is slightly above the front side, and slide
the top cover into its position.
Step 2
: Install the 6 screws that secure the top cover to the back panel of the player.
Step 3
: Install the 4 screws on the sides of the player, 2 on each side.
Removing the Stereo Audio Outputs Module
The BDT-101CI can accommodate one audio output module. In its basic configuration, the stereo audio
output module is pre-installed. In order to replace this module with an optional audio output module, you need
to remove the stereo audio output module first. Please follow these steps:
Step 1
: Unplug the 3 cables from the stereo audio output module. When unplugging the ribbon
cables, pay attention not to damage the cable. Only the cable ends that are connected to the stereo
audio output module need to be unplugged. The other ends that are connected to the main board
or power supply board do not need to be unplugged.
Step 2
: Remove the 3 screws that secure the stereo audio output module to the back panel.
Step 3
: Remove the 2 screws that secure the stereo audio output module to the bottom plate.
Step 4
: Lift and remove the stereo audio output module.
Other types of audio output modules can be removed using a similar procedure.
3


