


PREVIOUS | CONTENTS | NEXT
One Talk—
T49G IP desk phone guide
User guide
23
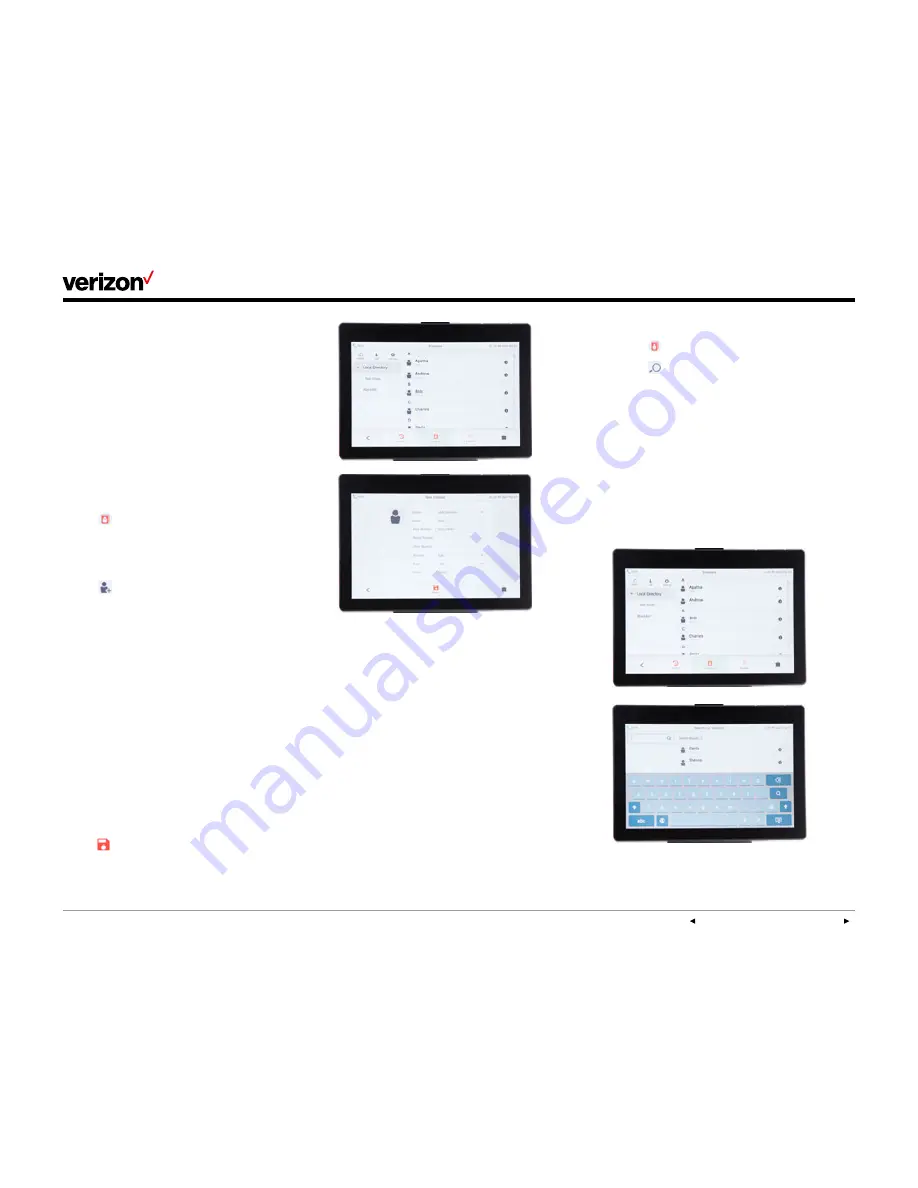
Search the directory for a contact:
1. Tap
Directory
to open your list of contacts.
2. Tap
Search
.
3. Using the onscreen keyboard, type the first
few letters of the contact’s name or phone
number. Contacts whose name or number
matches will appear on the screen as you type.
4. You can also search contacts alphabetically by
tapping the desired letter on the right side of
the screen.
Tip: If you know which group a contact belongs
to, tap the group, then scroll to find the contact
you’re looking for.
Contact management
Local Directory
The built-in phone directory can store the names
and phone numbers of up to 1,000 of your
contacts and 48 groups in its Local Directory.
You can add new groups and contacts; edit,
delete or search for a contact; blacklist a number;
move contacts between groups; or dial a contact
number directly from the Local Directory.
The Local Directory can be accessed from the
Idle screen, Menu screen or the keypad screen
for placing calls.
Add a contact:
1. Tap
Directory
.
2. Tap the Group you want to add to. If the Local
Directory is collapsed, tap
>
to reveal your list
of groups.
3. Tap
Add Contact
to open the New
Contact screen.
4. Tap the respective fields to enter name, office,
mobile and other numbers.
5. Tap the
Account
field to specify the line you
want to use when placing a call to this contact.
(Select
Auto
to use the default account.)
6. Tap the
Ring
field to open ringtone options for
this contact.
7. Select your desired ringtone and tap
OK
.
(If Auto is selected, this contact will use
the ringtone with the following priority:
1. Group Ringtone, 2. Account Ringtone,
3. Phone Ringtone.)
8. Tap the
Photo
field.
9. Select an image to use for this contact, then
tap
Save
to accept all changes and add the
new contact to the directory.


