


4–20
XR-56-201 5
Configuration 03/18
Configuration
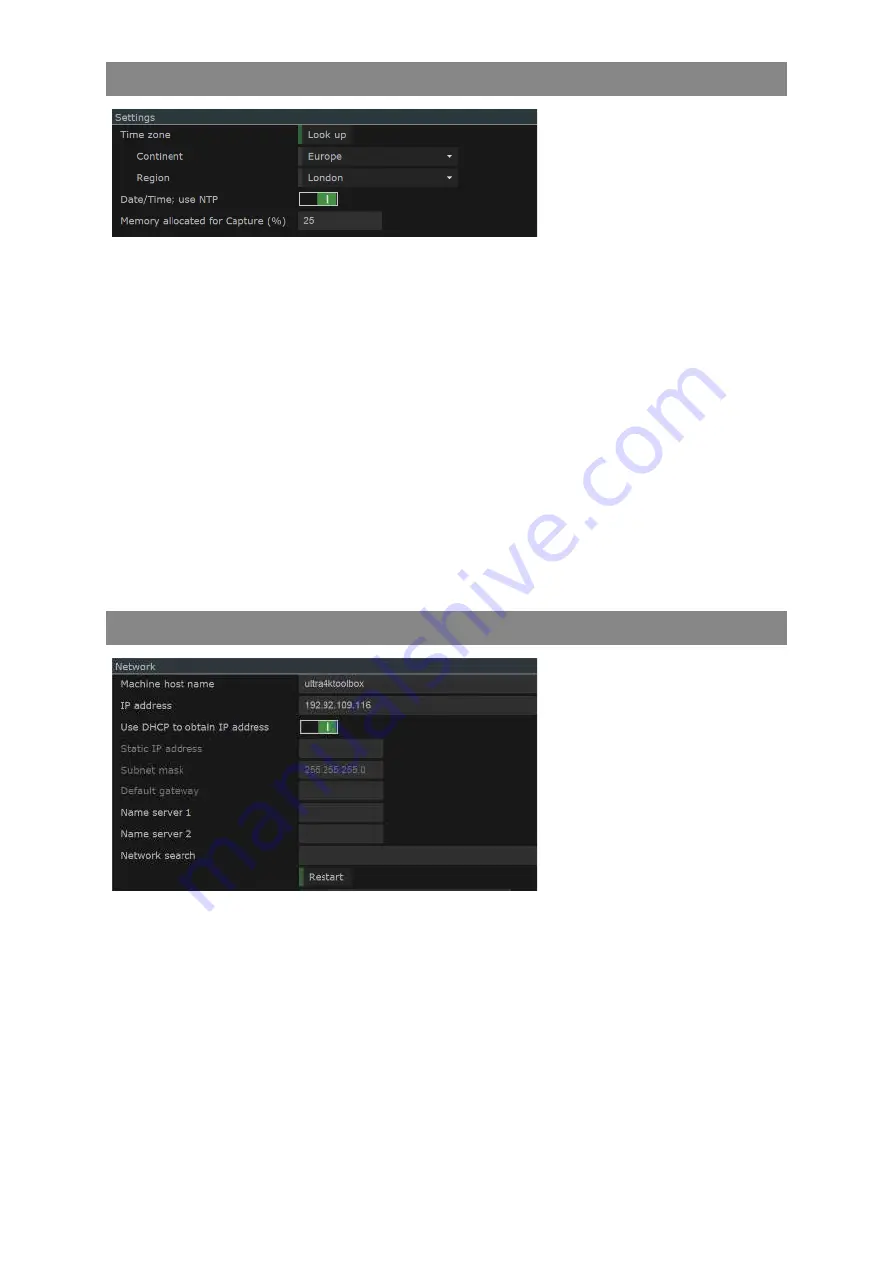
Settings Section
The "Settings" section allows the
system time to be set and the
amount of RAM allocated to video
capture.
Setting Date and Time Automatically
The system’s time and date can be setup automatically or manually. If the network you are using is
connected to the Internet you can use the Look up function:
Set the “Date/Time: Use NTP” switch to On (1).
Select the Continent (for examble Europe) from the drop down menu.
Select the Region (for example London) from the drop down menu.
The date and time should now be set automatically.
Setting Date and Time Manually
If the network you are using doesn’t have an Internet connection the date and time can be set
manually:
Set the “Date/Time: Use NTP” switch to Off (0).
Set the Time and Date details field by field.
Network Section
The "Network" section allows the
Ultra unit to be connected to a
network.
To access the Ultra’s user interface via the Web, you need one of the following Web browsers (Google
Chrome, Internet Explorer (version 11 or later), Opera, Safari or Firefox (version 38 or later) on your
computer. You also need to ensure that the screen resolution is set to 1920 x 1080.
The user interface is generally accessed either by giving the machine’s IP address or by giving the
Ultra’s Machine Host Name which on all new machines is based on the machine’s MAC address (given
on a label on the base of the chassis). Details of the steps used are given below.
Setting the IP Address using DHCP
To obtain an IP Address automatically from your network, set the “Use DHCP to obtain IP address” to
On (1).
Содержание Ultra XR
Страница 1: ...Copyright Omnitek 2016 18 XR 56 201 5 Ultra XR User Guide Software Release 3 4 58 0 Manual Revision 5...
Страница 13: ...Ultra XR User Guide 1 1 XR 56 201 5 1 Overview...
Страница 14: ...1 2 XR 56 201 5 Overview 03 18 Overview...
Страница 16: ...1 4 XR 56 201 5 Overview 03 18 Overview...
Страница 25: ...Ultra XR User Guide 2 1 XR 56 201 5 2 Viewer...
Страница 26: ...2 2 XR 56 201 5 Viewer 03 18 Viewer...
Страница 38: ...2 14 XR 56 201 5 Viewer 03 18 Viewer...
Страница 56: ...2 32 XR 56 201 5 Viewer 03 18 Viewer...
Страница 64: ...2 40 XR 56 201 5 Viewer 03 18 Viewer...
Страница 76: ...2 52 XR 56 201 5 Viewer 03 18 Viewer...
Страница 80: ...2 56 XR 56 201 5 Viewer 03 18 Viewer...
Страница 85: ...Ultra XR User Guide 3 1 XR 56 201 5 3 Generator...
Страница 86: ...3 2 XR 56 201 5 Generator 03 18 Generator...
Страница 92: ...3 8 XR 56 201 5 Generator 03 18 Generator...
Страница 93: ...Ultra XR User Guide 4 1 XR 56 201 5 4 Configuration...
Страница 94: ...4 2 XR 56 201 5 Configuration 03 18 Configuration...
Страница 108: ...4 16 XR 56 201 5 Configuration 03 18 Configuration...
Страница 120: ...4 28 XR 56 201 5 Configuration 03 18 Configuration...
Страница 121: ...Ultra XR User Guide 5 1 XR 56 201 5 5 Connections...
Страница 122: ...5 2 XR 56 201 5 Connections 03 18 Connections...
Страница 141: ...Ultra XR User Guide A 1 XR 56 201 5 A Glossary...
Страница 142: ...A 2 XR 56 201 5 Glossary 03 18 Glossary...
Страница 150: ...A 10 XR 56 201 5 Glossary 03 18 Glossary...
Страница 151: ...Ultra XR User Guide B 1 XR 56 201 5 B Installation...
Страница 152: ...B 2 XR 56 201 5 Installation 03 18 Installation...
Страница 158: ...B 8 XR 56 201 5 Installation 03 18 Installation...
Страница 162: ...B 12 XR 56 201 5 Installation 03 18 Installation...
Страница 169: ...Ultra XR User Guide C 1 XR 56 201 5 Ultra XR User Guide C 1 XR 56 201 5 C Applications...
Страница 170: ...C 2 XR 56 201 5 Applications 03 18 Applications...
Страница 176: ...C 8 XR 56 201 5 Applications 03 18 Applications...
Страница 184: ...C 16 XR 56 201 5 Applications 03 18 Applications...


