


4–8
XR-56-201 5
Configuration 03/18
Configuration
Setting up Standard Cages
To setup these cages Select the appropriate Standards body from the drop-down menu offered on the
Default fixed sizes line of the Cages area of the display.
Select the required screen geometry from the drop-down menu offered on the first line of the Cage
definition.
With the full Cage definition fully displayed, set the
Dashed
setting to On (1) or Off (0) as required.
When Dashed is set to Off (0), the cage will be displayed as a solid line.
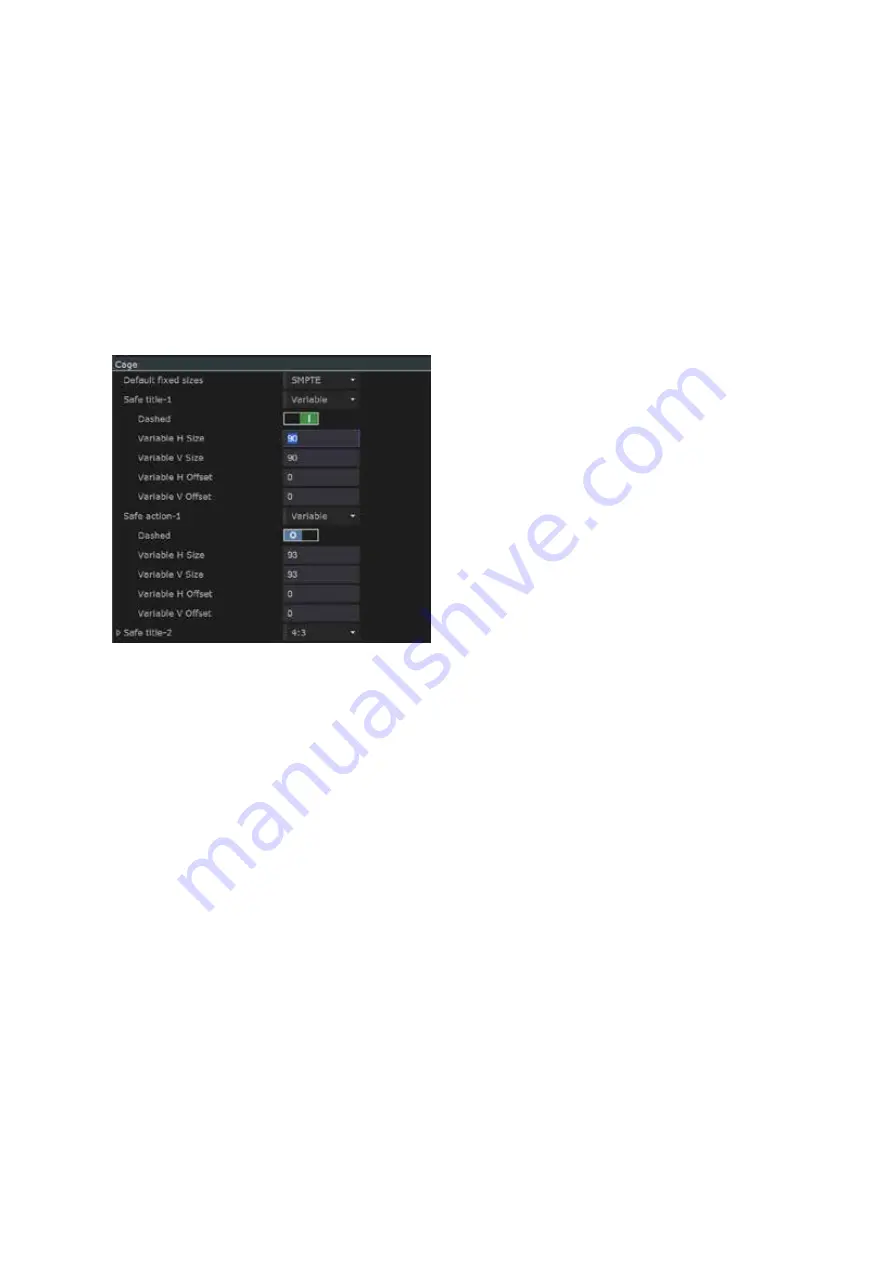
Setting up Variable Cages
Select
Variable
from the drop-down menu offered on the first line of the Cage definition.
With the full Cage definition fully displayed, set the values you require for the Variable H and V Sizes
and for the Variable H and V Offsets.
The values shown as a percentages of the screen
width / height. The offsets are with respect the
middle of the screen and refer to the position of
the middle of the cage
Variable H Size and Variable V Size can take values
in the range 10 – 100, while Variable H Offset and
Variable V Offset can take values in the range –50
to 50 (though it should be noted that if ± Variable
Variable H Offset is greater than (100 – Variable H
Size)/2 or ± Variable V Offset is greater than (100
– Variable V Size)/2, part of the cage will be off the
edge of the screen.
Set the
Dashed
setting to On (1) or Off (0) as required. When
Dashed
is set to Off (0), the cage will be
displayed as a solid line.
Comparisons between standards
The following steps allow comparison using the standard cages for two different sizes defined by one
of the supported Standards bodies.
Note that comparisons across different Standards bodies or involving standards not supported by the
Ultra require at least one set of cages to be set up as
Variable
cages.
Select the appropriate Standards body from the drop-down menu offered on the Default fixed sizes
line of the Cages area of the display.
Set
Safe title-1
and
Safe action-1
to one of the screen geometries that you want to compare.
Set
Safe title-2
and
Safe action-2
to the other screen geometry.
Set the Dashed setting for each cage to On (1) or Off (0) as required to distinguish the two sets of
cages. For example, you might opt to set Dashed to Off(0) for Safe title-1 and Safe action-1 and to
On (1) for Safe title-2 and Safe action-2. Alternatively, you might opt to set Dashed to On (1) for Safe
title-1 and Safe title-2 but Off (0) for Safe action-1 and Safe action-2 to allow you to readily distinguish
between Safe title and Safe action cages.
Содержание Ultra XR
Страница 1: ...Copyright Omnitek 2016 18 XR 56 201 5 Ultra XR User Guide Software Release 3 4 58 0 Manual Revision 5...
Страница 13: ...Ultra XR User Guide 1 1 XR 56 201 5 1 Overview...
Страница 14: ...1 2 XR 56 201 5 Overview 03 18 Overview...
Страница 16: ...1 4 XR 56 201 5 Overview 03 18 Overview...
Страница 25: ...Ultra XR User Guide 2 1 XR 56 201 5 2 Viewer...
Страница 26: ...2 2 XR 56 201 5 Viewer 03 18 Viewer...
Страница 38: ...2 14 XR 56 201 5 Viewer 03 18 Viewer...
Страница 56: ...2 32 XR 56 201 5 Viewer 03 18 Viewer...
Страница 64: ...2 40 XR 56 201 5 Viewer 03 18 Viewer...
Страница 76: ...2 52 XR 56 201 5 Viewer 03 18 Viewer...
Страница 80: ...2 56 XR 56 201 5 Viewer 03 18 Viewer...
Страница 85: ...Ultra XR User Guide 3 1 XR 56 201 5 3 Generator...
Страница 86: ...3 2 XR 56 201 5 Generator 03 18 Generator...
Страница 92: ...3 8 XR 56 201 5 Generator 03 18 Generator...
Страница 93: ...Ultra XR User Guide 4 1 XR 56 201 5 4 Configuration...
Страница 94: ...4 2 XR 56 201 5 Configuration 03 18 Configuration...
Страница 108: ...4 16 XR 56 201 5 Configuration 03 18 Configuration...
Страница 120: ...4 28 XR 56 201 5 Configuration 03 18 Configuration...
Страница 121: ...Ultra XR User Guide 5 1 XR 56 201 5 5 Connections...
Страница 122: ...5 2 XR 56 201 5 Connections 03 18 Connections...
Страница 141: ...Ultra XR User Guide A 1 XR 56 201 5 A Glossary...
Страница 142: ...A 2 XR 56 201 5 Glossary 03 18 Glossary...
Страница 150: ...A 10 XR 56 201 5 Glossary 03 18 Glossary...
Страница 151: ...Ultra XR User Guide B 1 XR 56 201 5 B Installation...
Страница 152: ...B 2 XR 56 201 5 Installation 03 18 Installation...
Страница 158: ...B 8 XR 56 201 5 Installation 03 18 Installation...
Страница 162: ...B 12 XR 56 201 5 Installation 03 18 Installation...
Страница 169: ...Ultra XR User Guide C 1 XR 56 201 5 Ultra XR User Guide C 1 XR 56 201 5 C Applications...
Страница 170: ...C 2 XR 56 201 5 Applications 03 18 Applications...
Страница 176: ...C 8 XR 56 201 5 Applications 03 18 Applications...
Страница 184: ...C 16 XR 56 201 5 Applications 03 18 Applications...


