30 |
Page
Oliver Machinery
4430 Planer
Test Run
Each planer has been inspected and calibrated before leaving the factory to meet our quality and precision
standards. Due to various reasons, the machine may need to be re-adjusted when it arrives at your
workshop. It is recommended to complete the test run before using the planer for production work, and
repeat the test run if the planer is relocated.
Step 1: Verify all electrical components are functional.
1.
Remove all tools and debris from the machine.
2.
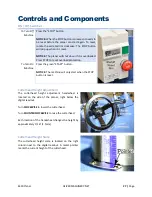
Press the STOP button.
3.
Connect the machine to the power source.
4.
Turn the rim of the STOP button clockwise to reset the safety shutoff mechanism.
5.
Press the green START button. The machine should be running with no excessive noise and
vibration.
6.
Press the STOP button to turn the machine off.
7.
Without resetting the STOP button, attempt to restart the machine by pressing the START button.
The machine should
NOT
start.
8.
Reset the STOP button to restart the machine. Disconnect the machine from the power source
while the machine is running, then reconnect the machine to power. The machine should
NOT
restart.
Step 2: Verify the planer headstock is functional and calibrated.
1.
Connect planer to a dust collection system.
2.
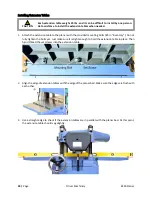
Lower the headstock all the way down. The headstock should stop at approximately 1/4" above
the planer table.
3.
Raise the headstock all the way up. Ensure all the anti-kickback fingers can move freely.
4.
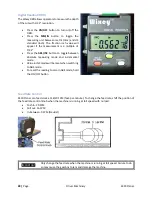
Turn on the DRO and verify its readings reflect the movements of the headstock.
5.
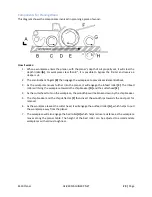
Prepare a piece of good quality, straight grain wood board with a flat bottom for a test run. It is
advised to choose a board that is close to
wide and at least 2 feet long.
6.
Start the dust collection system.
7.
Lower
the headstock to remove 1/16” of the workpiece for the test run
.
8.
Turn on the planer and gently feed the workpiece towards the infeed roller. Once the infeed roller
engages the workpiece, it should pull the workpiece through the planer. Verify the entire top
surface has been cut.
9.
Inspect the workpiece for defective finish.
10.
Use a caliper to measure the thickness of each side to ensure the cutterhead is parallel with the
planer table. If the thicknesses are the same, check if the reading is the same as shown on the
headstock height scale.
11.
Check for excessive snipes. A minimum amount of snipe may occur at the ends of the board, and
it is expected.
12.
While the machine is running idle, move the feed rate control knob to change the feed rate. This
ensures the gearbox and feed rate control knob is functional.
13.
Hit STOP to turn off the planer after testing.
Congratulations! This planer has completed the test run and is ready for production work. If you discover
any issues from the tests, please refer to the troubleshooting section and maintenance section for how
to diagnose the issue and make adjustments.
Содержание 4430.201 M-4430
Страница 2: ......
Страница 10: ...10 Page Oliver Machinery 4430 Planer Identification...
Страница 11: ...4430 Planer OLIVERMACHINERY NET 11 Page...
Страница 12: ...12 Page Oliver Machinery 4430 Planer...
Страница 38: ...38 Page Oliver Machinery 4430 Planer Figure 1 Figure 2 Figure 3 Figure 4 Figure 5 Figure 6...
Страница 50: ...50 Page Oliver Machinery 4430 Planer Wiring Diagram...
Страница 51: ...4430 Planer OLIVERMACHINERY NET 51 Page Parts List Table Assembly...
Страница 52: ...52 Page Oliver Machinery 4430 Planer Cabinet Assembly...
Страница 53: ...4430 Planer OLIVERMACHINERY NET 53 Page Motor Mount Assembly...
Страница 54: ...54 Page Oliver Machinery 4430 Planer Headstock Assembly...
Страница 55: ...4430 Planer OLIVERMACHINERY NET 55 Page Gearbox Assembly Cover and Dust Hood Assembly...
Страница 62: ...62 Page Oliver Machinery 4430 Planer Maintenance Record Date Task Operator...
Страница 63: ...4430 Planer OLIVERMACHINERY NET 63 Page Notes...

