


40496501TH Draft Version
67
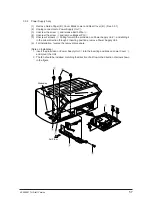
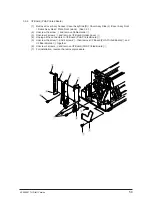
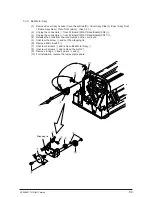
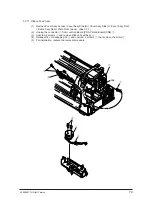
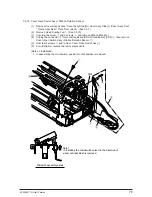
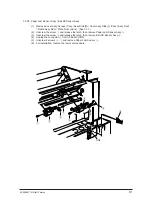
3.3.14 Head Cooling Fan 2
(1)
Remove Cover Assy Access / Cover Assy Side (R) / Cover Assy Side (L) /Cover Assy Front
/ Frame Assy Rear / Plate Front (stuck). (See 3.3.1)
(2)
Unscrew the screw
1
and remove Cable Holder Cover
2
.
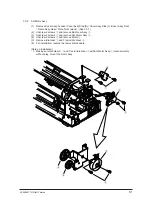
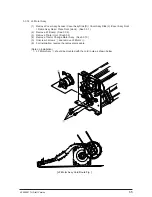
(3)
Unplug the connector
3
from I/F Board (PHA Printed Board)(CN6)
6
.
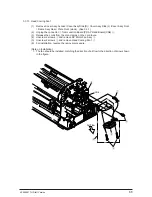
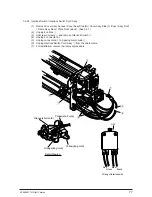
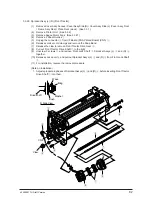
(4)
Release the cords from the cord clamps on the cord route.
(5)
Unscrew 2 screws
4
and remove Head Cleaning Fan 2
5
.
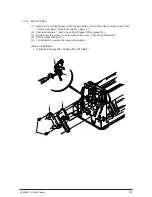
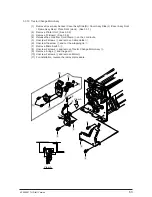
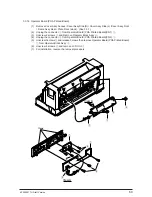
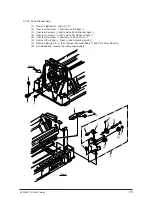
(6)
For installation, reverse the removal procedure.
(Note on Installation)
1. The fan should be installed, matching the direction of air flow to the direction of arrow shown
in the figure.
1
2
4
4
5
3
6
Air Flow
Содержание PACEMARK 4410
Страница 1: ...PACEMARK 4410 PRINTER SERVICE HANDBOOK...
Страница 52: ...40496501TH Draft Version 52 Figure 3 1 3 2 Parts Layout...
Страница 95: ...40496501TH Draft Version 95...
Страница 151: ...40496501TH Draft Version 151 No Yes End Replace PHA Board Recovered No Yes End Replace PMA Board...
Страница 168: ...XXXXXXXXTH Draft Version 8 5 Fig 8 5 45 38 38 40 42 39 44 44 122 41...
Страница 169: ...XXXXXXXXTH Draft Version 8 6 142 141 11 119 Fig 8 6...
Страница 170: ...XXXXXXXXTH Draft Version 8 7 Fig 8 7 105 102 61 33 104 100 101...
Страница 171: ...XXXXXXXXTH Draft Version 8 8 Fig 8 8 55...


